
How to use our Text Editor
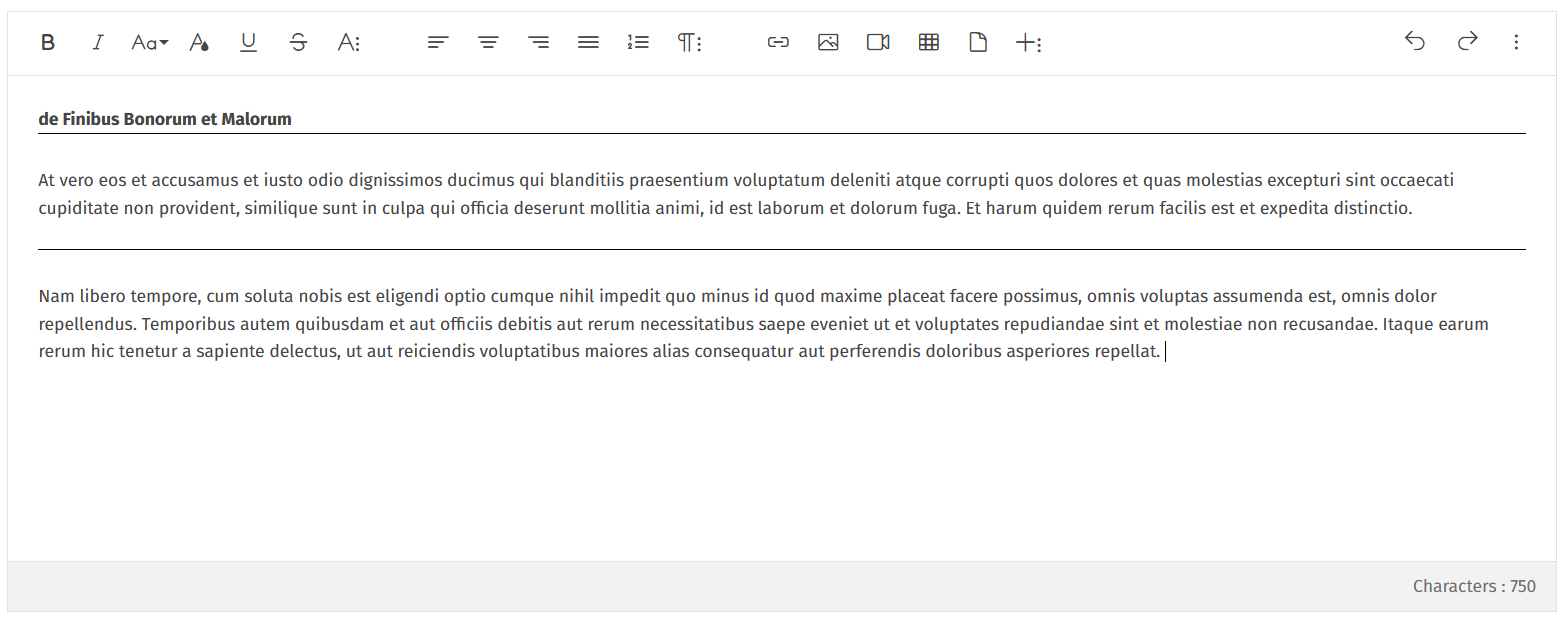
The games2gether platform uses a WYSIWYG rich text editor. That means “what you see is what you get:” what you see in the editor gives you a good idea of what your content will look like on the site. The text editor toolbar covers the “rich text” part. The toolbar gives you the functionality to bring your post to life.
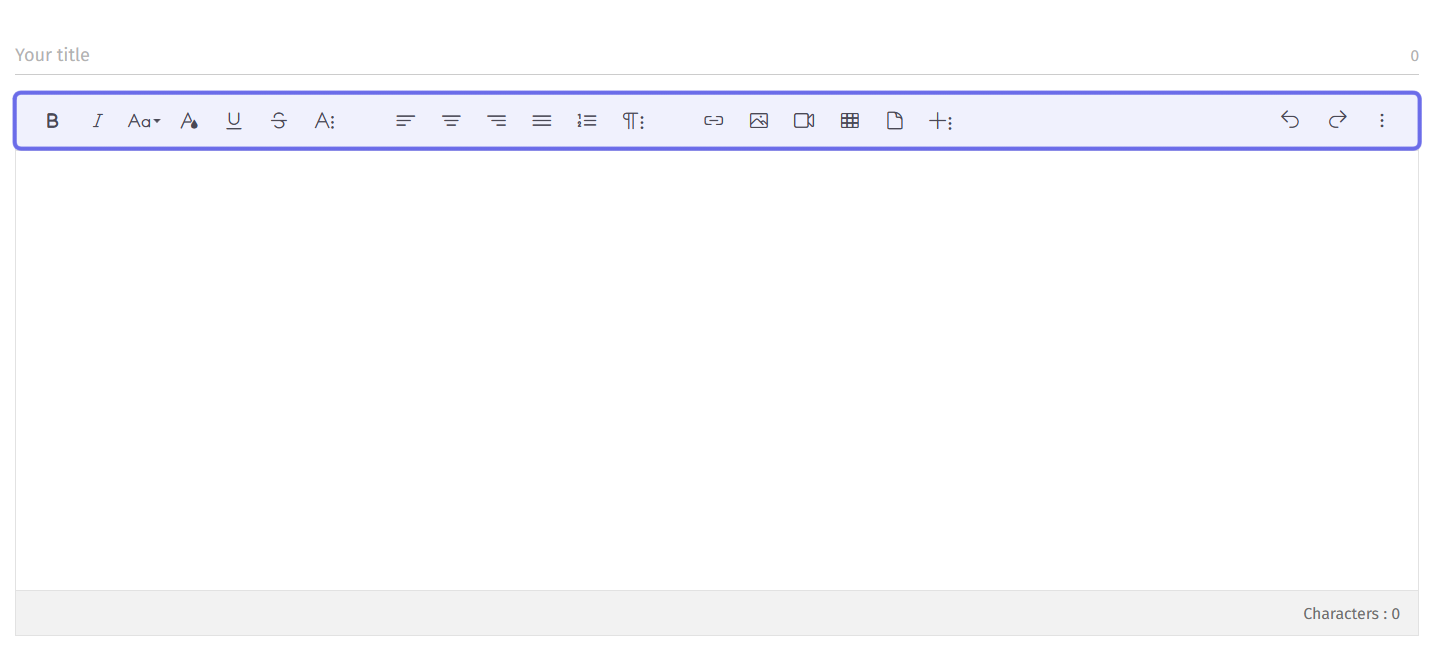
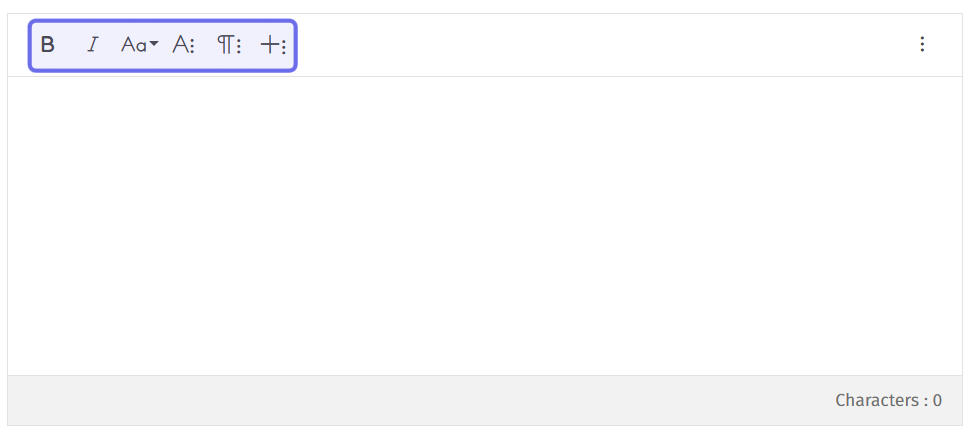
The toolbar of the text editor is highlighted here in blue.
There is a wide range of tools available, from basic font styling to embedding video.
This article covers how to use these tools.
Font Styling

The various font styling options are highlighted in blue above.
You can find all the standard font styling options in the toolbar: bold, italic, underline, and strikethrough. There are also options to change the size and color of text. (The icons should look familiar from most word processing applications!)
Styling Options Key
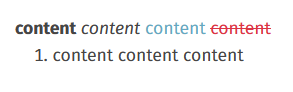
The available font emphasis options are:
| Bold |
| Italic |
| Underline |
|
|


If you don’t see the option you’re looking for, check under “Additional Styles.”
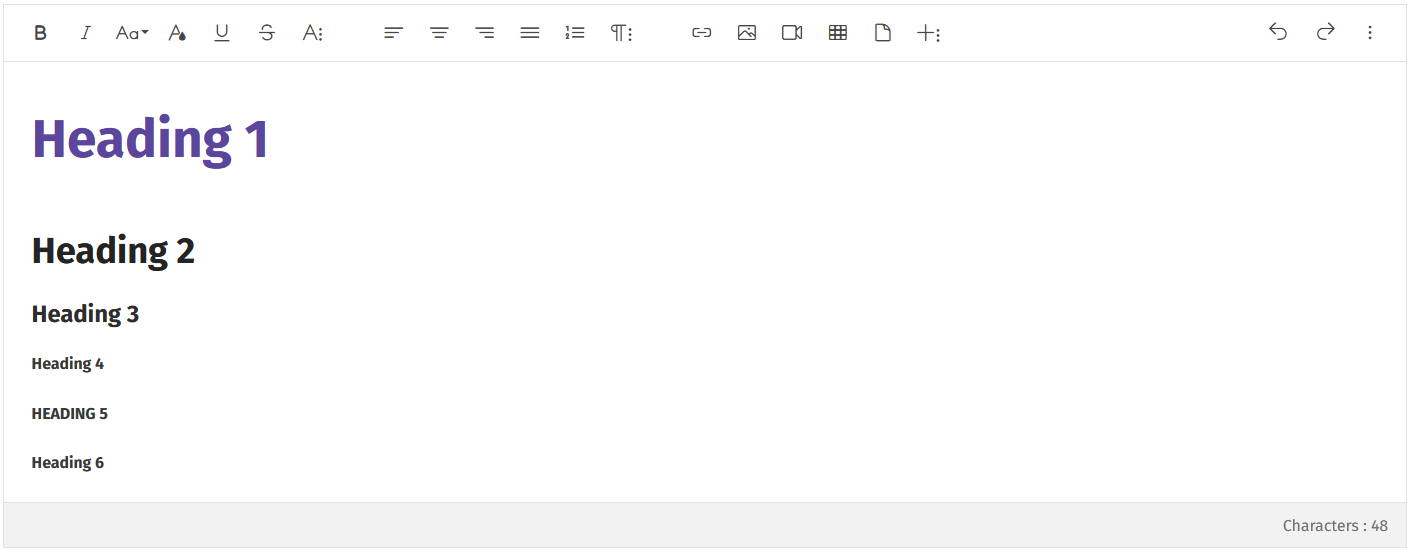
Font Size

Click on the icon with an uppercase and lowercase “A” (“Aa”) to see a dropdown with font size options. There are six different heading sizes to choose from, as well as the default text size.
Note: No formatting can be applied to Headings, as their style will applied on the front-end side.
Font Color

Add color to your posts by clicking on the “A” icon with a droplet. You can select a color from a palette, or type in a hex code if the color you want isn’t available as a swatch!
Clear Formatting

The “Clear formatting” button clears any changes to the text - styling, color, size, etc. It is great for when you copy-paste a line of text and want the formatting to fit in better with what you already have in place.
In general, the “Clear formatting” button is hidden. Click on the “Additional Styles” button and it will dropdown.
Paragraph Options

The section of the text editor toolbar with paragraph options is highlighted here in blue.
Alignment

You can re-align text by selecting one of the icons made up of four lines. The lines mimic the intended text alignment: left-aligned, center-aligned, right-aligned, or justified.
The default alignment is left-aligned.
Lists
You can add bulleted or numbered lists to posts. If you’re unable to see the list icons, click the “Additional Paragraph” icon for more options.
| The icon that shows bullets will let you make a bulleted list. |
| The icon that shows “1, 2” will let you make a numbered list. |


Note: You cannot combine list types. A list must be either bulleted or numbered.
Indents

You can indent text by clicking on the icons made up of four lines with an arrow. The direction of the arrow shows whether it will indent right or indent left (if the text is not already at the margin).
Indent options are commonly found under the “Additional Paragraph” options.
Quote

If you want to emphasize that a piece of text is a quote, you can use the “Quote” button. First highlight the quoted text, then click the quotation marks (“) icon. Text and styling can be edited after using quote formatting.
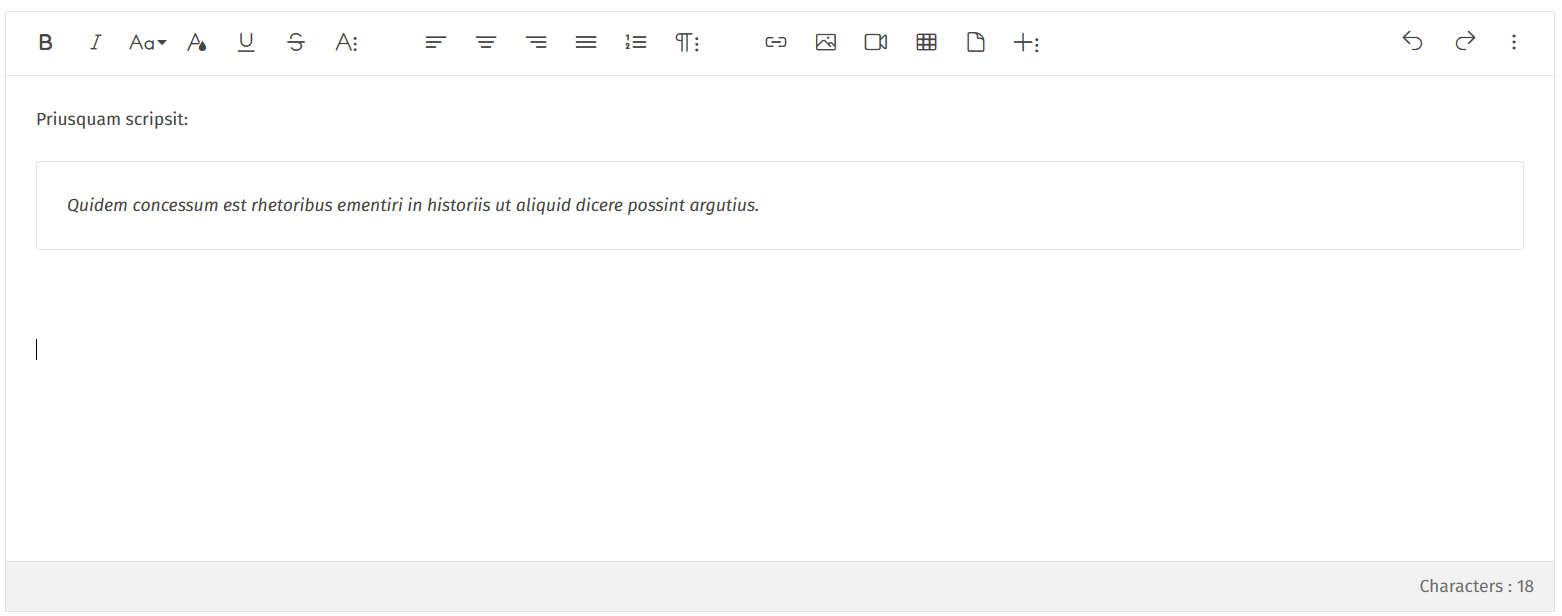
Quoted text will appear in a box, as seen in the image above.
If you can’t see the “Quote” button, check under the “Additional Paragraph” options.
Note: You can have multiple levels of quotes. A quote can be embedded inside a quote can be embedded inside a quote.
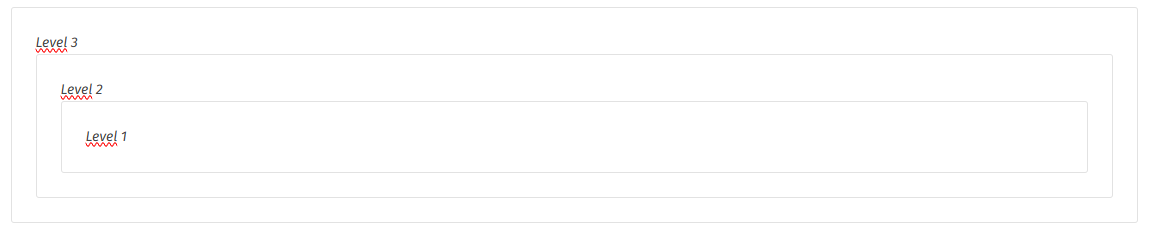
The screenshot above shows a quote with embedded quotes.
Media Features

The section of the toolbar that includes ways to add images, links, etc. is highlighted in blue above.
Link

You can link to another post or an external resource by clicking the “Link” button. It is the standard hyperlink icon to the left of the image icon.
Clicking the “Link” button will display two text fields. Enter the URL you want to link to in the top field. If you want the link to be displayed as text, rather than the URL, enter that text in the bottom field. Then click “Insert.”
Note: Highlighting text and clicking the “Link” button will automatically enter that text into the display text field.
Images

You can share more than just text. Click the “Image” icon to upload or link to an image or GIF.

The default method to enter an image is by uploading an image. You can drag and drop or click to browse.

Select the hyperlink icon if you want to instead enter an image from a URL directly.
Once an image is added, click the image to display a toolbar where you can make adjustments.
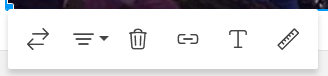
Once you insert an image, you can use the toolbar to make changes.
From the toolbar you can:
Replace the image
Re-align the image
Delete the image
Add a link to the image
Update the image’s alt-text
Resize the image
Note: You can also resize an image by dragging the image’s highlighted border.
Videos

You can even add video to your posts! Just click the camera icon. There are three ways to insert a video into your post.

The default option is to upload a video. Drag and drop or click to browse. Once a file is added, the video will automatically start to upload.
Note: There is a 5MB limit for uploaded files.

Click the hyperlink icon to the right of the “Upload” button to instead insert a link to a video. Copy the video’s URL into the text box and click “Insert” to add to the post.

You can also add a video with embed code by clicking the brackets icon. (Code to embed a video typically begins with “<iframe”) Copy the embed code and click “Insert” to add to the post.
Note: For security reasons, please make sure the embed does not include any <script> elements.
From the toolbar you can:
Replace the image
Re-align the image
Delete the image
You can resize the video by dragging on the video’s highlighted border.
Table

You can organize your content in a table by clicking on the icon that looks like a grid. A series of squares will drop down. Highlight the squares that represent the table layout you’re looking for and then click.
This will insert a table. Click into any row to add content and to access additional format options.
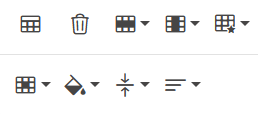
A table’s additional format options appear as two rows of icons.
In the top row, there are formatting options for the table as a whole. You can add a header, delete the table, add a row or column, change the border, and set alternating rows.
In the bottom row, there are formatting options for the individual cell your cursor is in. You can split a cell into two rows or two columns, change the cell’s background color, and align the content.
Attachment

You can share attachments with other users. Click on the icon that looks like a piece of paper with a folded down edge. A box will drop down with the option to drop or browse for a file.
Note: Your file must be below 5MB.
Undo/Redo

The “Undo” and “Redo” buttons are highlighted above in blue.
The arrows on the right-hand side of the text editor toolbar let you undo and redo the previous action.
Undo will erase the most recent character or small group of characters typed.
Redo will add the most recent character or small group of characters erased.
Note: Please use caution when using the Undo/Redo tools. The exact amount of text that will be undone or restored is not always clear. We are currently working on making this feature more reliable.
Additional Features

The additional features options - identifiable by three vertical dots - are highlighted here in blue.
To save space, some toolbar features are nested. Any icon with three dots on the right-hand side can be expanded.
In the compact text editor, more tools will be nested.
Additional Font Styling Options
You can find additional font styling options by clicking on the “A” with three dots next to it.
The “Clear Formatting” and “Strikethrough” options are commonly found in the additional style options.
Additional Paragraph Options
Additional paragraph options are found by clicking on the paragraph symbol with three dots next to it (looks like a backwards “P”). You will always find the option to add a quote in the additional paragraph options, but if the text editor is compressed, you may also find list and indent options here.
Additional Media Options
When the toolbar is compressed, you can find the options to add media or to further organize your content under the “Additional Media options” button. This is a plus sign with three dots next to it.
Add a Horizontal Bar
The horizontal bar icon is always nested under the “Additional features” button. Use this icon to break up different sections of your text with a horizontal line.
The above image shows text separated by horizontal bars added in the text editor.
Additional Tools

The button to see additional tools is located on the rightmost side of the toolbar, highlighted above in blue.
More tools can be found by clicking on the three dots on the rightmost side of the toolbar. In this menu you’ll find ways to:

Make the text editor full screen,

Select all content,

and edit HTML directly (in the back office).
Click on the “Edit HTML” button to view the post with HTML tags, rather than seeing how it will appear when published. This lets you further customize your post, such as adding collapsible blocks that are useful for FAQs.
The above shows text in the WYSIWYG editor followed by how it looks when you click the “Edit HTML” button.
Keyboard shortcuts
You do not need to use your mouse and click for many formatting options! The following keyboard shortcuts may be used:
Command | Windows Shortcut |
Bold | Ctrl + B |
Italic | Ctrl + I |
Underline | Ctrl + U |
Strikethrough (Surline) | None |
Increase indent | Tab |
Decrease indent | Shift +Tab |
Quote | None |
Unquote | None |
Select All | Ctrl + A |
Undo | Ctrl + Z |
Redo | Ctrl + Shift + Z |
The Compact Text Editor
Sometimes the layout of a page or size of your browser screen will compress the text editor. Fewer tools are visible by default in this compact version, but you still have access to all of the same tools!
The compact text editor’s smaller toolbar is highlighted here in blue.
Use the “Additional features” buttons to access the hidden text editor tools. When you click one of these buttons, the nested features will dropdown.
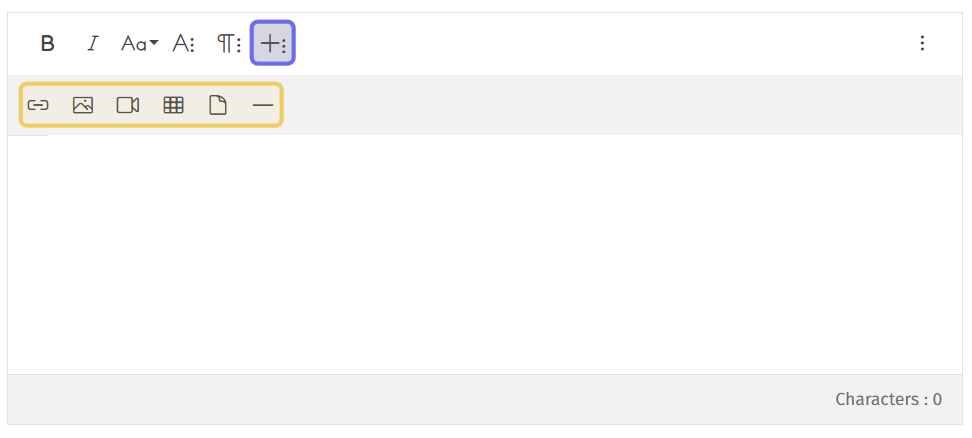
The “Additional Media Options” button is highlighted in blue. It has been clicked, displaying the nested tools below. They are highlighted here in yellow.
In the compact text editor, the following tools are nested:
Additional Styling: Font color, Underline, Strikethrough, Clear formatting
Additional Paragraph Options: Alignment tools, Lists, Indent, Quote
Additional Media Options: Add a link, image, video, table, attachment, or horizontal bar