
How to configure a Studio
Who can configure a new Studio?
Admins can configure a new Studio. Devs are able to make changes to some Studio settings.
Where can I configure a Studio?
Locate the Studio in the back office to configure it. To find a Studio, click on “Pages” in the “Manage” menu.
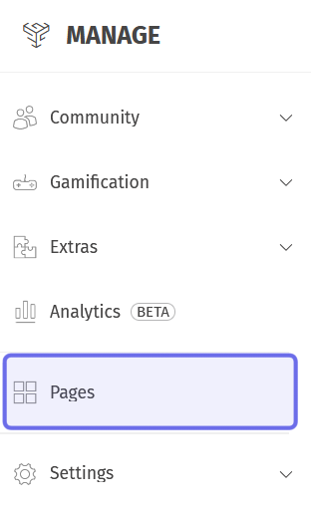
The “Manage” menu is pictured above. “Pages” is highlighted in purple.
You can access the “Configure” window by hovering over a Studio. Hover over the Studio and click on the three dots that appear in the top right of the Studio card. Then choose “Configure” from the dropdown menu.
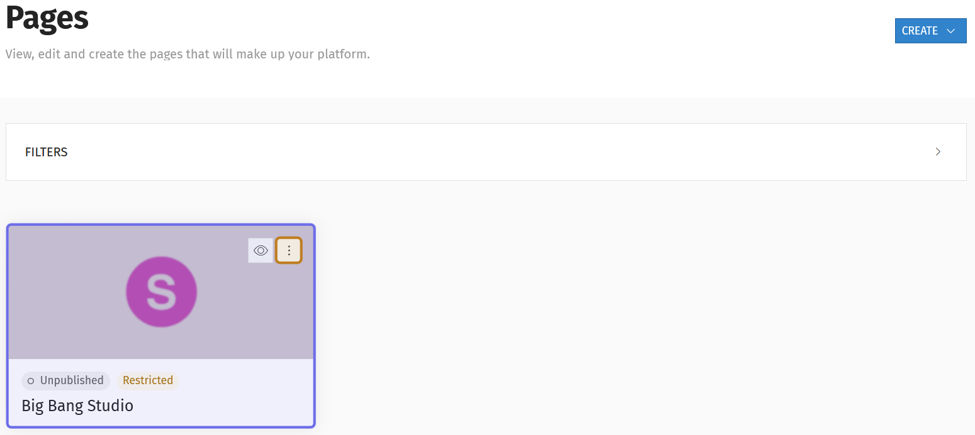
A Studio card is shown highlighted in purple above. The three dots that need to be hovered over to access the dropdown menu are highlighted in yellow.
If you click on a Studio card, you will be taken to that Studio’s page. You can access the “Configure” window from a Studio page by clicking “Customize” in the page header.

A Studio page header is shown above. The “Customize” button is outlined in purple.
Then, click “Configure.”
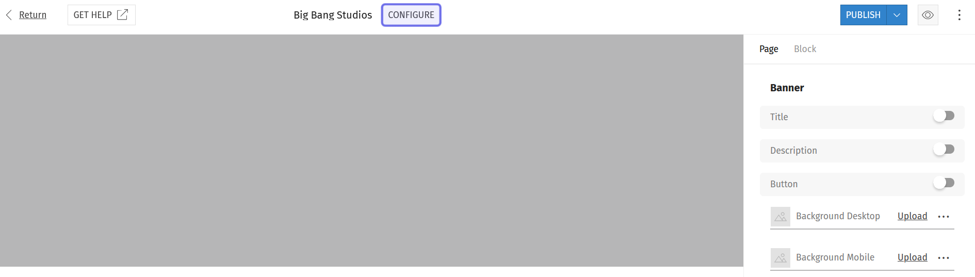
A Studio’s customization options are shown above. The “Configure” button is at the top in the center and highlighted here in purple.
How do I configure a Studio?
Once you open the “Configure” window, there is a menu on the left-hand side that lists four sections. Click on a section name to navigate directly to that section.
Note: If this is your first time configuring the Studio, make sure to edit all four sections.
The Studio configuration can be updated at any time. Some elements, such as editing the Studio name, affect how the Studio is accessed. Those elements are limited to users with the “Admin” Restriction Level. Check the table below to see the required Restriction Level to update each section of the “Configure” window.
Section | Restriction Level | Required |
General | Admin only | What you will call the Studio A default Universe |
Visibility | Admin only | Know who should have access to the Studio on the front end |
Assets & personalization | Admin and Dev | A 32x32px SVG icon and three hex codes for the Studio color scheme More information on how to format the icon is included in the section below |
SEO | Admin and Dev | A 1200x1200px image and details on how you want the Studio to appear in search results and social media shares |
Delete Studio | Admin only | Certainty that you will never want to recover any data from this Studio or any of its linked Universes |
After configuring a section, click “Apply Changes.” The button will be greyed out until one of the fields is edited. Then, a confirmation window will pop up. Click “Apply Now” to confirm.
Note: You must hit “Apply Changes” after editing any one section. Edits are not saved when you move between sections.
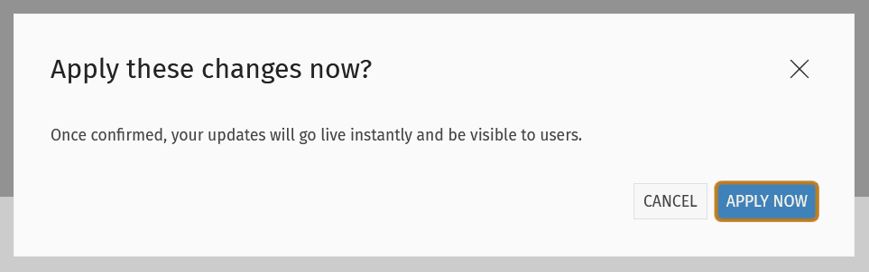
The above dialogue window appears when you apply changes to a Studio. The “Apply Now” button that confirms changes is highlighted in yellow.
General
Under “General,” you can change the Studio name and the default Universe.
To change the name, click the “Studio name” text field. Enter a new name.
The Studio URL is displayed below the “Studio name” field. Changing the Studio name will change the URL. The URL cannot be edited.
Note: Changing the Studio name will break previous links back to the Studio and to the Studio’s Universes. The Studio and Universe URLs will update to incorporate the new Studio name.
To change the default Universe, click the “Default Universe” dropdown. Select a new default Universe. The default Universe is where cross-Universe content–content in a feature that is displayed across all Universes in a Studio–is housed.
After making changes, click “Apply Changes” at the bottom of the window. Click “Apply Now” in the window that pops up to confirm.
If you close the window or move to another section before applying changes, your changes will be lost.
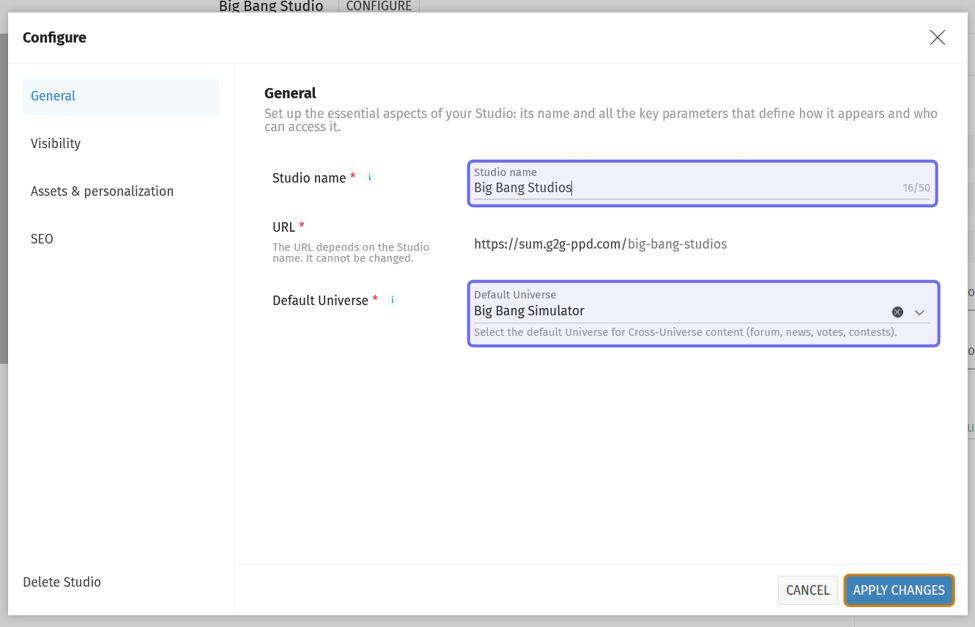
The “Configure” window is shown above. The editable fields, “Studio name” and “Default Universe” are highlighted in purple. The “Apply Changes” button is highlighted in yellow.
Visibility
Under “Visibility,” you can set the Restriction Level necessary to view the Studio.
Click the “Studio visibility” dropdown. Then select a Restriction Level from the link.
Note: Selecting “Public” will make the Studio visible to all visitors.
After updating the visibility, apply changes.
Note: The visibility of the Studio applies to all Universes attached to that Studio.
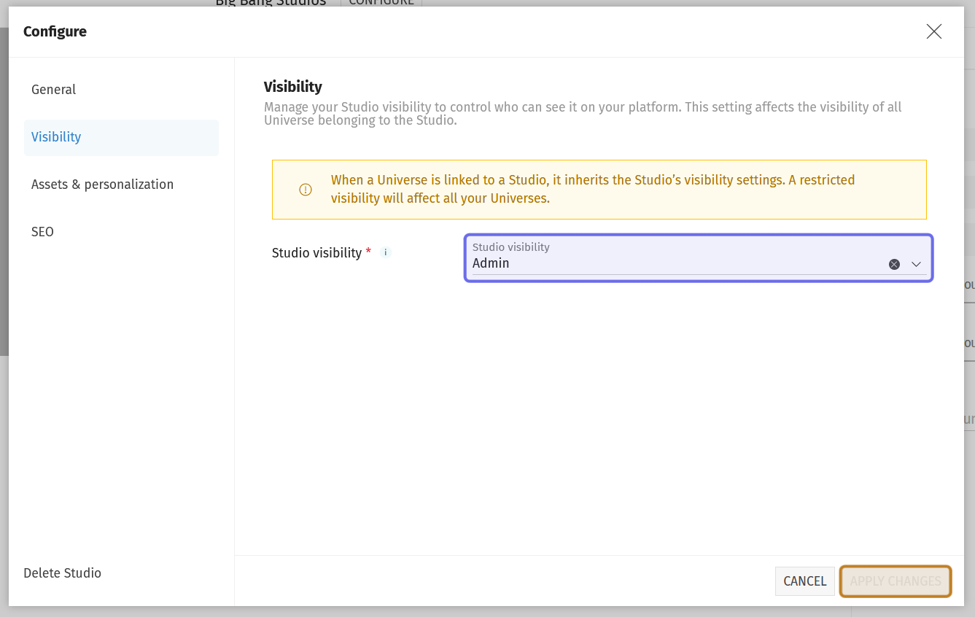
In the “Configure” window above, the “Studio visibility” dropdown is highlighted in purple. The “Apply Changes” button is highlighted in yellow. As the Studio visibility has not yet been edited, the button is greyed out.
Assets and Personalization
Under “Assets and Personalization,” you can add an icon and color palette to help define your Studio’s identity.
Click “Upload” under “Assets Settings” to add an icon. Browse your computer for an image and upload it.
The file must be a 32x32 pixel SVG. Your icon should be 24x24 pixels, with an 8px safety margin. The SVG should be vectorized and flattened (only one layer). It cannot contain more than one icon.
Note: You can use our Figma template to preview and validate your assets.
Below “Personalization” there are three text fields: primary, secondary, and tertiary. These are used to define your Studio’s color palette. Separate palettes can be defined for Universes.
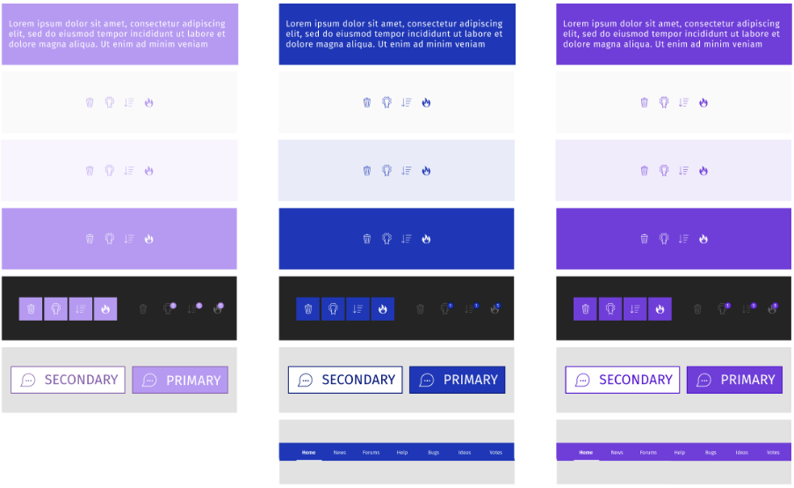
Color palette examples
The primary color is the most prominent color on the Studio front end. It is used for the page menu and most icons and buttons. The secondary color helps contrast different elements, such as when you have a “Cancel” and “Submit” button side-by-side. The tertiary color provides additional variation that can make some elements easier to read and helps bring the palette together.
To set your color palette, enter the respective color hex code in the primary, secondary, and tertiary text fields. A hex code is six alphanumeric characters following a hash symbol (#) that represents a color. You can find hex codes on various online tools and in the color picker of many image editing programs.
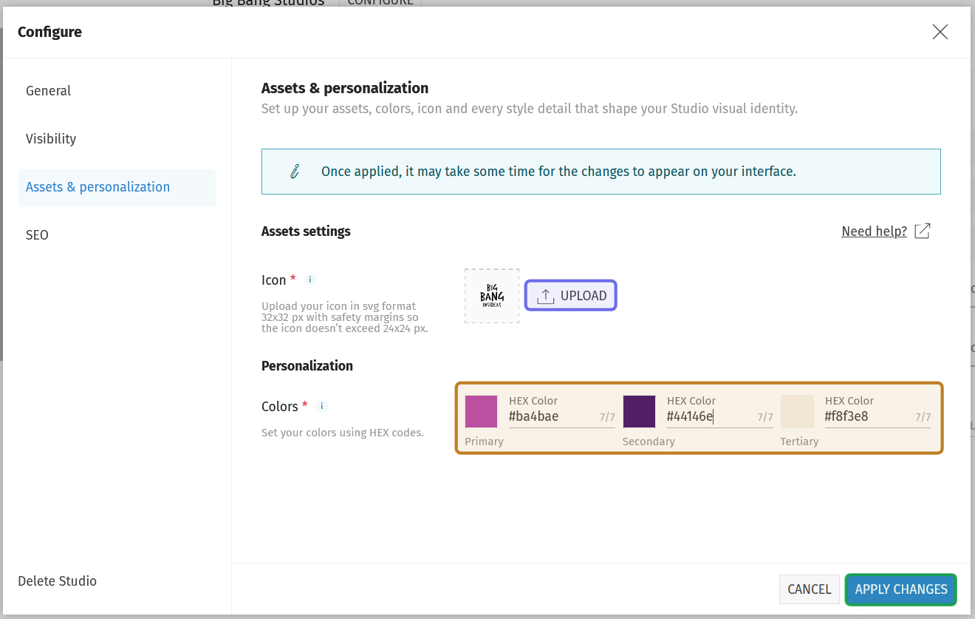
The “Assets and personalization” section of the “Configure” window is shown above. The icon “Upload” button is highlighted in purple. The fields to set a color palette are highlighted in yellow. The “Apply Changes” button is highlighted in green.
Then, apply changes.
SEO
Configure the SEO section to make your Studio more visible to search engines and to optimize how it appears in search results and shares on social media networks.

A search result is shown above. The “Title tag” text is highlighted in purple. The “Meta description” content is highlighted in yellow.
The “Title tag” field is the name your Studio is given when it appears in search engines. It should be straightforward, pithy, and unique to your Studio.
Edit the title by clicking in the “Title tag” field and entering text. There is a 60 character limit.
The “Meta description” is the page snippet that appears in search results and lets users know what to expect. It should be short, informative, and use words that people are likely to associate with your content.
Type a short description into the “Meta description” field.
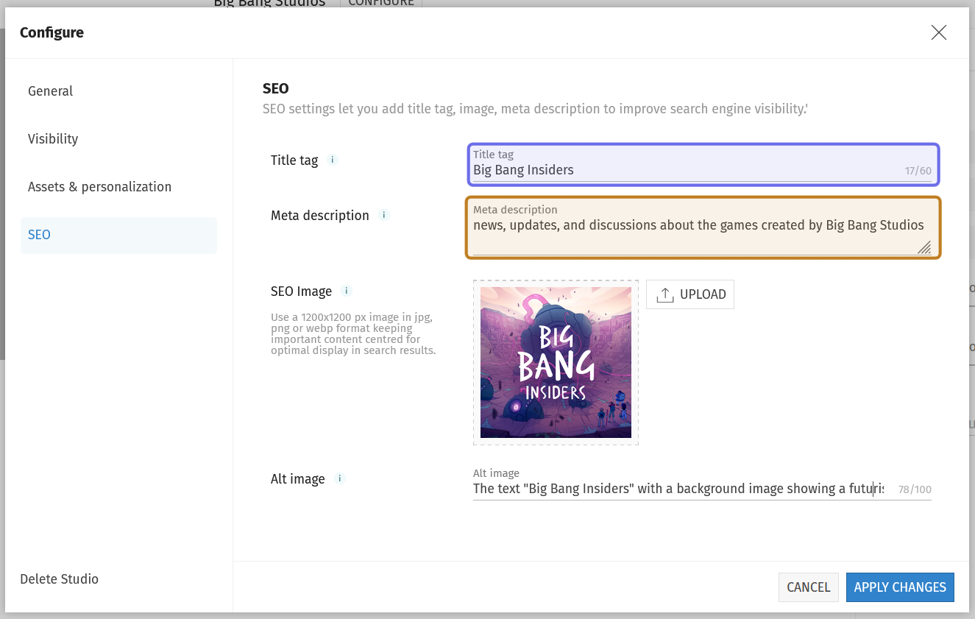
The “SEO” section of the “Configure” window is shown above. The “Title tag” field is highlighted in purple. The “Meta description” field is highlighted in yellow.
You also have the option to include an image. The image may appear in search engines. It is also often used by social media platforms when generating a link preview for your page.
To add an image, click “Upload.” The “Upload” button is to the right of “SEO Image” and an image preview, if one has been previously added. Browse and upload an image from your computer. The image should be 1200x1200 pixels and cannot be more than 100KB.
Add alt text by writing a short image description in the “Alt Image” field. Alt text is used by screen readers and makes your content more accessible to all visitors.
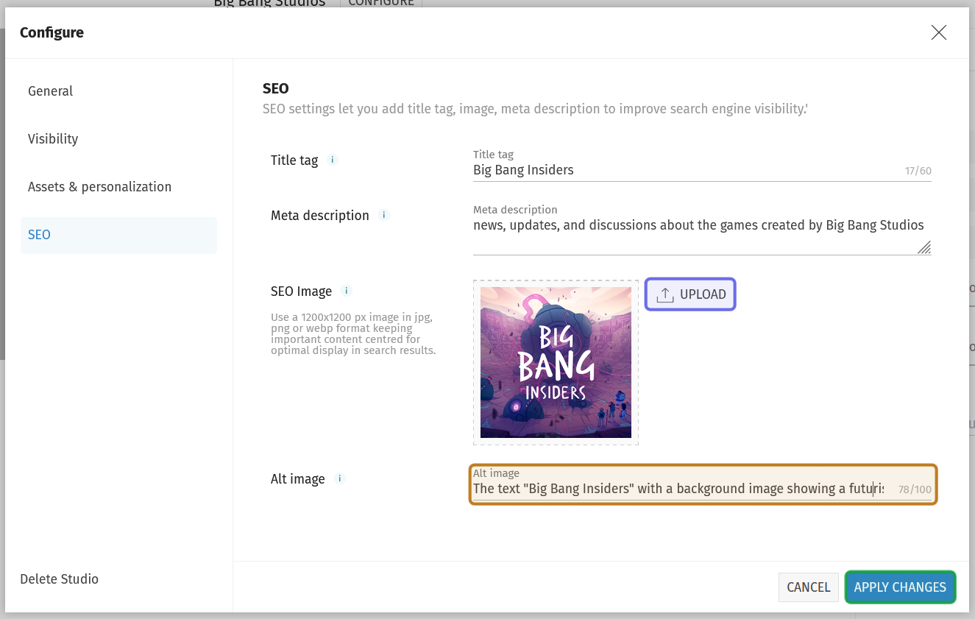
The “SEO” section of the “Configure” window is shown above. The “Upload” button is highlighted in purple. The “Alt image” field is highlighted in yellow. The “Apply Changes” button at the bottom is highlighted in green.
After adding SEO, apply changes.