
How to highlight a bug on the front-end “Bugs” page
Who can select bugs to highlight?
Devs and Admins can select bugs to be highlighted on the front-end “Bugs” page.
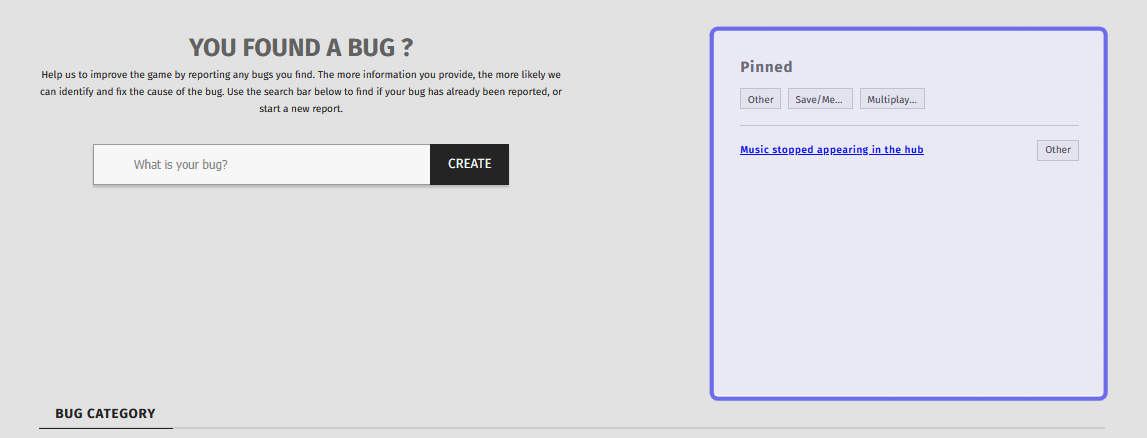
Part of a front-end “Bugs” page is shown above. An example of a highlighted bug is outlined in purple on the right.
Where can I select bugs to highlight?
You can select bugs to highlight in the back office. First, locate the “Bugs” feature for the desired Universe. You will land on the “Bugs” dashboard.
Then, click the “Settings” button. It is in the page header on the right-hand side.
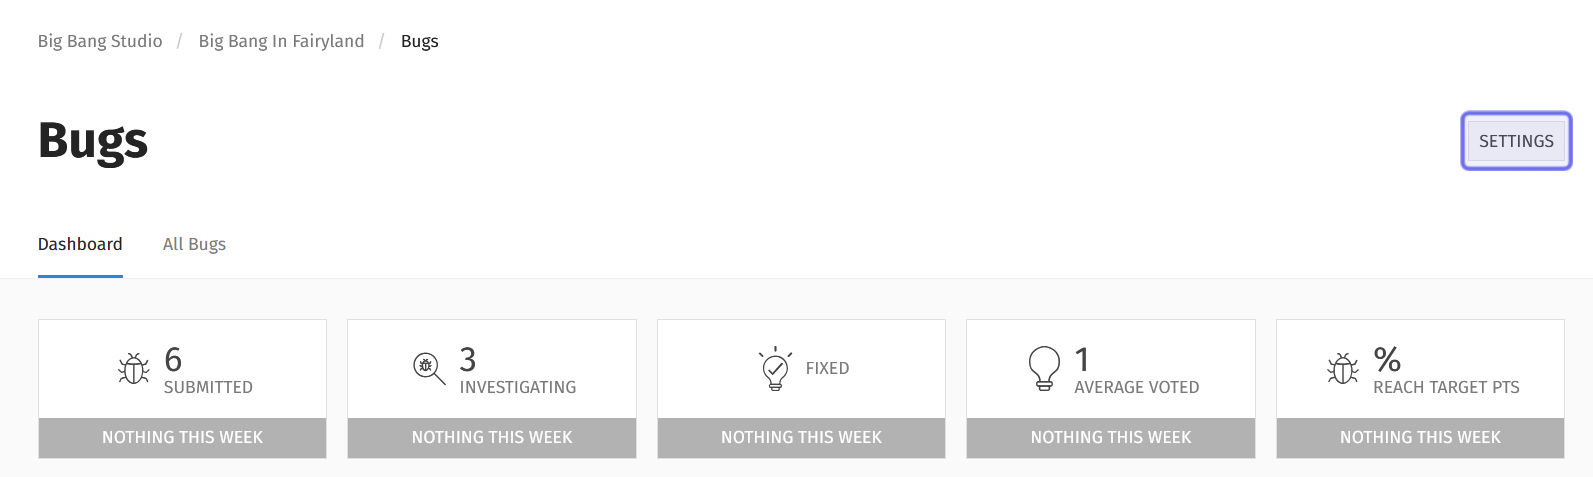
The “Settings” button is shown highlighted in purple.
This will take you to the “Bugs” feature settings.
There are several tabs on the “Settings” page. Click the “Highlights” tab.
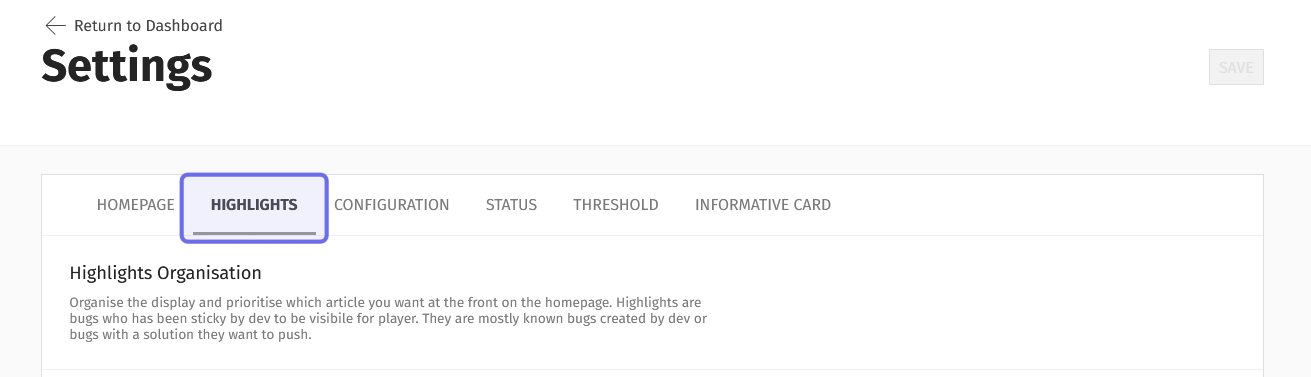
The “Settings” page has a series of tabs. The “Highlights” tab is highlighted in purple above.
How do I select a bug to highlight?
Directly under the “Highlights” tab is a dropdown labeled “Bug.” Below the dropdown is a text field labeled “Link.”
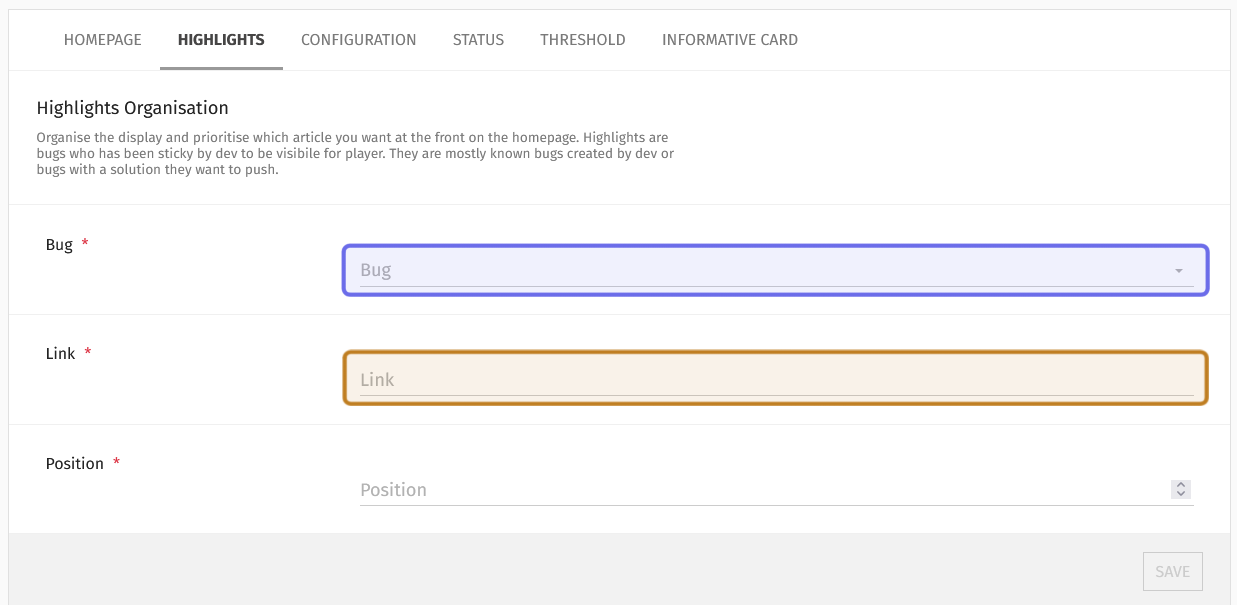
The “Highlights” tab is shown above. The “Bug” dropdown is highlighted in purple. The “Link” field, which autofills, is highlighted in yellow.
To highlight a bug on the front end, first click the “Bugs” dropdown. It lists the titles of all submitted bug reports. Select a bug from the list.
Note: Once you have opened the dropdown, you can use your browser’s “Find” function (usually CTRL + F) to search for a specific bug report title.
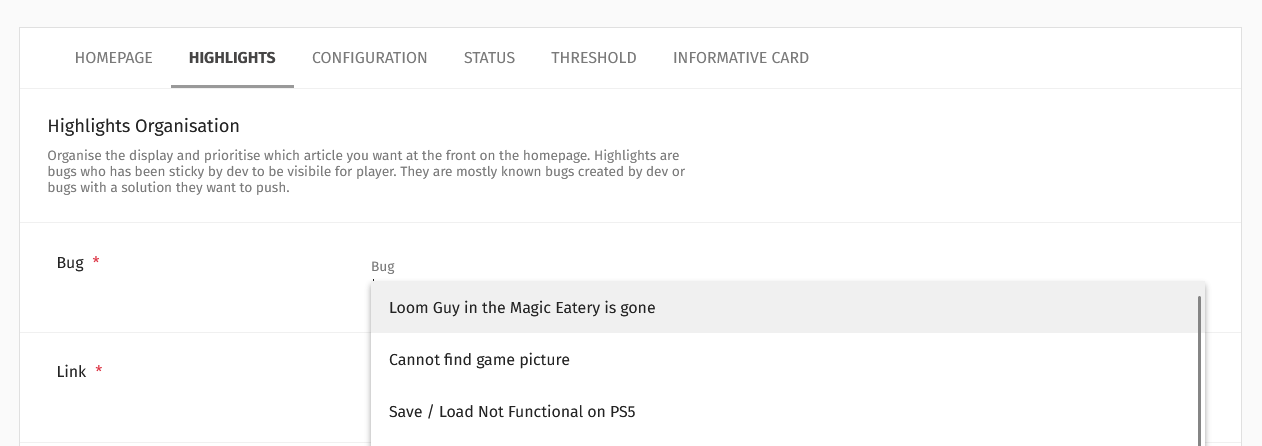
An example of an open “Bugs” dropdown beneath the “Highlights” tab.
When you select a bug, the “Link” field will automatically populate with the direct link to the bug report on the front end.
Then, use the “Position” field to indicate where in the list of highlighted bugs on the front end this bug should appear.
Enter an integer into the “Position” field. You can also use the vertical arrows on the right to change the number by increments of one. The bugs will be ordered on the front end in ascending order, so the lower the number the higher in the list it will appear.
Last, hit the “Save” button to save.
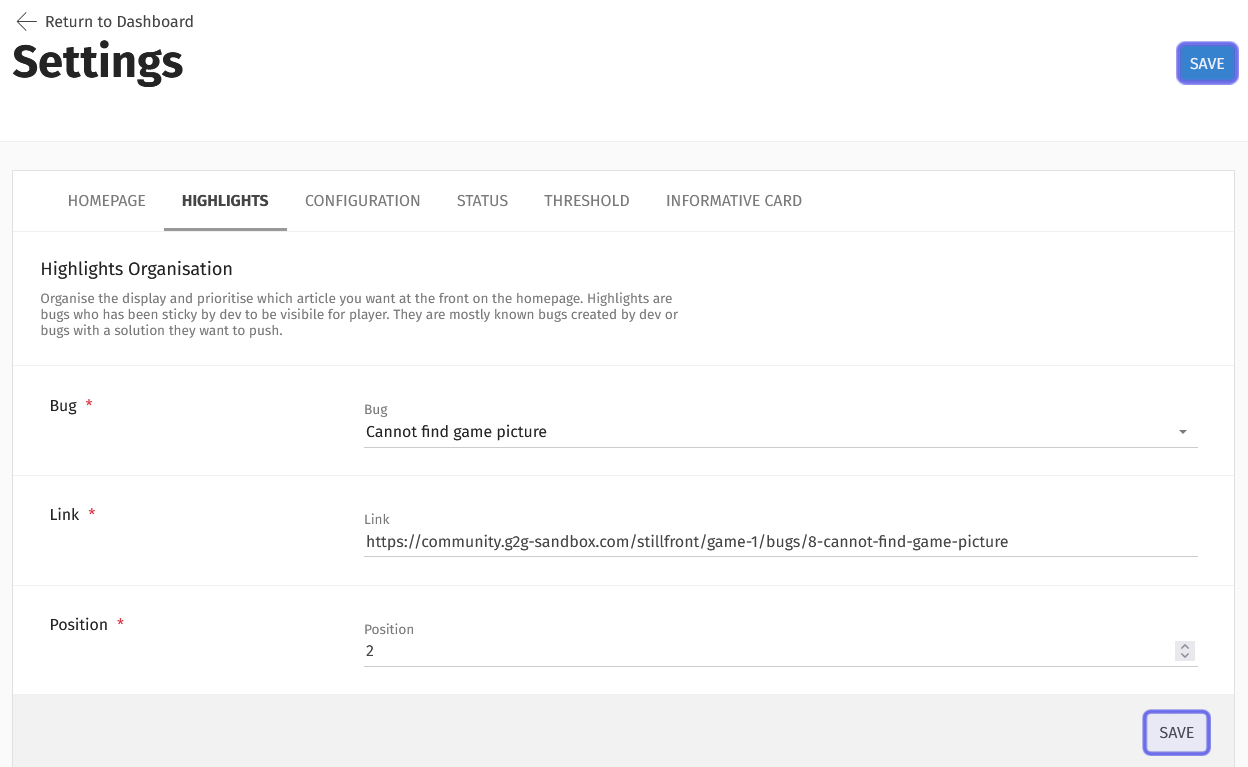
The two “Save” buttons under the “Highlights” tab are outlined in purple.
There are two “Save” buttons on the page. One is below the “Position” field on the right-hand side. The other is near the top of the page to the right of the “Settings” title.
How do I change the display order of highlighted bugs?
If you want to change the display order of highlighted bugs on the front end, scroll down to the list of highlighted bugs under the “Highlights” tab. There is a button above the list to the right labeled “Reposition.”
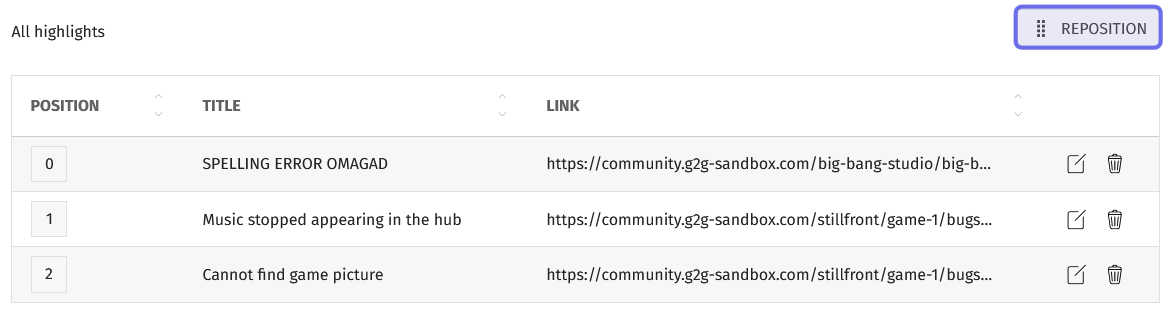
A list of highlighted bugs in the back office is shown above. The “Reposition” button is highlighted in purple.
Click “Reposition.” You will now be able to rearrange the list.
Click and drag to rearrange. Once you’ve rearranged the list into its new order, click the “Save” button. The “Save” button is above the list of highlighted bugs to the right of “Cancel.”
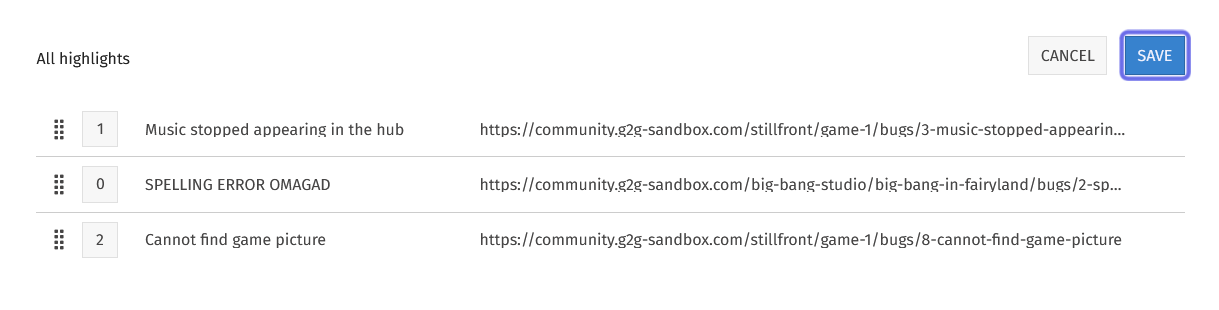
The list of highlighted bugs above has been rearranged. The “Save” button is outlined in purple.
After you save, the position field will update accordingly.
You can also update the “Position” field of a single bug. Find the bug whose position you want to change in the list beneath the “Highlights” tab. On the right-hand side of that bug’s row, you will see two icons. The square with a line through it is the “Edit” button.
Click the “Edit” button. This will reopen the bug in the section above.

An “Edit” button is highlighted in purple.
Update the “Position” field. You should change the field to match the position of the bug you want this one to replace.
Then, click “Update.” The “Update” buttons replace the “Save” buttons. There is one below the position field on the right and one near the top of the page to the right of the “Settings” title. The position fields of all highlighted bugs will then update accordingly.
To demonstrate how the position field automatically updates, the following example will show the bug at position 3 being moved to immediately below position 0.
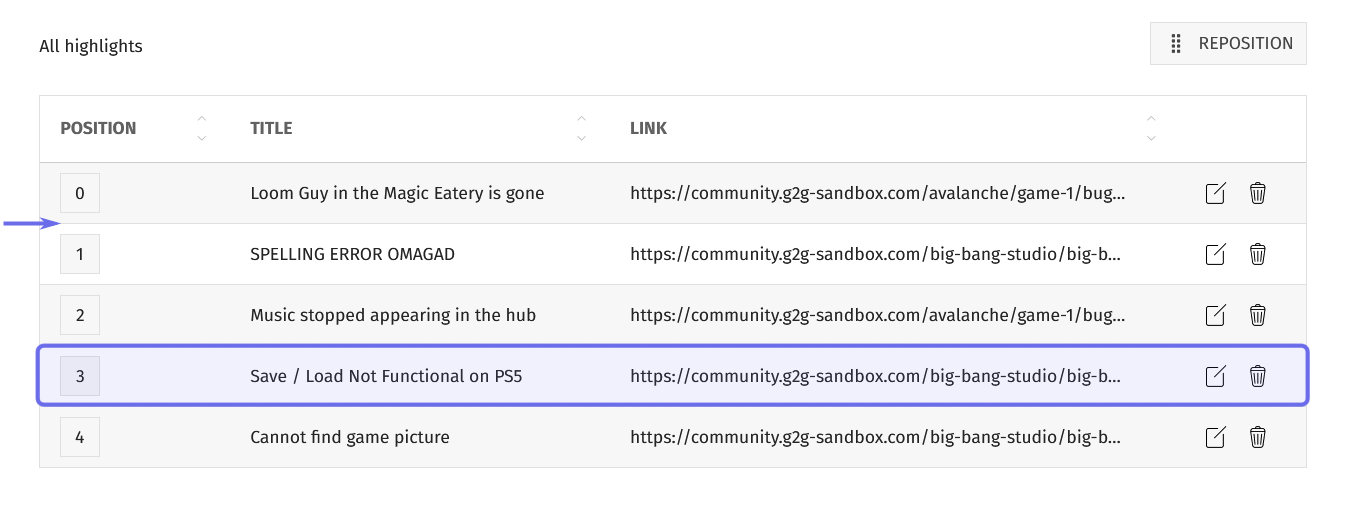
The bug that will be moved is highlighted in purple above. The arrow points to where in the list the bug will be moved to.
Either by using the “Reposition” field and clicking and dragging or by clicking the “Edit” button, position 3 is changed to position 1.
All bugs above the moved bug’s new position will remain the same. All bugs below the moved bug’s original position will remain the same. The bugs in between those two positions will be updated to “original position + 1.”
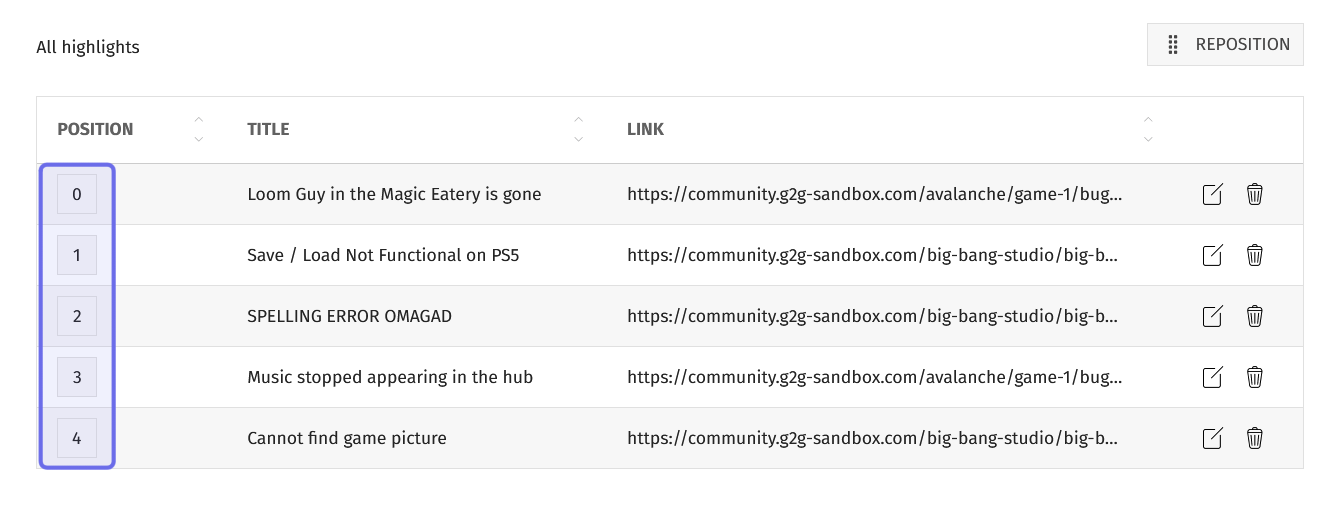
The same list as the previous screenshot is shown above, with one bug moved. The updated “Position” column is highlighted in purple. “SPELLING ERROR OMAGAD” and “Music stopped appearing in the hub” were not manually moved, but their positions have been updated from 1 and 2 to 2 and 3 respectively.
Can I replace a highlighted bug?
You can replace a highlighted bug two ways. You can delete the bug you no longer want to highlight, and then highlight a different bug. Alternatively, you can edit the bug you want to replace.
To edit a bug, find the bug you want to replace in the list of highlighted bugs beneath the “Highlights” tab. Look on the right-hand side of that row. You will see two icons.
Click the “Edit” button. It looks like a square with a line through it. This will reopen the bug in the section above.

An “Edit” button is highlighted in purple above.
Select a new bug from the “Bug” dropdown. The “Link” field will update automatically.
Click “Update” to confirm the change.
The “Update” buttons replace the “Save” buttons. You can find one beneath the “Position” field on the right. The other is near the top of the page to the right of the “Settings” title.
How do I delete a bug from the list of highlighted bugs?
If you no longer want to highlight a specific bug, you can delete it from the list.
Scroll down beneath the “Highlights” tab until you see the “All highlights” list. Find the title of the bug you want to delete in the list.
Look on the right-hand side of that row in the list. There are two icons. The trash can icon is the “Delete” button.
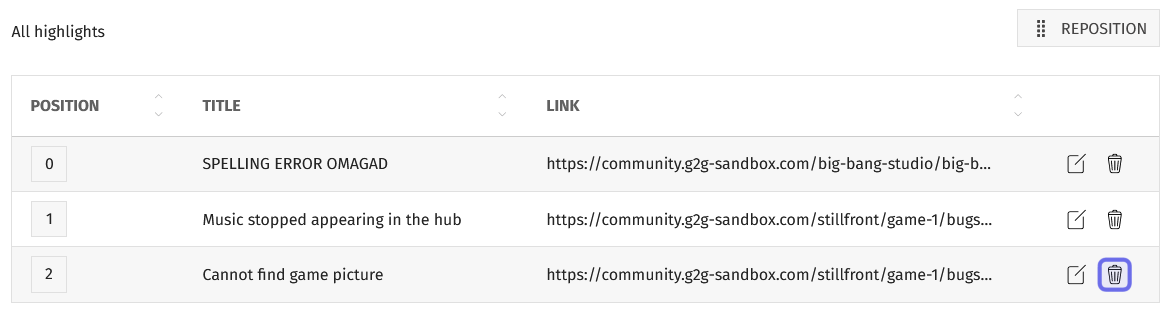
A “Delete” button in a list of highlighted bugs is outlined in purple above.
Click the “Delete” button.
A window will pop up asking you to confirm that you want to remove the highlight from the list. Click “Delete” to confirm. The bug will be removed from the list and no longer shown on the front-end “Bugs” page.