
How to navigate the back office?
What is the back office?
The back office is the content management hub for the games2gether platform. Here Devs and Admins can customize the platform to meet the needs of your Universes and communities. The back office includes options to redesign your landing page and to update Universe features, from organizing forums to reviewing ideas.
The back office also includes tools to help you track activity on the platform. Dashboards are a way to visualize engagement with Universes and individual features. Lists can be filtered to highlight what content is trending or to show posts that still require a response from your team.
Additional moderation tools, Twitch drops, and options for editing Universes can also be found in the back office.
Currently some set-up and customization options need to be handled by the G2G Dev team. We are committed to giving you as much control over the platform as possible. Our Devs are actively working on ways to reduce clients’ reliance on our team and to give you further autonomy through the back office. Speak to your account manager for further details.
How do I find the back office?
Contact your account manager for access to the back office.
What is the “Manage” menu?
The “Manage” menu is found on the left-hand side of the back office. This menu is the back office’s core navigation tool. It has several dropdowns linking to the tools you need to manage the platform, including searching for a user, creating rewards, posting news, and updating the landing page.
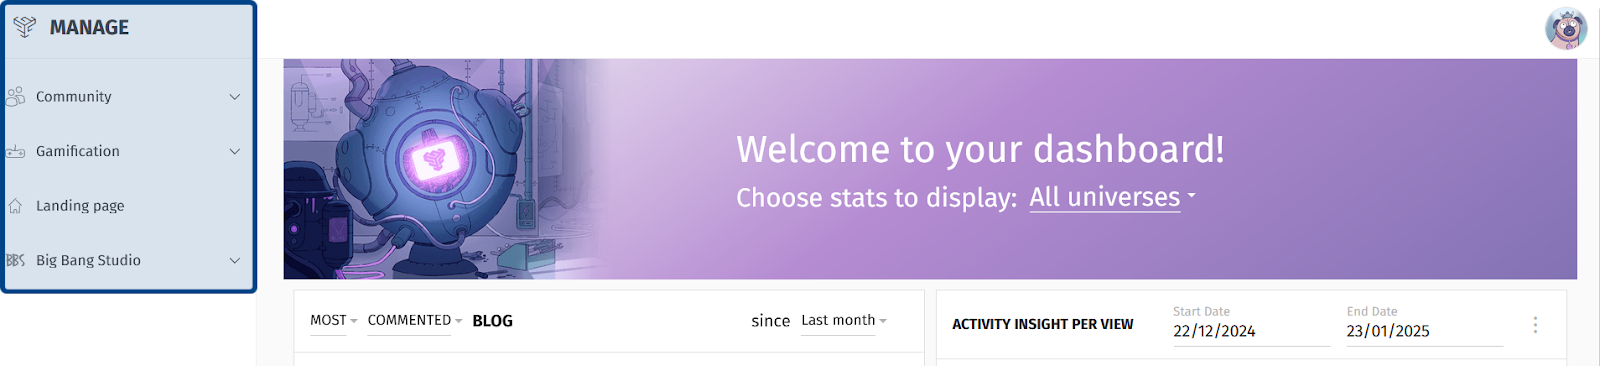
The “Manage” menu is highlighted in dark blue.
What can I find in the “Community” section?
Click on “Community” to open the “Community” dropdown. The “Community” dropdown is where you can find options for managing users on the platform.
Users: Clicking on “Users” will take you to the “Users” dashboard. From here, you can also access the “All Users” tab.
Moderation: Clicking on “Moderation” takes you to the “Moderation” dashboard. At the top of the dashboard there is a series of tabs that give you access to other moderation tools, such as “Bans” and “Reports.”
Access Keys: Clicking on “Access Keys” will take you to a list of all campaigns. From here, you can also generate new access keys to allow users to register to your platform when the “Access Keys” feature is activated.
Click on any item in the dropdown to access the described tools.
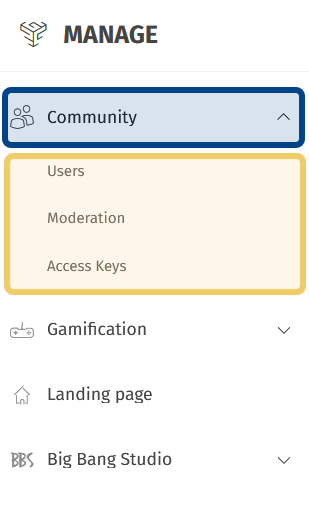
The “Community” dropdown is highlighted in dark blue.
The dropdown’s options are highlighted in light yellow.
What can I find in the “Gamification” section?
Click on “Gamification” to open the “Gamification” dropdown. The “Gamification” dropdown is where you can set-up and edit options for gamification across Universes.
Rewards: Clicking on “Rewards” takes you to the “Rewards” dashboard. From here, you can add a reward and find a list of all rewards under the “All Rewards” tab.
Badges: Clicking on “Badges” will take you to a list of all badges. You also have the option to create new badges.
Avatars: Clicking on “Avatars” will take you to a list of all avatars. From here, you can edit existing avatars and create new avatars.
Titles: Clicking “Titles” takes you to a list of all titles. Click on a title to edit it, or click on “Add Title” to create a new title.
Click on any item in the dropdown to access the described tools.
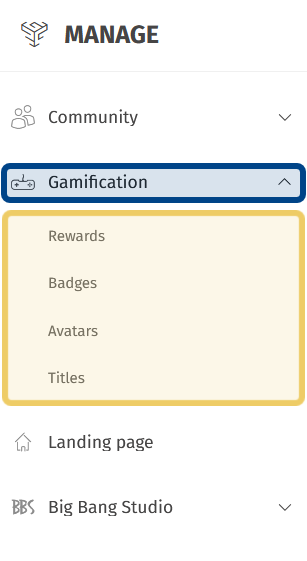
The “Gamification” dropdown is highlighted in dark blue.
The dropdown’s options are highlighted in light yellow.
Where is the CMS?
Editing the Landing Page
Click on “Landing Page” in the “Manage” menu to update your Studio’s home page. You can edit the page description, update sections, and add images, among other things.
Editing a Universe’s Layout
To edit a Universe’s home page, hover over a Universe’s dropdown in the “Manage” menu. You can find Universes by clicking on your Studio’s name in the “Manage” menu.
To the right of the Universe name, you will see a grey gear icon and a grey rectangles icon. Click on the rectangles icon to access that Universe’s “Layout” page.
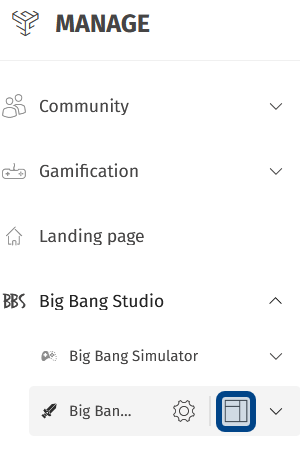
The “Layout” button is highlighted in dark blue.
How do I find a feature in the back office?
To find a feature, first open the Studio dropdown.
Studios are listed at the bottom of the “Manage” side menu. Locate your Studio’s name and icon. Click to open the Studio dropdown.
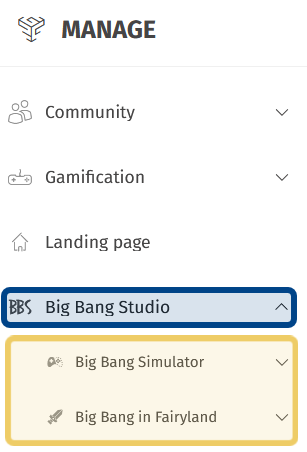
The Studio dropdown is highlighted in dark blue.
The Studio’s Universes are highlighted in light yellow.
The Studio dropdown contains all of that Studio’s Universes. Select the Universe that has the feature you want to access.
Note: Each Universe dropdown only includes the features related to that Universe. If you aren’t seeing the features or dashboard information you expect, double-check you have the correct dropdown open.
Click on a Universe name to open a dropdown. The Universe dropdown lists all of that Universe’s enabled features. Select the feature you want to access.
Clicking on a feature name takes you to that feature’s dashboard. Each feature also has a menu of horizontal tabs where you can find additional information and tools depending on the feature.
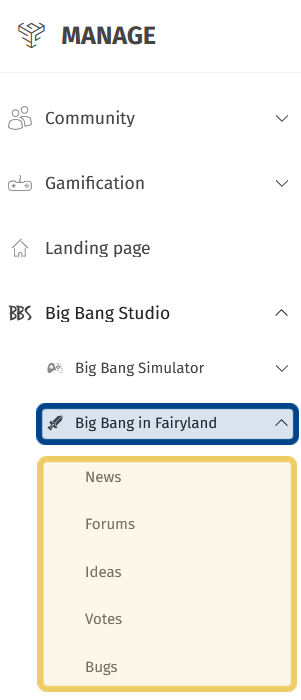
A Universe dropdown is highlighted in dark blue.
The Universe’s list of features is highlighted in light yellow.