
How to set up statuses in the “Bugs” feature
Who can set up statuses in the “Bugs” feature?
Devs and Admins can add a new status, edit an existing status, and delete a status from the “Bugs” feature.
Where can I set up statuses in the “Bugs” feature?
You can set up “Bugs” statuses in the back office. First, locate the “Bugs” feature for the desired Universe. You will land on the “Bugs” dashboard.
Then, click the “Settings” button. It is in the page header on the right-hand side.
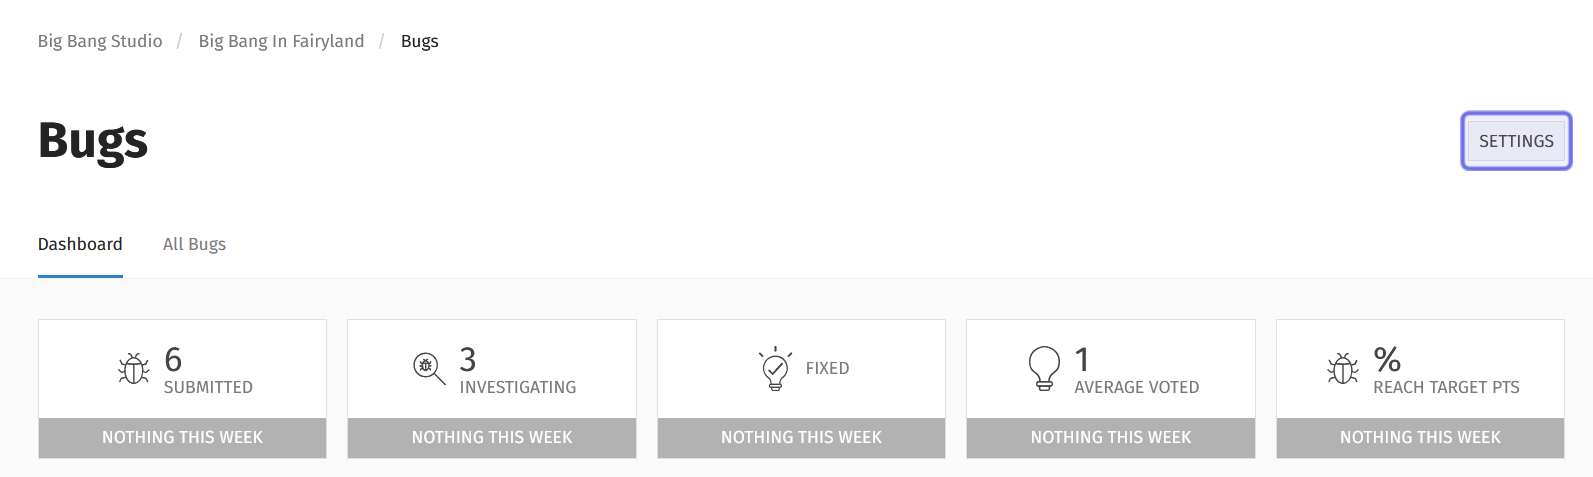
The “Settings” button is shown highlighted in purple.
This will take you to the “Bugs” feature settings.
There are several tabs on the “Settings” page. Click the “Status” tab.
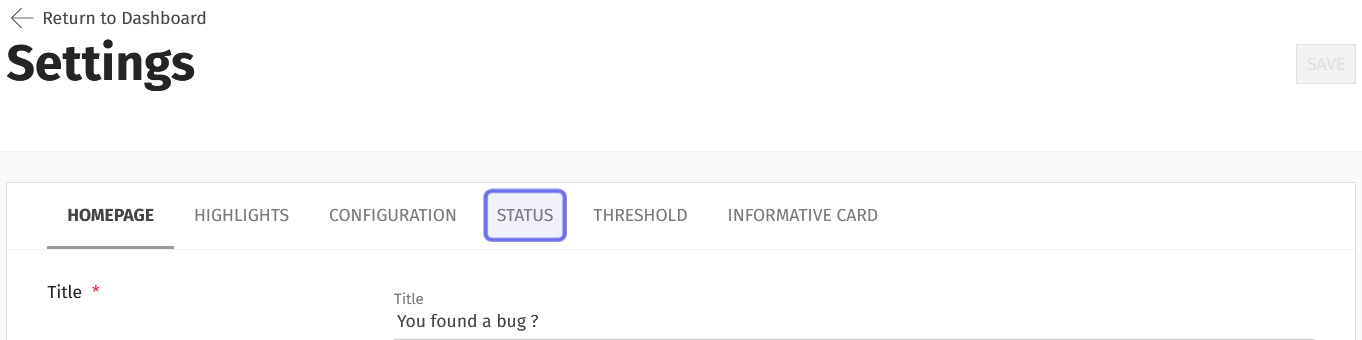
The “Settings” page has a series of tabs. The “Status” tab is highlighted in purple above.
You can add a new status and view existing statuses under the “Status” tab.
How do I manage statuses in the “Bugs” feature?
In the “Bugs” feature, you can manage the statuses the Devs and Admins can assign bug reports. Statuses are a way to both track progress and communicate with your community.
Three statuses are mandatory, but you can edit these statuses. Three statuses is likely the minimum you will need to describe your process (for example, “investigating,” “working,” and “fixed”), so you can also always add new statuses.
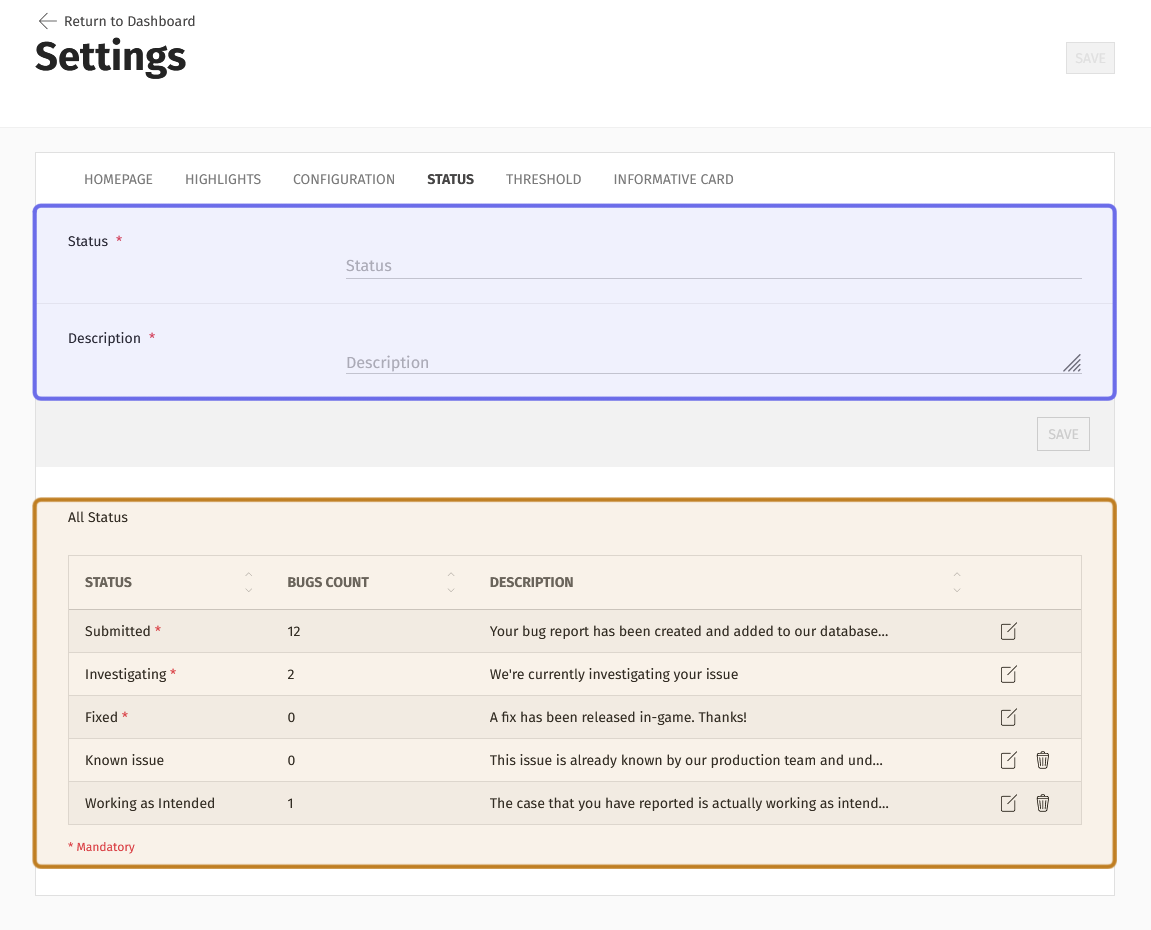
The contents of the “Status” tab are shown above. The section highlighted in purple is where you can add or edit a status. The section highlighted in yellow is the list of statuses.
Add a status
Add a status by filling in the two fields under the “Status” tab. First, enter a name for the status in the text field labeled “Status.”
Then, type a short description of the status in the “Description” field.
After filling out the fields, click “Save” to confirm.

The fields to create a new status on the “Settings” page are shown above. The two “Save” buttons are highlighted in purple.
There are two “Save” buttons. One is located below the “Description” field on the right. The other is at the top of the page to the right of the “Settings” title.
Once you have saved the new status, it will be added to the list at the bottom of the page and available as an option when assigning a status to a bug report.
Edit a status
Scroll to the list of statuses at the bottom of the page. Find the name of the status you want to edit.
Look on the right-hand side of that status’s row. There will be one or two icons, but all rows will have a square with a line through it. This is the “Edit” button.
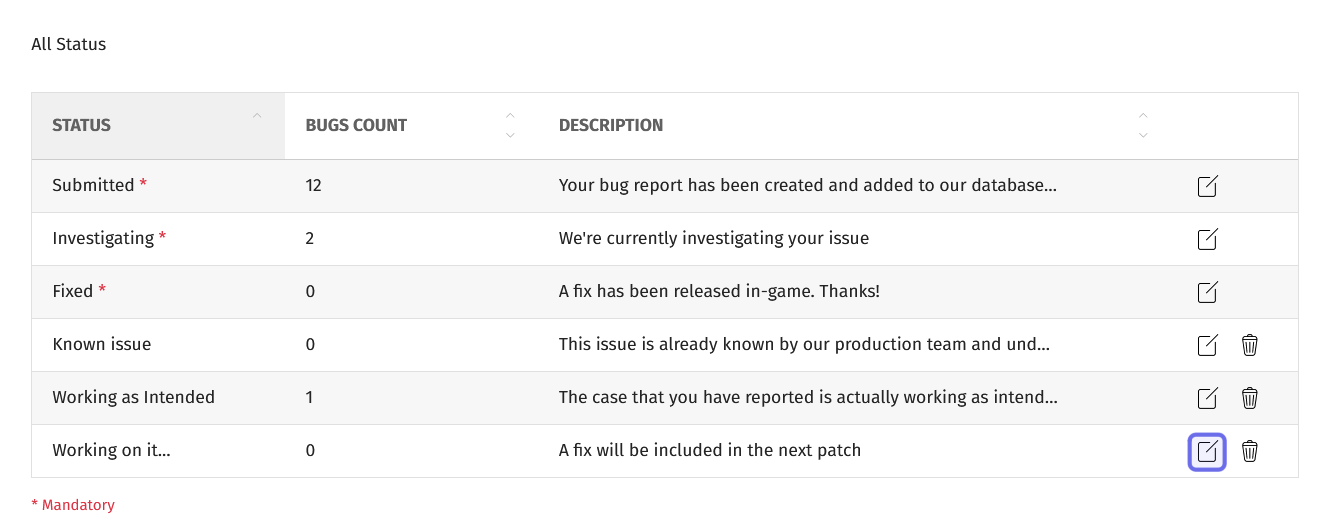
A list of statuses is shown above. The “Edit” button is outlined in purple.
Click on the “Edit” button. The status will open in the section above.
Make the desired changes. Then, click “Update” to confirm the changes.
There are two “Update” buttons: one below the “Description” field and one at the top of the page on the right. The “Update” buttons replace the “Save” buttons.
Delete a status
Scroll to the list of statuses at the bottom of the page.
Look on the right-hand side of that status’s row. Rows may have one or two icons. You can only delete rows with two icons. The second icon is a trash can. This is the “Delete” button.
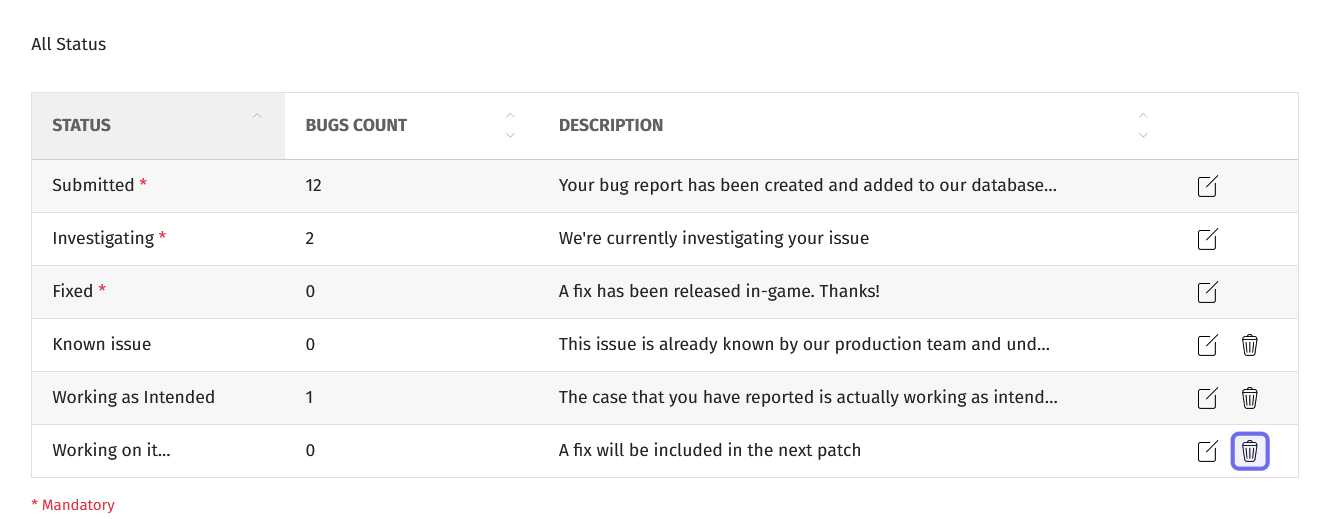
A list of statuses is shown above. The “Delete” button is outlined in purple.
Click the “Delete” button.
Note: If a bug report is currently assigned the status you are trying to delete, you will see an error message and be unable to delete the bug.
A window will pop up. Click “Delete” to confirm.
A deleted status will be removed from the options available when setting a bug report’s status and removed from the timeline of any bug previously assigned that status.
For example, if a bug report’s timeline showed a change from “Submitted” to “On hold” to “Investigating” and you delete “On hold” from the status options, the timeline would now read only “Submitted” and “Investigating.” You would also no longer be able to set any bug report to “On hold.”