
How to customize your profile ?
Who can customize their profile?
All registered users can customize their profile.
Where do I customize my profile?
Visit your profile to customize it.
To access your profile, click on your avatar in the navigation bar. Then, select “Profile” from the user menu that drops down.
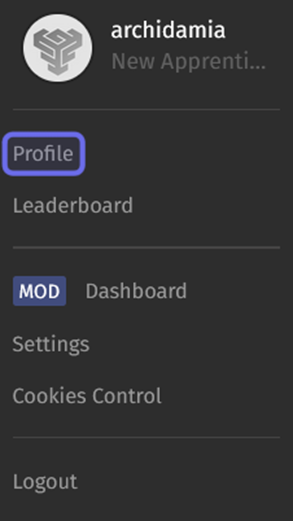
The user menu is shown above. The “Profile” link is highlighted in purple.
How do I customize my profile header?
There are three ways you can customize your profile header: choosing an avatar, changing your title, and selecting five favorite badges.
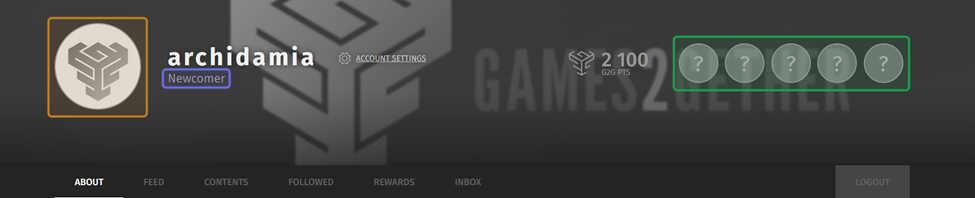
A profile header is shown above. The avatar is highlighted in yellow. The title is highlighted in purple. The placeholders for favorite badges are highlighted in green.
Change your avatar
To change your avatar, click on your avatar in your profile header. This will take you to the “Avatars” subsection of the “Rewards” tab. The “Avatars” subsection lists avatars that you have unlocked and locked avatars that are visible on the platform.
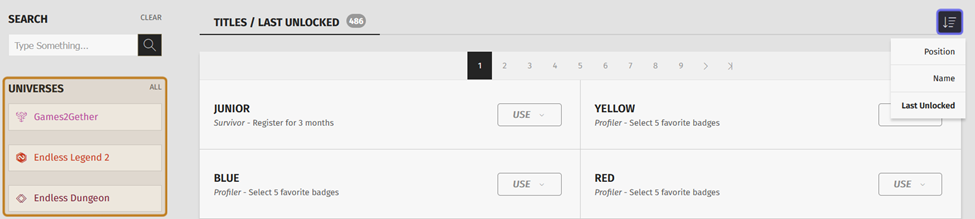
You can sort and filter avatars to make it easier to find the one you’re looking for. The “Sort” button is on the right above the avatar pagination. Click the “Sort” button to open a menu with three options: position, name, and last unlocked.
Click “Last Unlocked” to display available avatars first. If you know the name of the avatar you want to set, you can select “Name” to organize avatars alphabetically, or use the search bar on the left.
You can narrow down the avatars displayed using the “Universes” filters on the left. Click on one of the listed Universes to only display the avatars associated with that Universe.
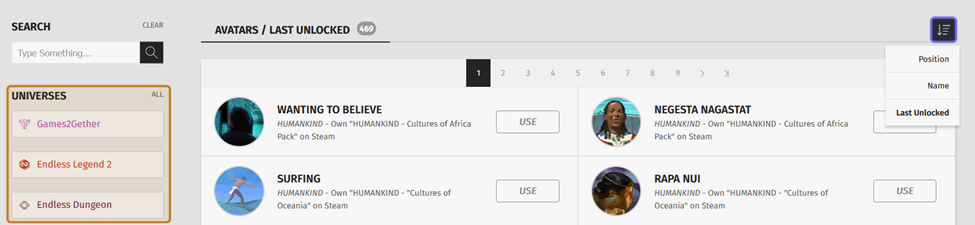
A user’s recently unlocked avatars are shown above. The “Sort” button is highlighted in purple on the right. The “Universes” filters are highlighted in yellow on the left.
Click the “Use” button to the right of an unlocked avatar. Your avatar will be set to that avatar.
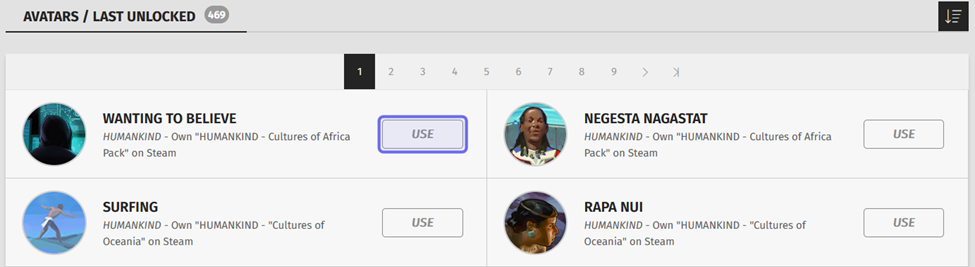
The “Use” button to select the “Wanting to Believe” avatar is highlighted in purple above.
Note: Some avatar selections include an update to your profile header background.
Update your title
Your title is located beneath your username in the profile header. Click on your title to update it. This will take you to the “Titles” subsection of the “Rewards” tab. The “Titles” subsection lists the titles that you have unlocked and shows the locked, but visible titles available on the platform.
You can select one title or combine two titles.
Note: An individual title may be more than one word, but you aren’t able to combine more than two titles.
The “Sort” button is on the right-hand side. Click the “Sort” button to open a menu with three options: position, name, and last unlocked.
Choose “Last Unlocked” to show unlocked titles at the top of the list. Choose “Name” to organize titles alphabetically. You can also use the search bar above the “Universes” filters on the left to search for a specific title. Click one of the Universe names on the left to show only titles associated with that Universe.
A user’s recently unlocked titles are shown above. The “Sort” button is highlighted in purple on the right. The “Universes” filters are highlighted in yellow on the left.
To the right of each unlocked title is a “Use” button. Click on the “Use” button to open a dropdown list of title options.
The options in the dropdown will depend on your current title. The first option is always the selected title in isolation. The rest of the options are drawn from your current title and reflect all possible combinations of the selected title and your current title. If you are currently using a single title, the “Use” dropdown will have three options. If you are currently using a double title, the “Use” dropdown will have five options.
Select a title from the list of title options.
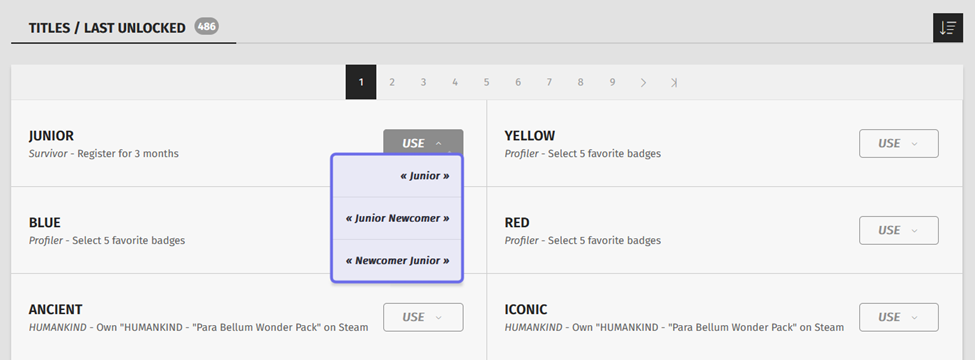
The image above shows a selection of titles that a user has unlocked. The title options including the selected title, “Junior,” and the current title, “Newcomer,” are highlighted in purple.
If you would like to add a new second title element, repeat this process. The dropdown will include two options that combine the previously selected title and the currently selected title. Select one of these options to replace both old title elements to create a new title.
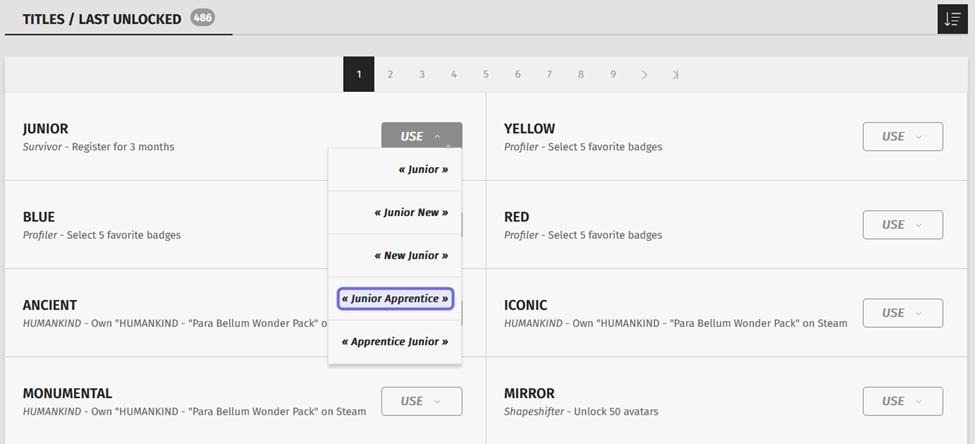
Unlocked titles on a user’s profile are shown above. The “Use” button to the right of “Junior” has been clicked and options including that title have dropped down. Clicking on one of the options, such as the one highlighted in purple, will assign that title to the user.
Set favorite badges
You can select up to five unlocked badges to feature in your profile header.
To select or change a featured badge, hover over one of the five badges shown in your header. If you’ve never selected favorite badges before, the five slots will be represented with a question mark.
Click on the gear icon that appears when you hover over a highlighted badge or placeholder badge.
Badge options will drop down. Click on the badge that you want to highlight.

Five badge placeholders in a profile header are shown above. One placeholder has been clicked, opening a window from which a favorite badge can be selected.
You can display up to five favorite badges. These will appear in your public profile header. Your favorite badges are also shown slightly larger than the other badges displayed beneath your avatar when you make a post.
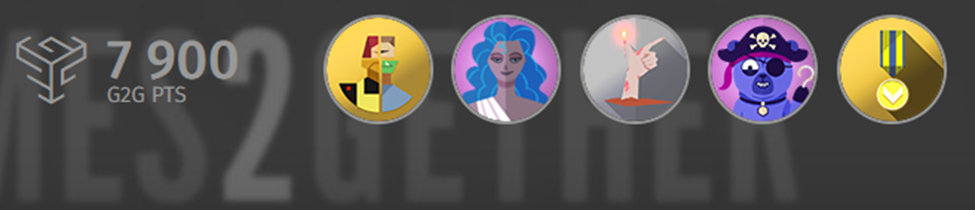
Five favorite badges are displayed above.
How do I update my “About” section?
The “About” section of your profile is an opportunity to give other community members more information about you and your interests. You can add a short description, a signature, and external links that will be visible to other members when they view your profile.
Description and Signature
You can add a description and signature under the “About” tab.
To add or change a description, click on “Tell us about yourself” under “Description.” If you have previously added a description, you can click on the “Edit” button to the right of “Description” or click on the description itself.

The “Edit” button for a user’s description on their profile is highlighted in purple above.
Enter the information you want to share in the text field that pops up.
Then, click “Send.” The text you entered will be added to your profile.
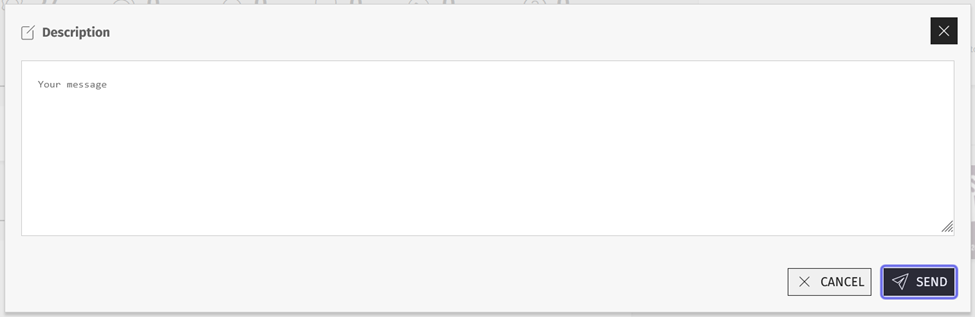
The pop-up window that lets a user add a description is shown above. The “Send” button is highlighted in purple.
To add or update a signature, click “Customize your signature,” your existing signature, or the “Edit” button to the right of “Signature” and follow the same process.
Add Links
You can add links to the “My Links” section of your “About” tab. This section is on the right-hand side.
Click inside the text field under “My Links.” A cursor will appear in the text field. An “+ Add” button will appear below the text field.
Enter the URL you want to share into the text field.
Then, click “Add.” The link will now be visible on your public profile.
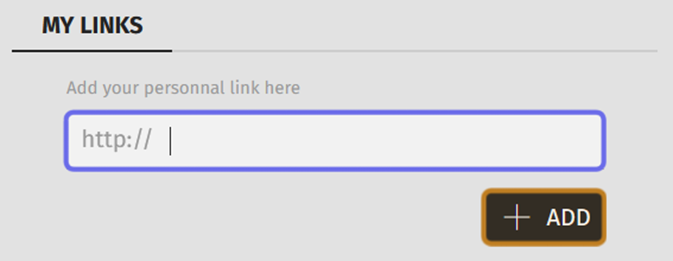
A “My Links” section before any links have been added is shown above. The text field is highlighted in purple. The “Add” button is highlighted in yellow.
After you add a link, another text field will appear below the link you just added. You can add another link by following the same process as above.
To the right of each added link is an “X.” Click the “X” to delete a link you no longer wish to share.
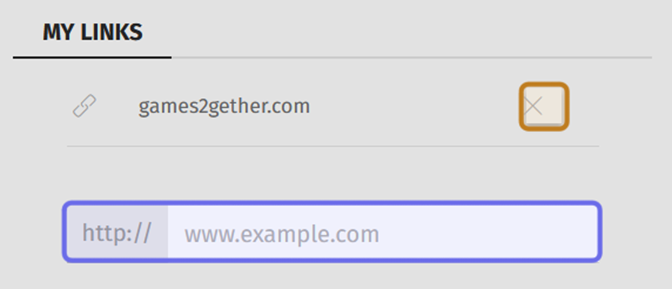
The “My Links” section of the “About” tab with a single link added. The field to add a second link is highlighted in purple. The “X” to delete the existing link is highlighted in yellow.