
How to add ranks to a badge?
Who can create a ranked badge?
Admins and Devs can create a ranked badge.
Where do I create a ranked badge?
You can create a badge in the back office. Look for the “Gamification” section on the left. Select “Badges” from the dropdown. This will take you to the back office “Badges” page.
Note: You can also click on one of the badges in the list of badges on the “Badges” page to add icons and quests for different ranks. However, the badge must already have “Multiple ranks create” toggled on.
How do I add ranks to a badge?
First, create the badge. Then, toggle on “Multiple ranks create.” This can only be done if you have not previously saved the badge with this toggle off.
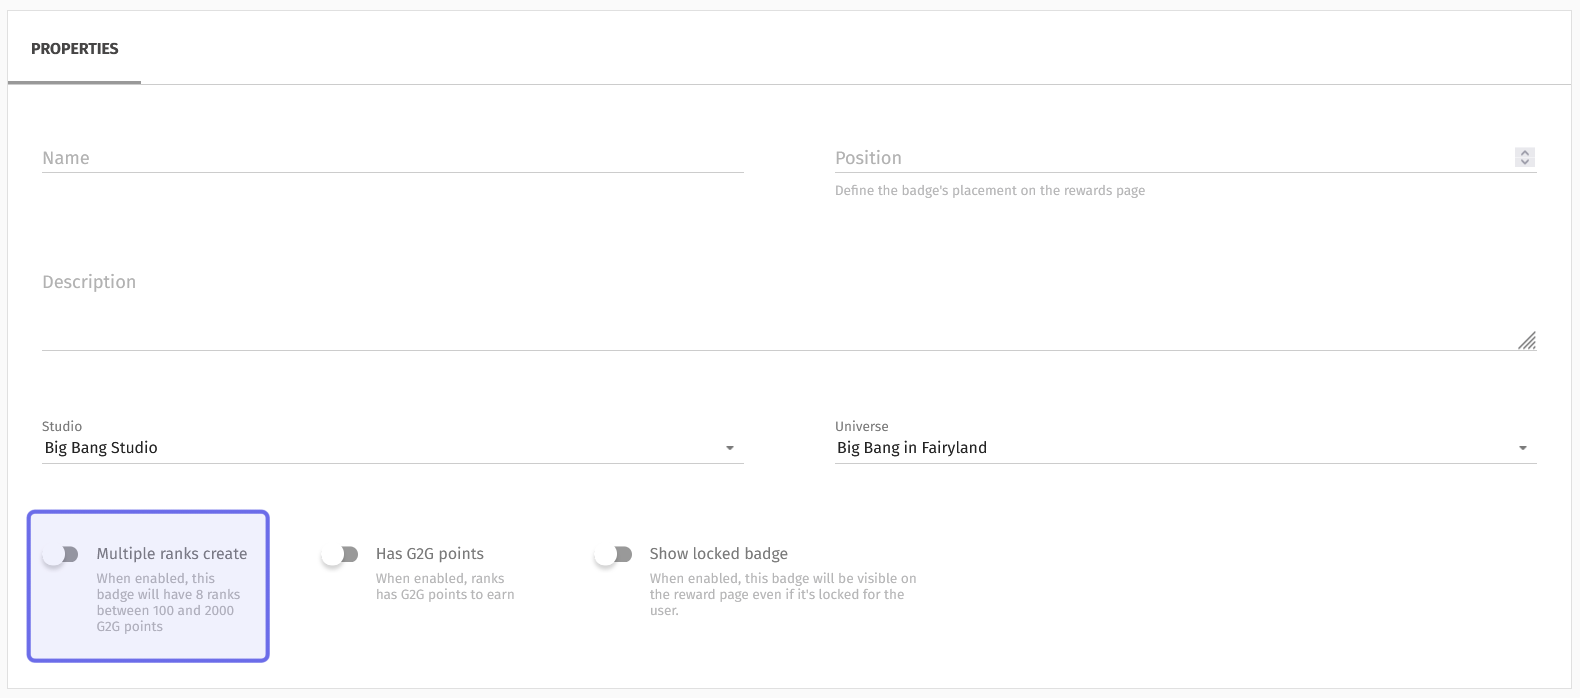
The “Multiple ranks create” toggle in the “Properties” box is highlighted in purple above.
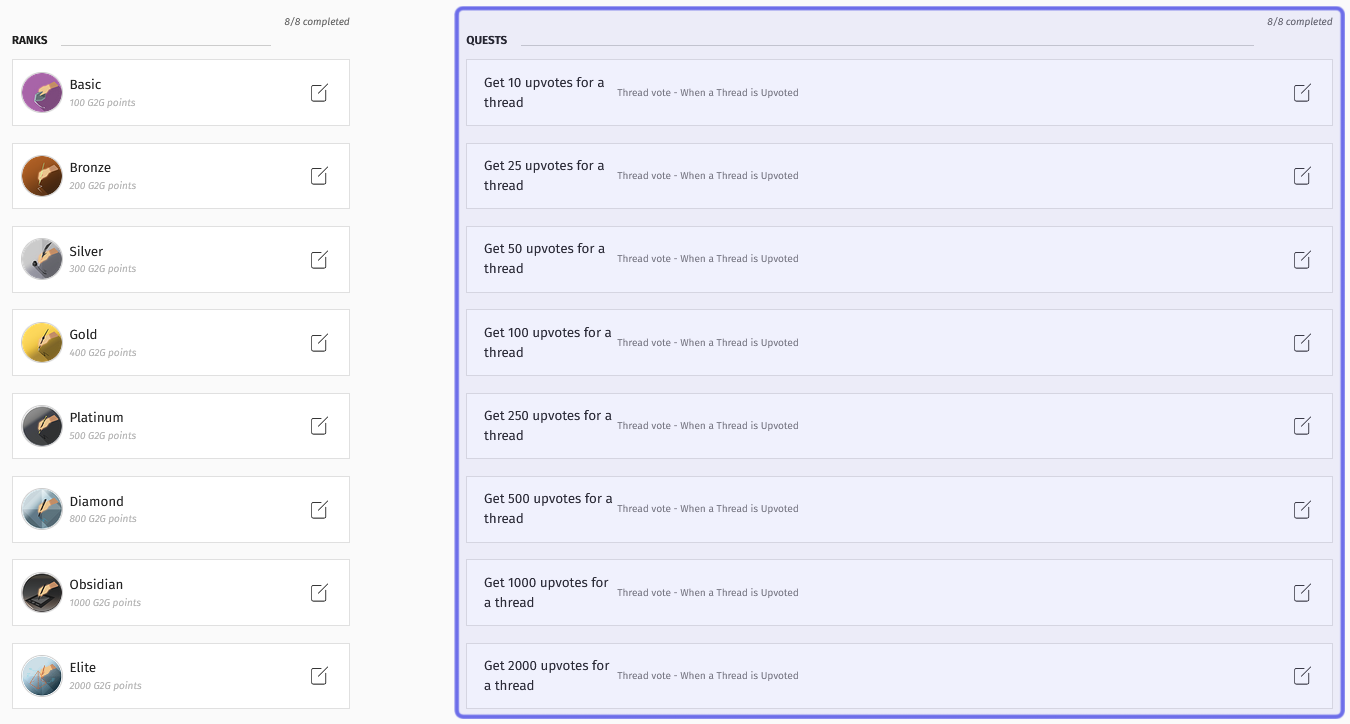
Then, scroll down below the “Properties” box. You will see two columns: “Ranks” and “Quests.” If you have made an unranked badge before, you will have seen these columns with only one rectangle each. Now, there will be eight.
Note: All eight ranks do not need to be filled to create a ranked badge.
Each rectangle in the “Ranks” column is labeled with a metal or mineral (except for the first rank, “Basic,” and the last rank, “Elite”) as well as a number of G2G points. This is the number of G2G points awarded for earning the badge. The higher the rank, the larger the number of points awarded.
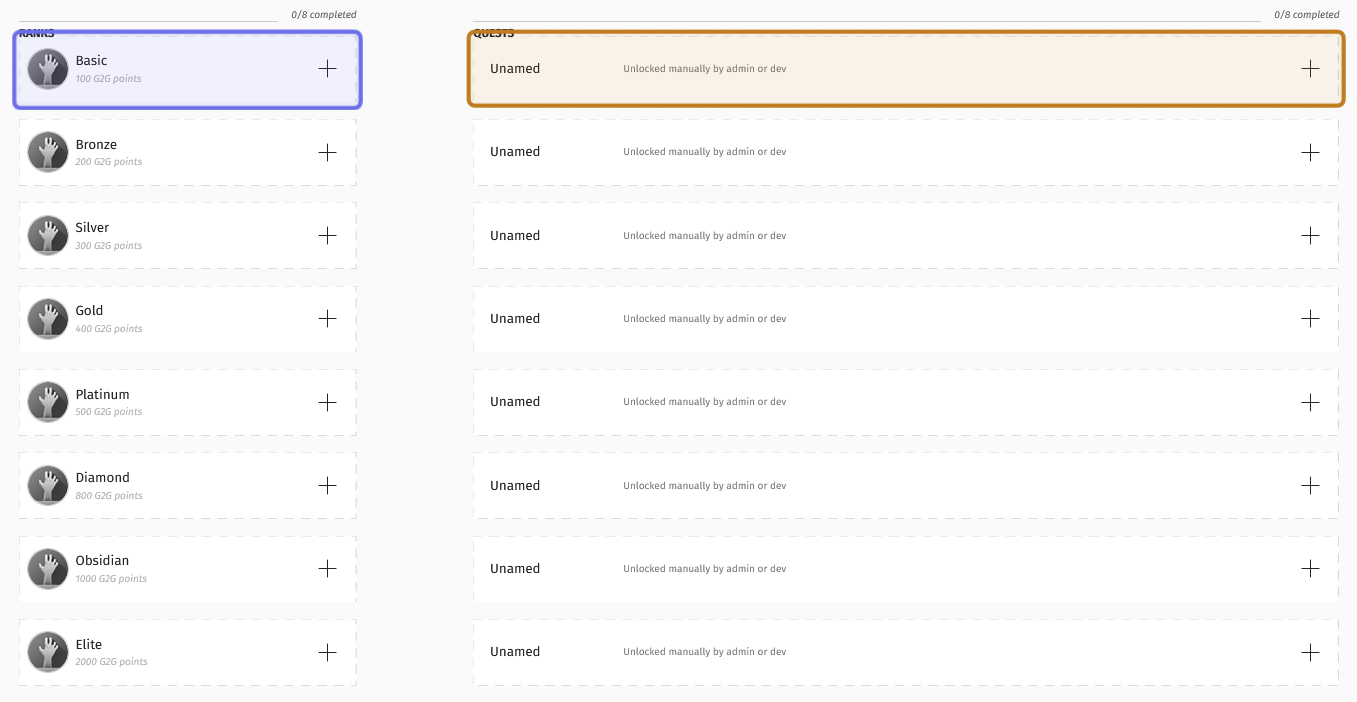
Clicking the rectangle highlighted in purple above would allow a user to update the badge icon. Clicking the rectangle highlighted in yellow would allow a user to set up a quest.
Add a badge icon
Click on one of the rectangles in the “Ranks” column. This will open a side panel. To add a badge icon, first click the trash can icon to remove the existing image. Then, click on the grey circle that replaces the previous icon. You can now browse and upload a new image.
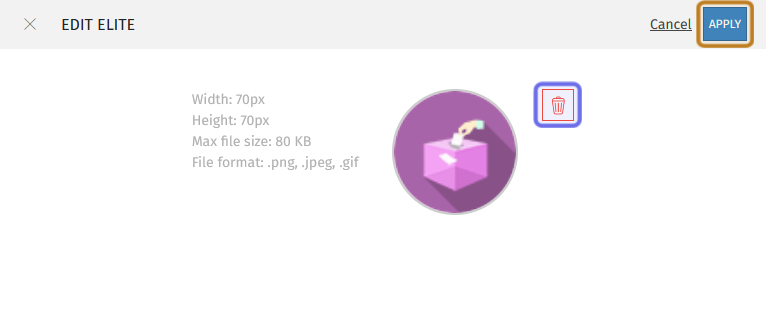
The trash can icon to remove the existing image is highlighted in the purple. The “Apply” button to confirm the changes is highlighted in yellow above.
A badge icon must be 70x70px and no more than 80KB. Accepted file types are .png, .jpeg, and .gif (so you can have animated badges!).

An example of an animated badge icon
Once your image is uploaded, click the “Apply” button in the top right of the side panel. Your badge icon should now be updated!
Repeat the process up to seven times to add badge icons for additional badge ranks.
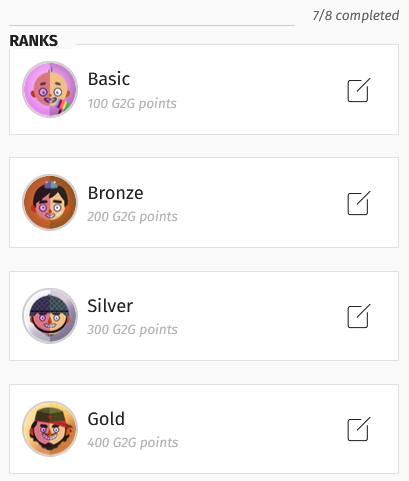
Badge icons can represent rank progression, as in the above example that illustrates the avatar growing up.
Next, set up the conditions under which ranks are awarded.
Add a badge quest
To the right of each rank is a second rectangle under the heading “Quests.” There are the same number of ranks and quests, but a quest is not tied to a specific rank.
Quests for a ranked badge in the back office are highlighted above in purple.
Quests are unnamed and set to “unlocked manually by admin or dev” by default. Click on one of the rectangles to set up an automatic trigger. This will open a side panel with three fields: “Name,” “Trigger,” and “Unlock criteria.”
“Name” is the text that will describe the quest on the front end. It is useful to make this a description of the quest.
“Trigger” is a dropdown with all the currently available ways for a user to earn a badge. The exact requirements can be further clarified by the “Unlock criteria” field. Click here to see the full list of triggers and any parameters they can take.
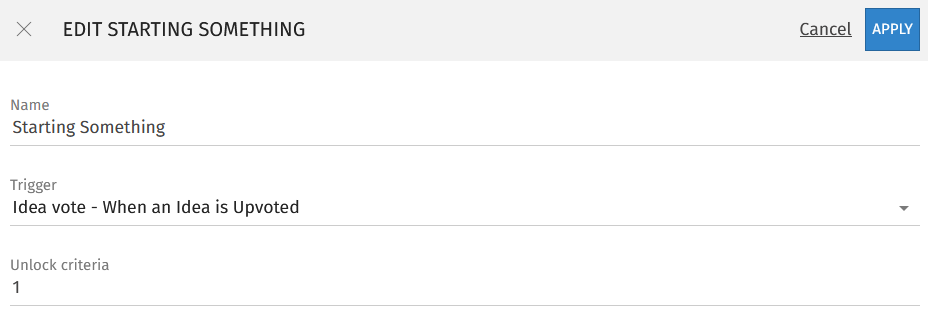
An example of the “Quests” side panel.
In the example shown above, the badge unlocks when an idea submitted by the user is upvoted. However, if the “Unlock criteria” were instead set to 5, the user’s idea would need to be upvoted 5 times before the badge was awarded.
Note: If the “Unlock criteria” takes multiple parameters, these must be separated by a semicolon (;).
When you have filled out the “Name,” “Trigger,” and optional “Unlock criteria” fields, click “Apply” in the top right. Community members now have a new quest to pursue!
You can repeat the process up to seven times.
Note: Using quests that build on each other, for example “Get 5 upvotes for a thread” and “Get 10 upvotes for a thread,” helps create a sense of progression. However, this is not required.
Each badge quest is independent. The badge rank is based on the number of unlocked quests, but unlocked content, such as titles or avatars, is associated with a specific quest.
Take the example of the “Profiler” badge shown below. This user has unlocked four quests, so they have been awarded the fourth highest badge rank (“Gold”) and earned the associated number of G2G points (400 G2G points).
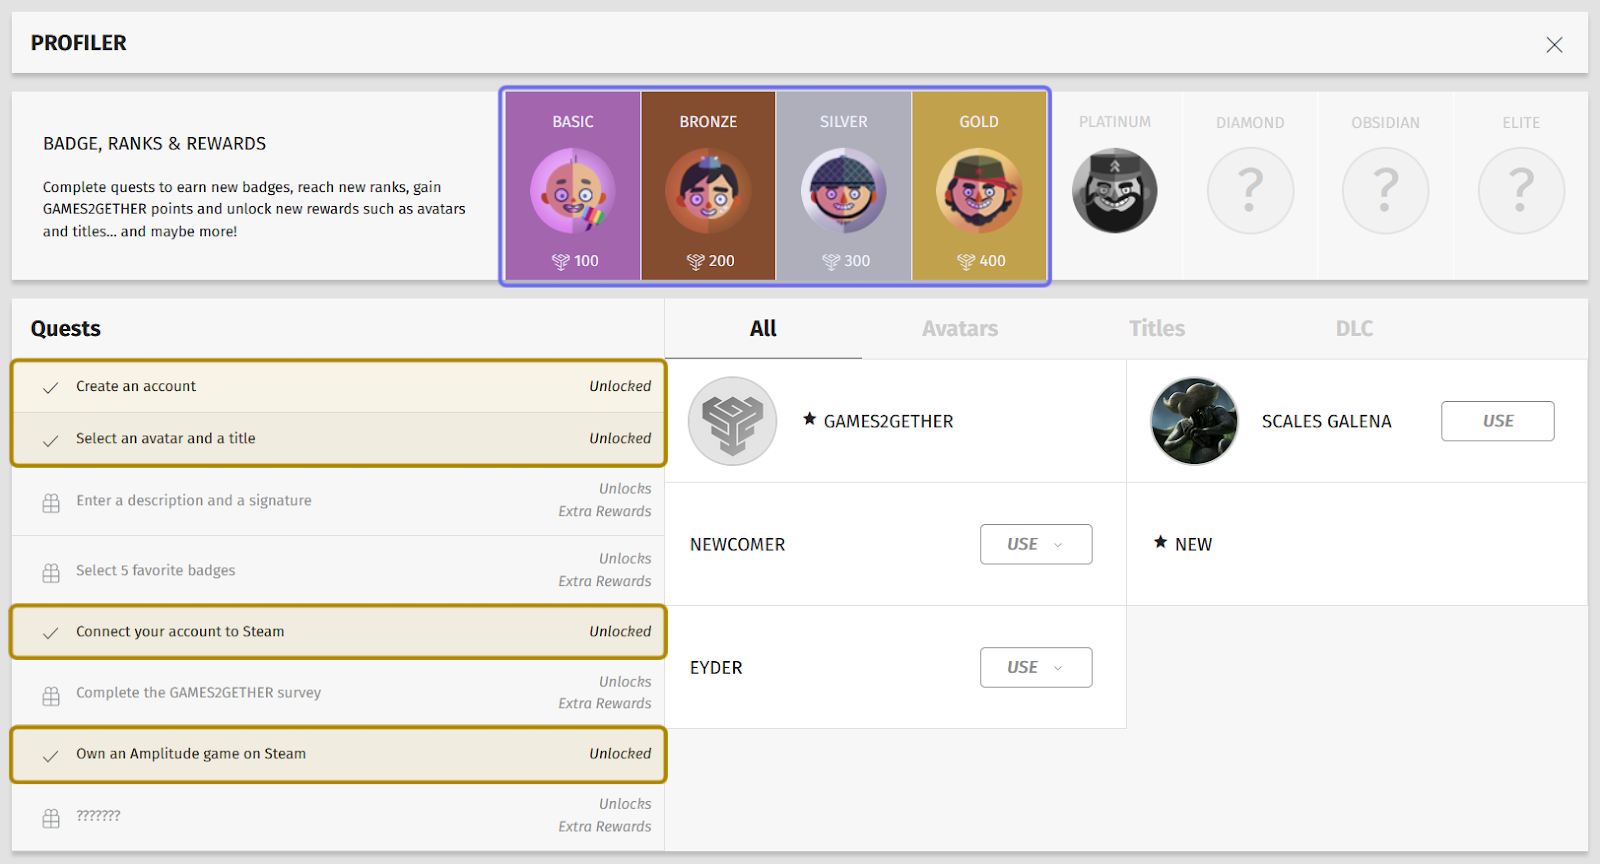
The “Profiler” badge on a user’s front-end profile. Badge ranks are outlined in purple. The badge quests they have completed are highlighted in yellow.
However, because the “Beginner” title is associated with the “Enter a description and a signature” quest, the user has not unlocked this title. They only have access to rewards linked to the specific quests they have unlocked.
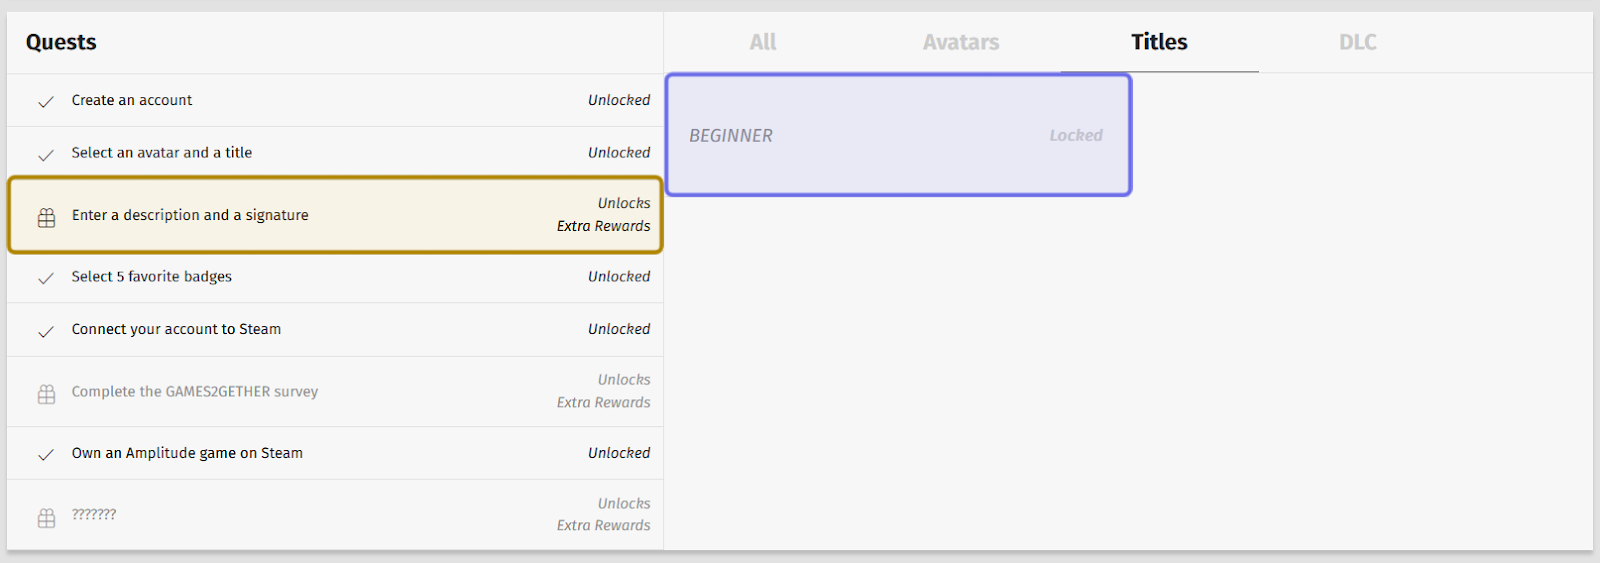
The image above shows the “Enter a description and a signature” quest is selected and highlighted in yellow. Because it is not completed, the “Beginner” title, highlighted in purple, is still shown locked.
If fewer than eight badge quests are set up, a user will not be able to earn all ranks of a badge. An Admin or Dev may need to intervene for a user to earn all ranks of a badge.
For example, the “Profiler” badge shown below has set up triggers for eight quests. However, only seven use conditions that a user can trigger automatically through the front end. The eighth quest is set to be unlocked manually by an Admin or Dev. An Admin or Dev would have to unlock this quest through the back office in order for a user to earn “Elite” rank.
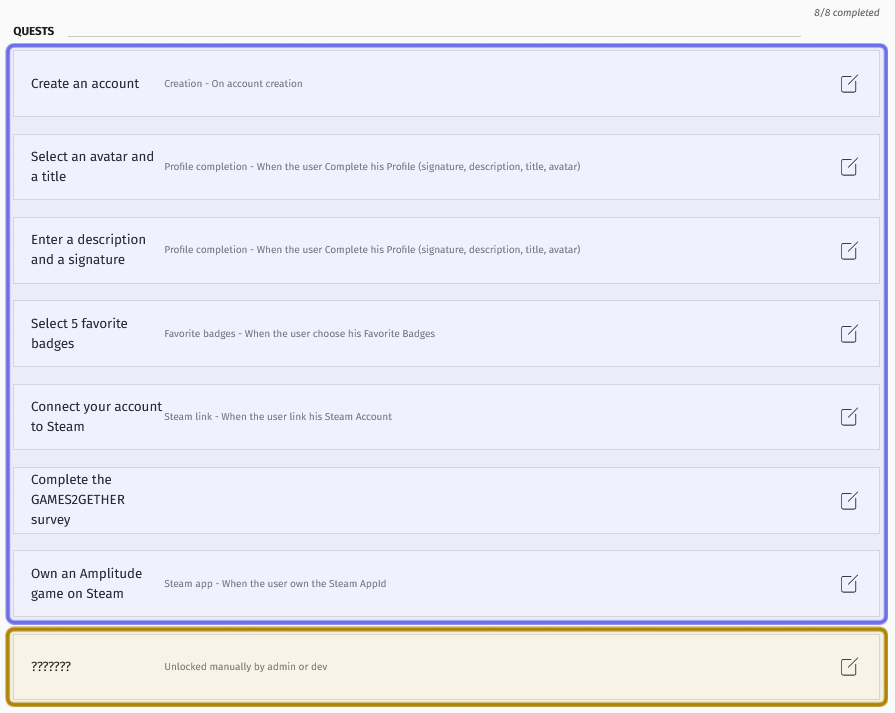
The “Quests” section when creating a badge in the back office is shown above. The quests that a user can unlock through the front end are highlighted in purple. The quest that must be unlocked through the back office is highlighted in yellow.
Once you have set up each rank’s badge icon and badge quests, click “Save” on the right-hand side of the page header.
Then, it’s time for members to start questing!