
How to create a badge?
Who can create a badge?
Devs and Admins can create badges.
Where do I create a badge?
You can create a badge in the back office. Look for the “Gamification” dropdown on the left. Select “Badges” from the dropdown. This will take you to the back office “Badges” page.
How do I create a badge?
On the right-hand side of the “Badges” page header, you will see a button that says “Create Badge.” Click this button to kick off the badge creation process.

The “Create Badge” button is outlined in purple above.
This will open the “New Badge” page. The first section of the page is a box labeled “Properties.” Most of the fields in this box determine how the badge will appear under “Rewards > Badges” on a user’s front-end profile.
On the left are two text fields: “Name” and “Description.”
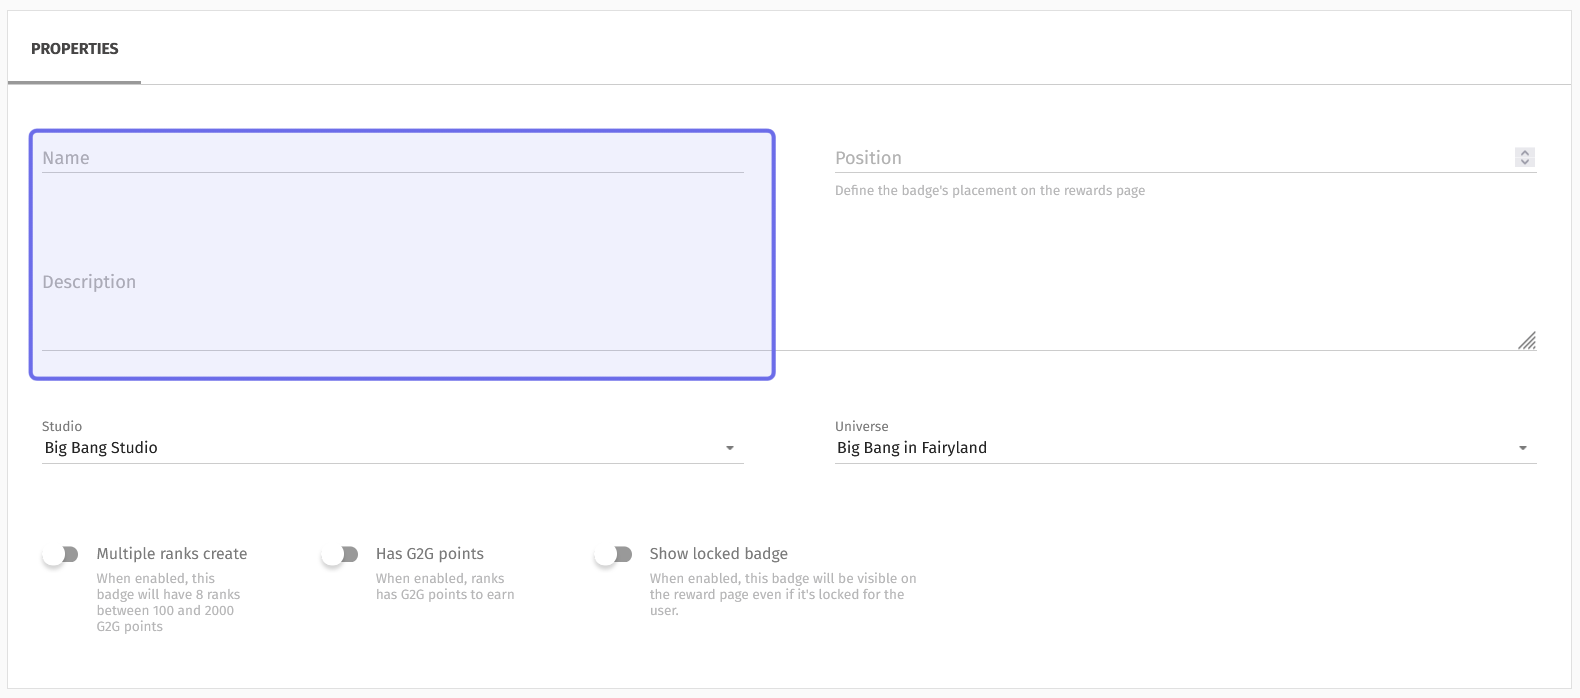
The “Name” and “Description” fields in the “Properties” box are highlighted in purple above.
First, enter a name for the badge and a description. Next, set a position for the badge. The “Position” field is to the right of the “Name” field.
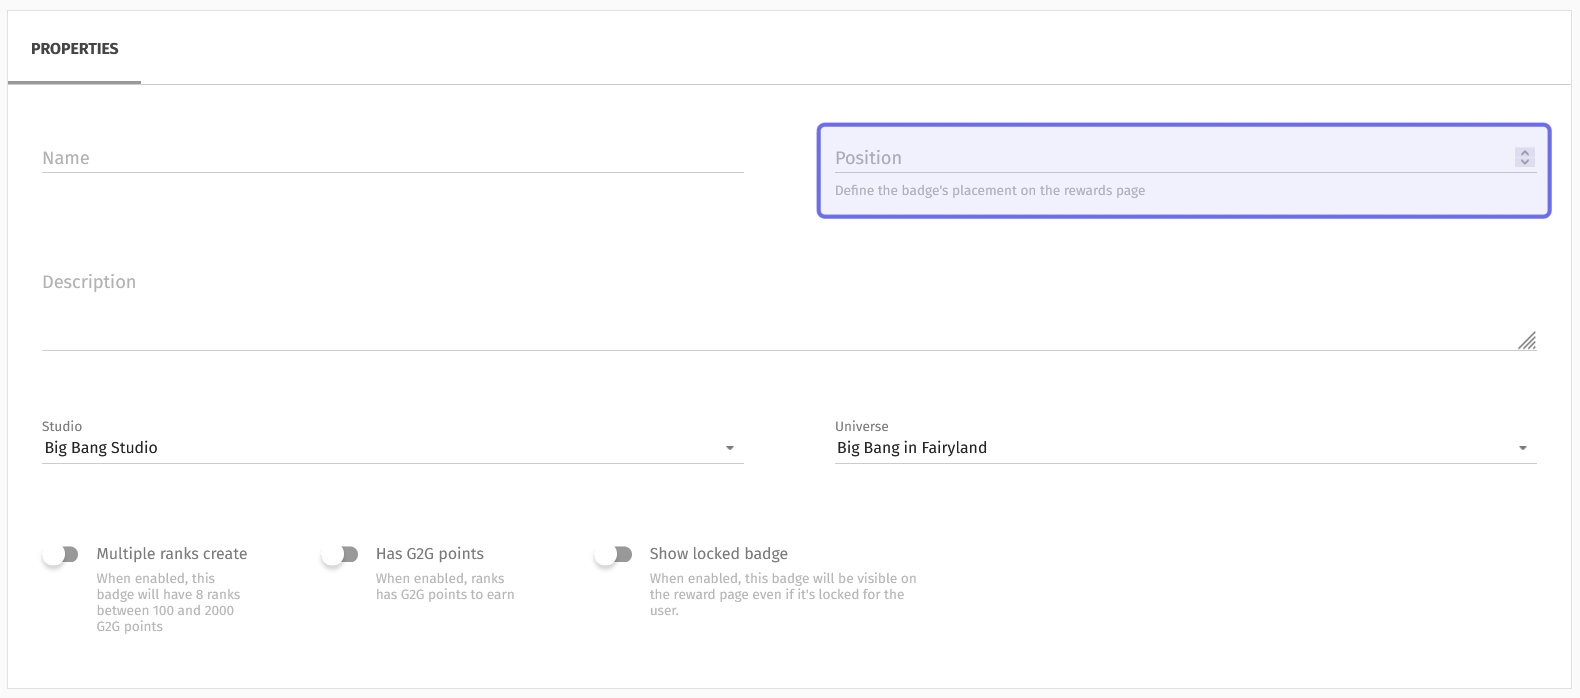
The “Position” field is highlighted here in purple.
You can type or use the arrows on the right to enter an integer. This will determine where on the front-end “Rewards” section the badge will appear.
Members can see a grid of visible badges on their profile. It is found by selecting “Rewards” from the “Profile” page menu, then “Badges” from the sub-menu. Badges are added to the grid horizontally in ascending order based on the integer entered in the “Position” field.
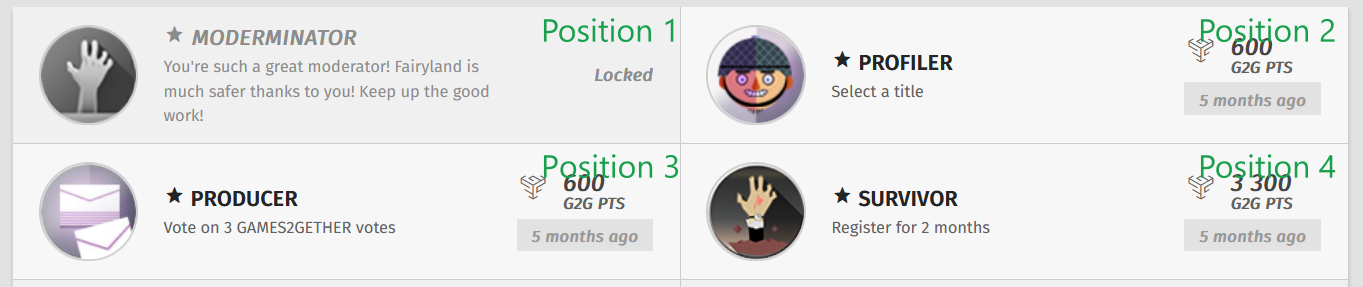
Part of a badges grid on a user’s profile with the “Position” field values labeled in green.
Below the “Description” field are the “Studio” dropdown and the “Universe” dropdown. Select the Studio and Universe this badge should be linked to.
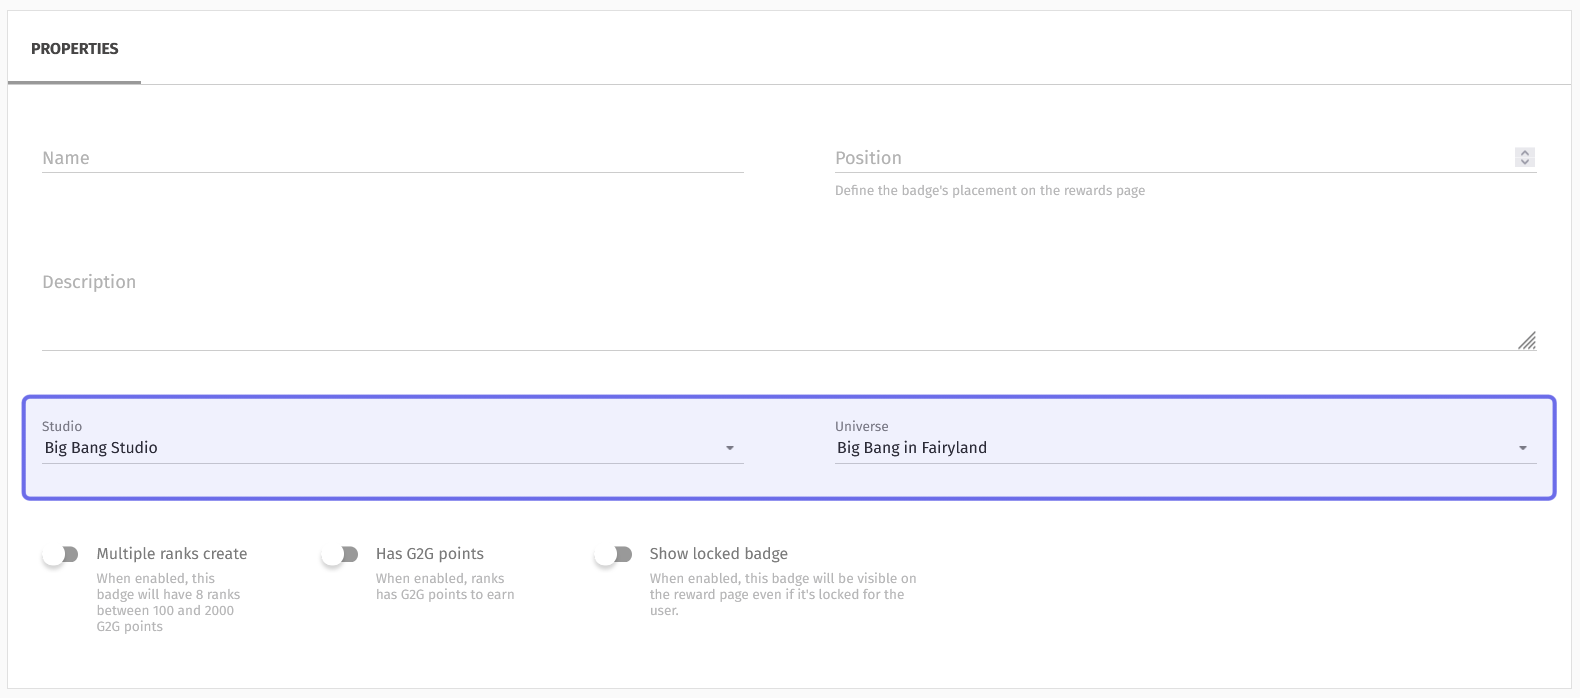
The “Studio” and “Universe” dropdowns in the “Properties” box are shown in purple above.
Badges can only belong to a single Universe. If a badge is unlocked based on specific events, such as upvotes on an idea, it will only unlock based on ideas submitted to that Universe.
Below the two dropdowns are three toggles. These help determine how the badge operates.
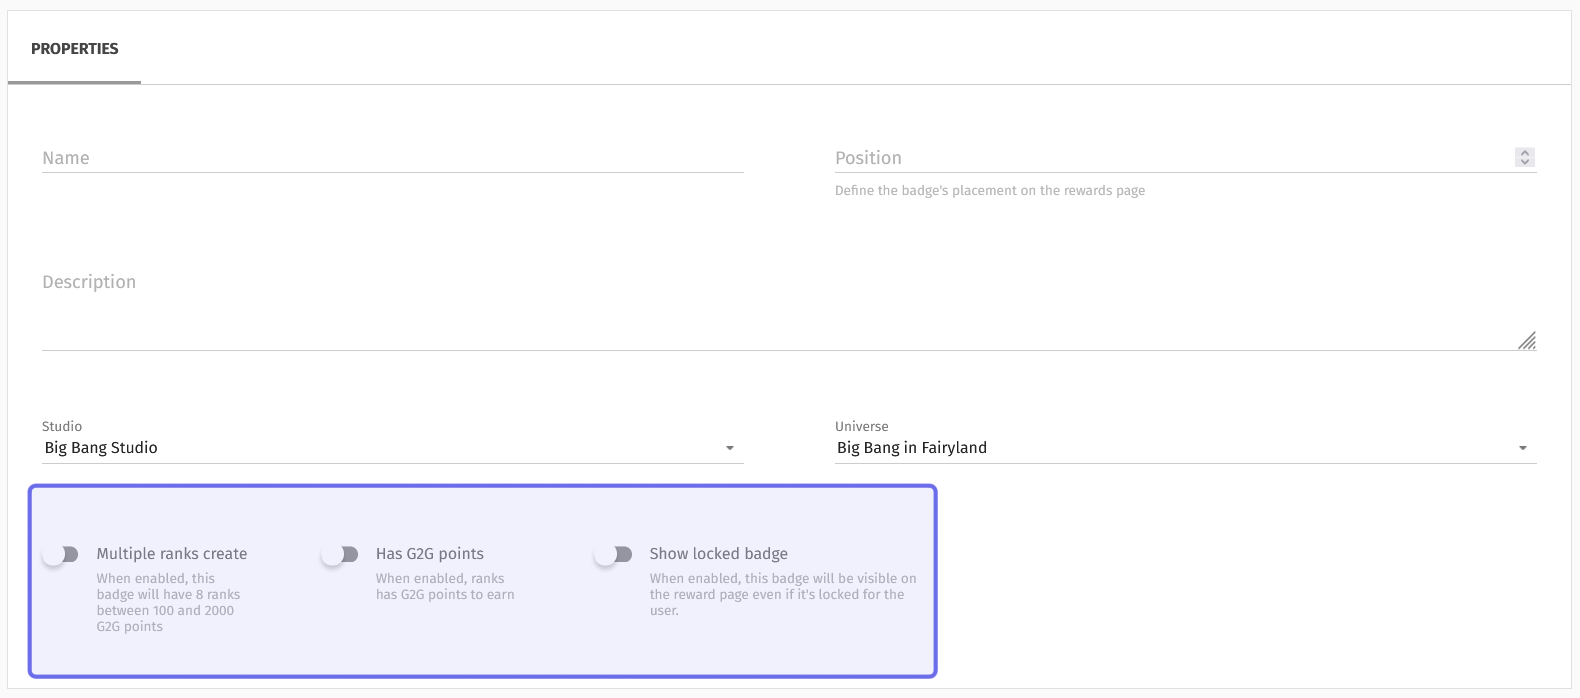
The three toggles in the “Properties” box are highlighted here in purple.
The “Multiple ranks create” toggle allows you to create a badge with individual levels that can each have their own quest to unlock. When toggled on, you will have the option to add seven more ranks.
The “Has G2G points” toggle determines whether or not a user is awarded G2G points when they earn this badge. If this is toggled on and the badge is unranked, a user will earn 2000 G2G points when they unlock the badge. A ranked badge must award G2G points.
The “Show locked badge” toggle indicates whether this badge is visible on the front end before the user has unlocked it. When toggled on, users will be able to see this badge on their profile under “Rewards > Badges.”
Note: “Has G2G points” and “Multiple ranks create” cannot be changed once a badge is saved for the first time.
If you want to create a badge with multiple ranks, you can learn more about that process here.
Add a badge icon
There are two additional fields below the “Properties” box. On the left, you will see a column labeled “Ranks.”
If you did not toggle on “Multiple ranks create,” you will see a rectangle bordered with a dotted line. Click on this rectangle to add a new image for your badge.

Above is the “Ranks” column for a badge without multiple ranks.
Click on the highlighted block to update the badge icon.
A side panel will open. Click the trash can icon to remove the existing image. Then, click on the grey circle that replaces the previous icon. You can then browse for and upload a new image.
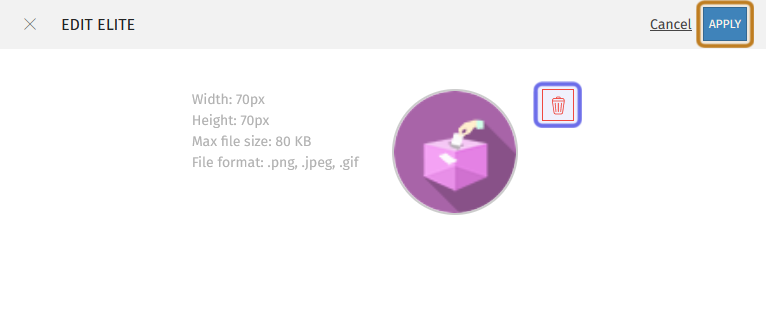
The trash can to clear the default badge icon is highlighted above in purple.
The “Apply” button to confirm changes is highlighted in yellow.
A badge icon must be 70x70px and no more than 80KB. Accepted file types are .png, .jpeg, and .gif (so you can have animated badges!).

An example of an animated badge icon
Once your image is uploaded, click the “Apply” button in the top right of the side panel. Your badge icon should now be updated!
Lastly, you need to set-up the conditions under which the badge will be awarded.
Set up a badge quest
To the right of “Ranks” is a column labeled “Quests.” This is where you set up the trigger that awards a user the badge. In an unranked badge, you will see one rectangle bordered with a dotted line beneath “Quests.”
Quests are unnamed and set to “unlocked manually by admin or dev” by default. To set up an automatic trigger, click on the rectangle. This will open a side panel on the right.
The side panel has three fields: “Name,” “Trigger,” and “Unlock criteria.”
“Name” is the text that will describe the quest on the front end.
“Trigger” is a dropdown with all the currently available ways for a user to earn a badge. The exact requirements can be further clarified by the “Unlock criteria” field. See below for a full list of triggers and any parameters they can take.
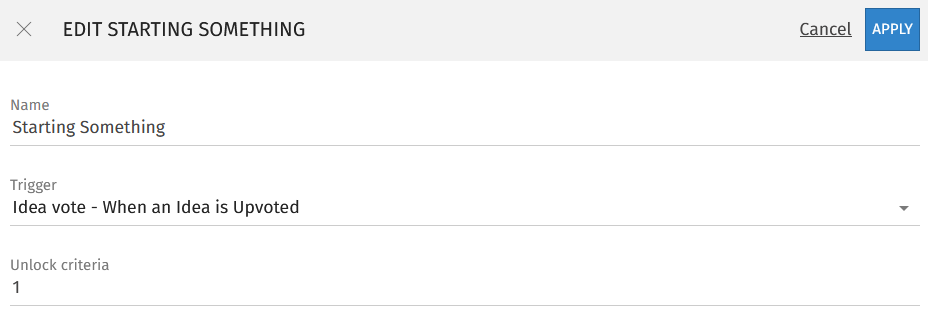
An example of the “Quests” side panel.
In the example shown above, the badge unlocks when an idea submitted by the user is upvoted. However, if the “Unlock criteria” were instead set to 5, the user’s idea would need to be upvoted 5 times before the badge was awarded.
See the screenshot below for how this example quest will appear on the front end. It may be useful to make the parameters of the quest the quest name, to clarify quest requirements for members.
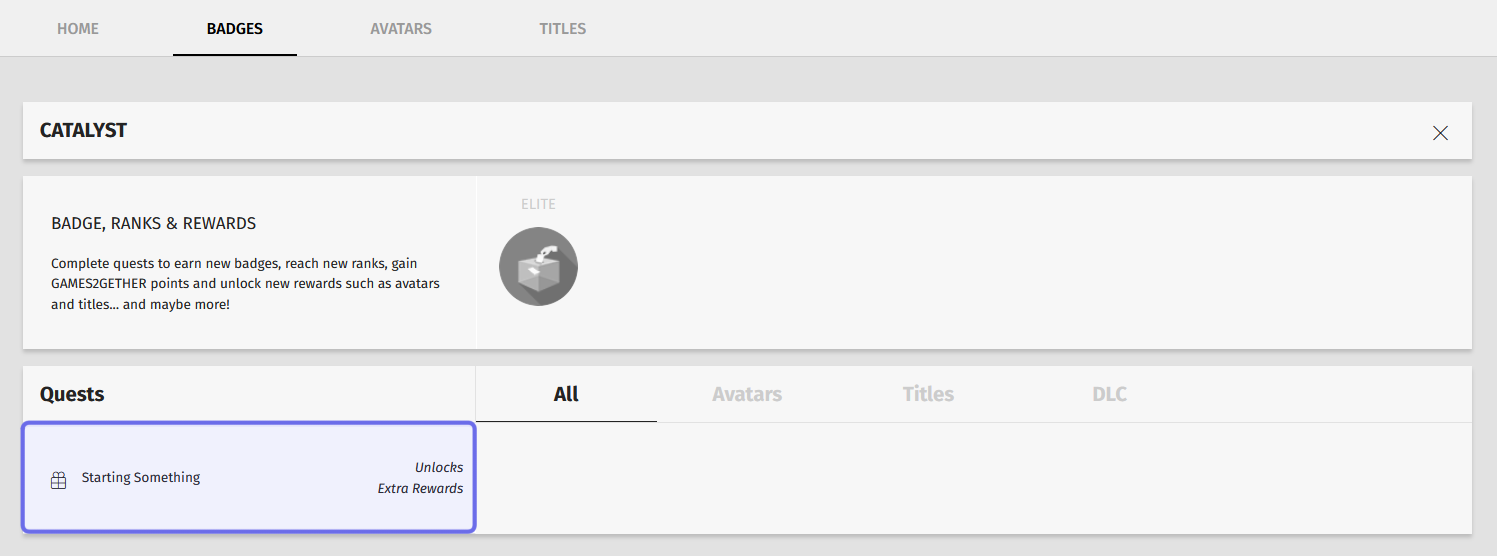
A badge quest shown on the front end is highlighted in purple above.
Save the badge
Once you’ve filled out the information outlined above, click “Save” on the right-hand side of the header. A new badge has been added!

The “Save” button can be found on the right of the “New Badge” page header. It is shown highlighted in purple above.
You can update the badge, including adding a new badge icon or changing a quest, after you have saved the badge. However, you can not change whether the badge is ranked or if the badge awards G2G points.
What quests are available?
The table below shows all options currently available under the quest “Trigger” dropdown. The dropdown is composed of categories, shown in the leftmost column below. Each category opens to a series of triggers, shown in the middle column. Some triggers require or can take a parameter to further define the trigger, shown in the rightmost column below.
Note: If the “Unlock criteria” takes multiple parameters, these must be separated by a semicolon (;) if all parameters are required or separated by a comma (,) if only one of a list of parameters is required.
Category | Trigger | Unlock Criteria (Quest Parameters) |
Default | Unlocked manually by admin or dev | None |
Authentification | Apps: When a user logs into an app with his G2G account for the first time | None |
Login: When a user logs in during an event | Currently managed by the G2G team. Please reach out to your account manager for more information. | |
User | Creation: On account creation | None |
Registered for: Check account age whenever a user connects | Days (d#), Months (m#), Years (y#) | |
Profile Completion: User customizes a profile element, e.g. avatar or description | Signature, Description, Title, or Avatar (as a string) Use “;” to separate multiple parameters Example: Description; Avatar | |
Favorite Badges: User selects their favorite badges to be displayed | Number of favorite badges selected to unlock (as an integer) | |
Steam Link: User links their Steam account to their games2gether account | None | |
Steam App: User owns the game, identifying by its SteamApp ID (Steam account must be linked and publicly visible) Note: This quest cannot reward a user pre-ordering a game. If a user pre-orders a game, the badge quest will unlock when the game releases. | SteamApp ID(s) Example: 249050;289130 Use a comma (,) to separate IDs, if only one of a list of IDs must be owned Example: 249050,289130 | |
Steam Wishlist: User wishlists the game on Steam (Steam account must be linked) Note: This badge quest will be unlocked upon the game’s release. | SteamApp ID | |
Steam Review: User leaves a review of the game (Steam account must be linked) | SteamApp ID | |
Steam Achievement: When the user achieves a specific achievement (Steam account must be linked) | SteamApp ID;Achievement API Name Use a semicolon (;) to separate the SteamAPP ID and the Achievement. Example: 123456;ACHIEVEMENT_1 | |
Steam Achievements List: User earns all available achievements for the game on Steam Note: If you only want the badge to unlock when a single achievement is awarded, you may want to look at the “Steam Achievement” quest. You cannot use the “Steam Achievements List” to award a badge when only one of a list of achievements is completed. | SteamApp ID(s); Achievement API Name(s) Use a semicolon (;) to separate achievements in the list. The list will accept multiple SteamApp IDs. Example: 123456,ACHIEVEMENT_1;123456,ACHIEVEMENT_2;654321,ACHIEVEMENT_3 | |
Referrer: When a user creates account, check if the user has named a referrer | None | |
Titles: User unlocks a new Title | Number of titles needed to unlock (as an integer) | |
Twitch link: User links their Twitch account to their games2gether account | None | |
Avatars: User unlocks a new avatar | Number of avatars needed to unlock (as an integer) | |
Thread | Thread Sticky: When a user’s thread is stickied | None |
Thread Vote: When a user’s thread is upvoted by another user | Number of upvotes to unlock (as an integer) | |
Thread Follow: When a user’s thread is followed by another user | Number of follows to unlock (as an integer) | |
Vote | Vote: The user participates in a vote | Number of votes participated in to unlock (as an integer) |
Idea | Idea Vote: A user’s idea is upvoted by another user | Number of upvotes to unlock (as an integer) |
Idea Follow: A user’s idea is followed by another user | Number of follows to unlock (as an integer) | |
Idea Status: A user’s idea changes status | None | |
Tutorial | Tutorial Vote: A tutorial submitted by a user is upvoted by another user | Number of votes to unlock (as an integer) |
Question | Question Vote: A user’s question is upvoted by another user | Number of upvotes to unlock (as an integer) |
Question Follow: A user’s question is followed by another user | Number of follows to unlock (as an integer) | |
Question Resolve: A user’s question is resolved | None | |
Answer | Answer Vote: When a user’s answer is upvoted by another user | Number of upvotes to unlock (as an integer) |
WhatIf | What If Meme: User generates a meme on the What If page | Number of memes generated (as an integer) |