
How to create a comic reward ?
Who can create comic rewards?
Admins and Devs can create comic rewards.
Where do I create a comic reward?
Comic rewards can be created in the back office. To create a comic reward, find the “Gamification” section on the left. Select “Rewards.”
Then, click the “Add Reward” button on the right-hand side of the page header. This will open the “New Reward” page where you can add a new comic reward.

The “Add Reward” button in the back office “Rewards” page header is highlighted in purple above.
How do I create a comic reward?
When the “New Reward” page opens, it will display a single section: “General Settings.” The page will continue to populate with new fields as you make your settings selections.
To create a comic reward, first click on the “Type” dropdown. Select “Comic.”

The screenshot above shows the three fields initially available on the “New Rewards” page.
Next is the “Universe” dropdown. Use this dropdown to select which Universe the reward belongs to.
Then enter a name for the reward in the “Title” field. Once you’ve added a title, several more sections will populate.
Note: The title cannot exceed 50 characters.
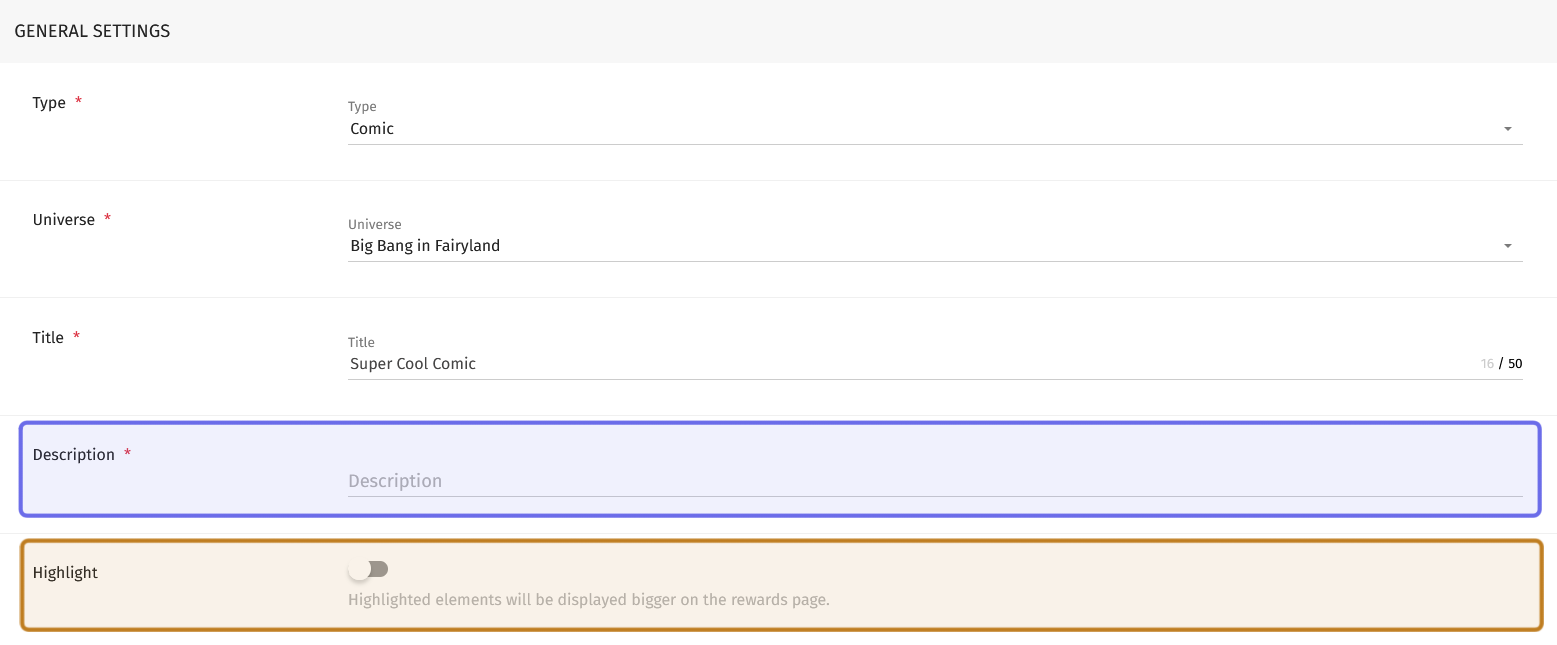
The “Description” text field and “Highlight” toggle will be added to the “General Settings” section once a title is entered. The “Description” field is highlighted in purple above. The “Highlight” toggle is in yellow.
Directly below the “Title” field, two fields will be added:
Description is a text field. Enter a short description of the reward here.
Highlight is a toggle. If this is toggled on, this reward’s preview will be displayed larger on the “Rewards” section of the “Profile” page. Click to toggle on.
Below these fields is a section labeled “Visibility.” At the top of this section is a dropdown labeled “Badge Descriptor Id.” This is where you can link the reward to a badge.
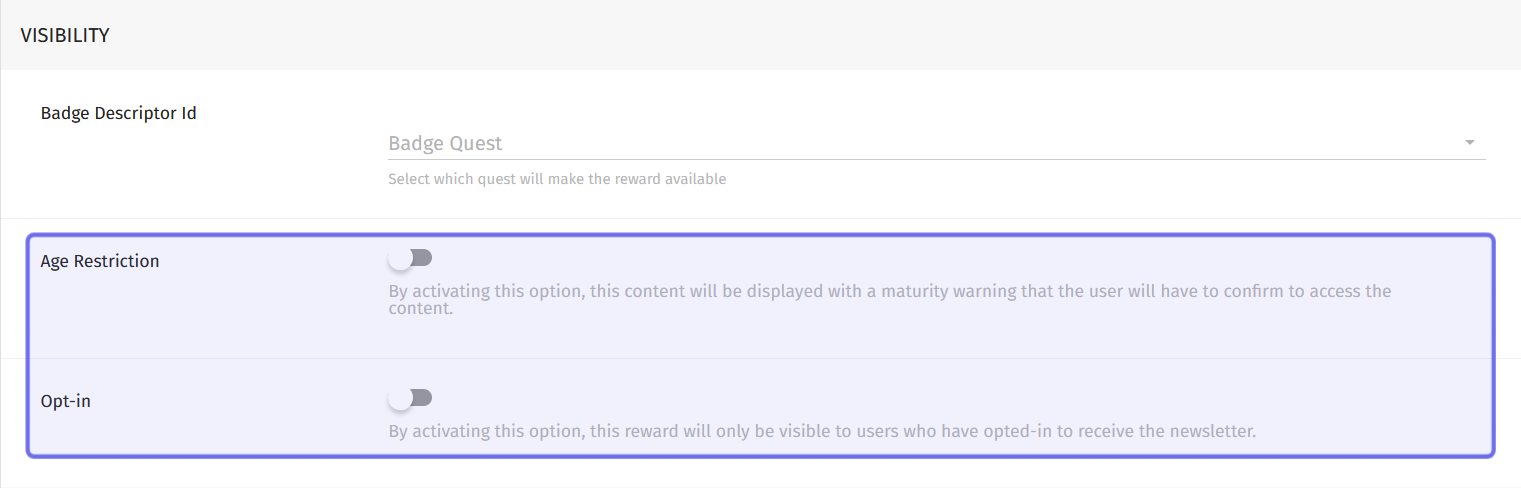
The “Visibility” section is shown with the “Age Restriction” and “Opt-in” toggles highlighted in purple.
There are also two toggles in the “Visibility” section. The first is the “Age Restriction” toggle. When this is toggled on, the reward will be marked as mature.
The second is the “Opt-in” toggle. Only users who have subscribed to your newsletter will be able to view and access this reward when this is toggled on. To set this up, click the toggle then select the relevant newsletter from the dropdown that appears.
In the next section, you can specify when the reward should be published and when it should be removed from the site. To set a publication date, click the “Start Date” field on the left-hand side of the “Dates” section. This will open a date picker. Select a date from the calendar, then type in a time in the HH:MM SS field to the right.
On the right-hand side there is an “End Date” field. If you want to specify a time for the reward to be removed, click this field to open a date picker. Select a date from the calendar, then type a time into the HH:MM SS field to the right.
Note: You don’t need to specify a start or end date. If you enter no dates in this section, the reward will be available immediately and remain available.
In the next section, you can show off the reward!
Under “Assets,” you first need to add a main picture. Look for “Main Picture” on the left of the “Assets” section. To the right is a grey rectangle with an “Upload Picture” button below. Click to browse and upload the picture that will represent your reward.
The main picture must be a 1024x576px .jpeg under 150KB. If you need help formatting an image, you can download the Figma template at the top of the “Assets” section.
Below “Main Picture,” you will see “Images” with a second grey rectangle and “Upload Picture” button to the right. Click to browse and upload an additional image. If you want to add further images, click the plus button to the right of the grey rectangle.
You can also optionally add a video. Below “Images” you will see a “Video” label with file requirements on the left and a grey rectangle to the right. Click the “Upload Video” button below the rectangle to browse and upload your video.
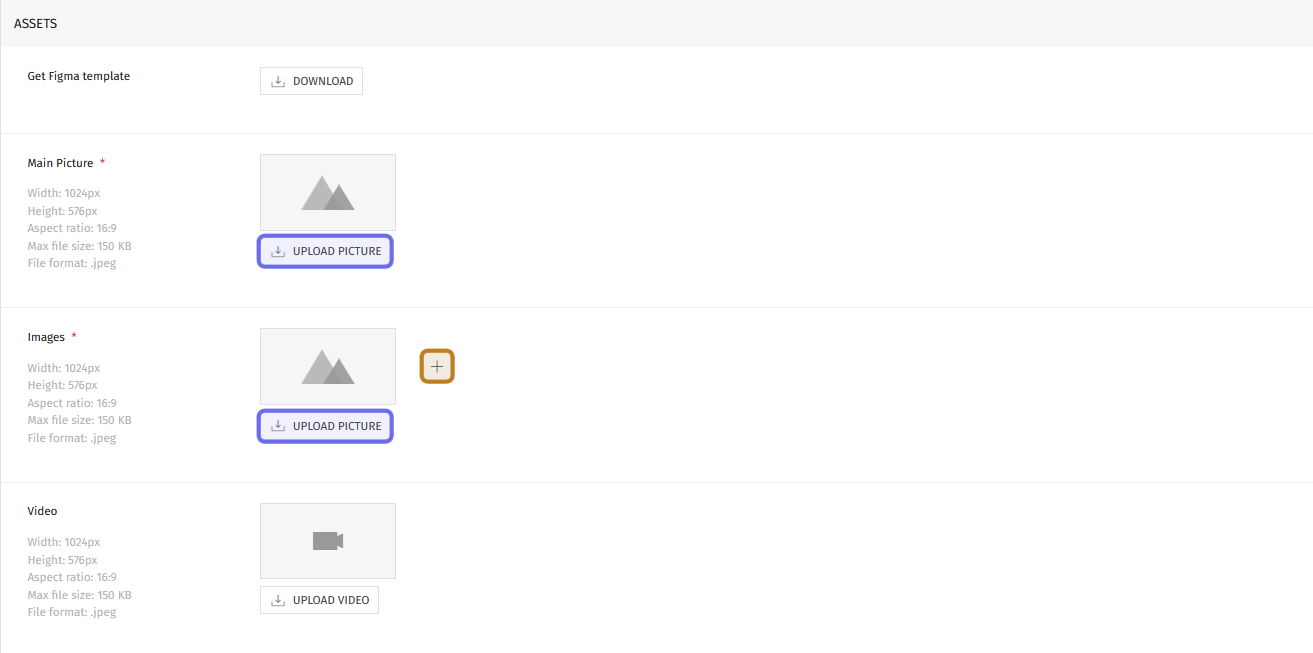
The “Assets” section is shown above. Here, the “Upload Picture” buttons are highlighted in purple and the plus icon to add additional images is highlighted in yellow.
Below the “Assets” section, give credit to the creators! There are two text fields. In the top field, enter the writer. In the bottom field, enter the artist.
Now you just need to upload the comic itself!
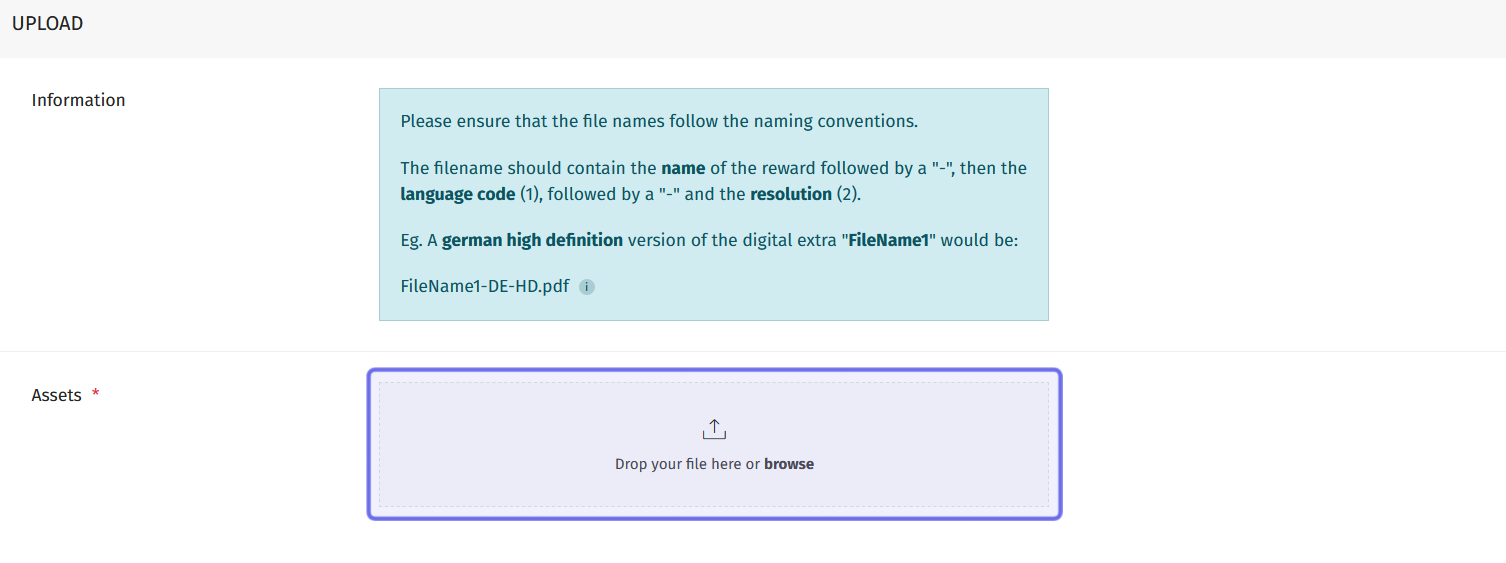
The field used to upload an asset by dragging and dropping or browsing and uploading is highlighted in purple.
Scroll to the section labeled “Upload.” At the bottom of this section is a grey box with the text “Drop your file here or browse.” Drag and drop a comics file here, or click to browse and upload.
Comics must be a .pdf or .zip file. Uploads must follow a specific naming convention, as defined in the information box at the top of the section. To name a file, you’ll need the language code and resolution acronym.
Note: Asset files should follow the convention “AssetName-LanguageCode-ResolutionAcronym.”
Some common language codes and resolutions are listed below:
Language | Code | Language | Code |
Brazilian Portuguese | BR | Korean | KR |
Chinese (Simplified) | CHS | Polish | PL |
Chinese (Traditional) | CHT | Russian | RU |
English | EN | ||
Spanish | ES | Resolution | Acronym |
German | DE | High Resolution | HD |
French | FR | Medium Resolution | MD |
Italian | IT | Standard Resolution | SD |
Repeat the process to upload multiple versions of the comics asset with different languages and/or resolutions.
Once you’ve uploaded the assets, don’t forget to save or publish the reward!
At the top of the page you’ll see two buttons on the right-hand side. Click “Save” to save the reward as a draft. Click “Publish” to publish the reward to the front end.
Note: If you have set a specific publication date, clicking “Publish” will not immediately display the reward on the front end. It will not be visible until the specified date and time.