
How to manage file types in the “Bugs” feature settings
Who can manage file types in the “Bugs” settings?
Devs and Admins can manage file types in the “Bugs” settings.
Where do I manage file types in the “Bugs” settings?
To manage file types in the “Bugs” settings, first locate the “Bugs” feature for the relevant Universe in the back office. Then, click “Bugs” in the Universe dropdown. This will take you to the “Bugs” dashboard.
In the “Bugs” dashboard page header, there is a “Settings” button. You can find it on the right-hand side. Click the “Settings” button.
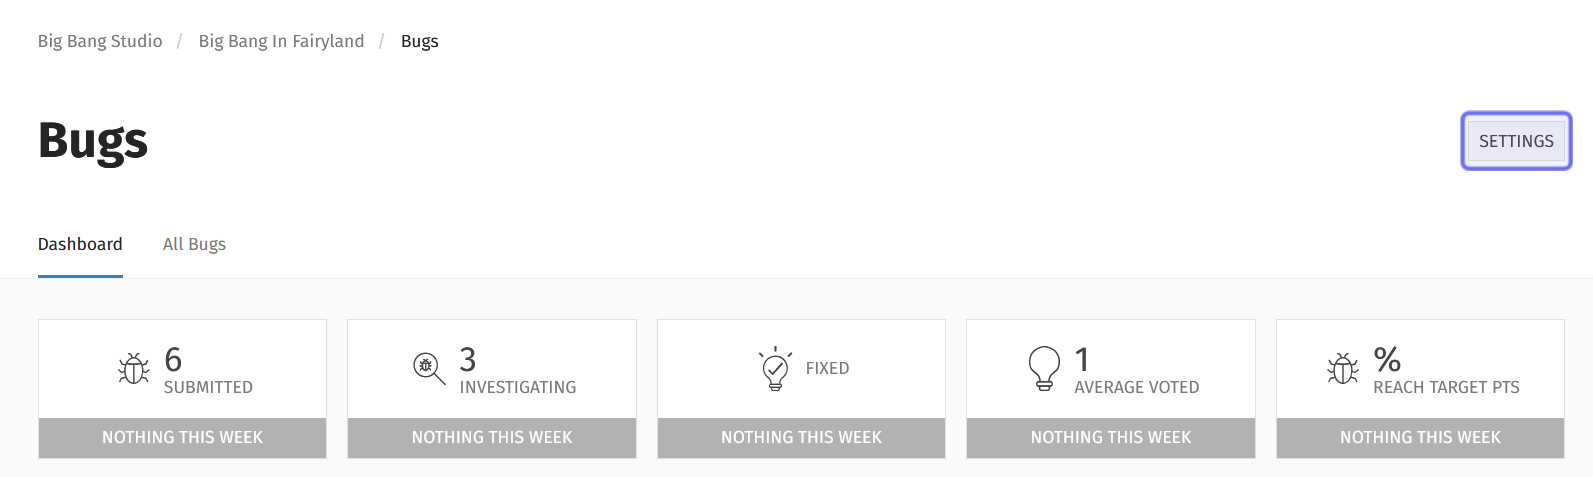
The “Settings” button is shown highlighted in purple.
How do I manage file types in the “Bugs” settings?
The “Settings” button will take you to the settings for the “Bugs” feature. Different options can be accessed via the tabs beneath the page header.
To manage file types users can upload in the front-end “Bugs” feature, select the “Configuration” tab.
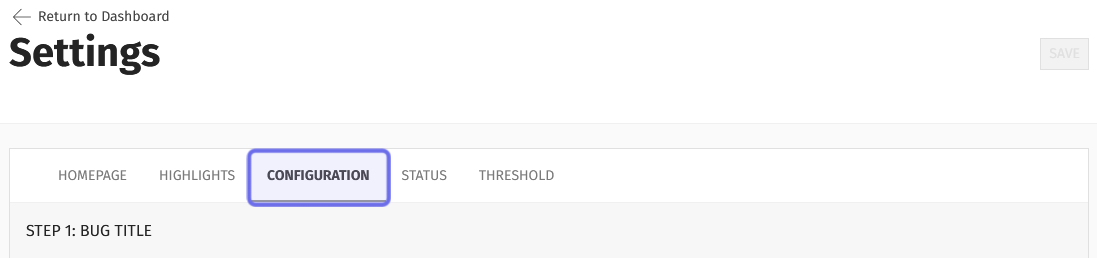
The “Settings” page tabs are shown above. The “Configuration” tab is highlighted in purple.
Scroll down to “Step 5: File Upload.” This section has five rows. The first row has a toggle labeled “Is Display.” If this is not toggled on, changes made to this section will not be visible on the front end. You can learn more in “How to modify the bug report flow.”
At the bottom of the section, there is a row labeled “Manage file types.” Click to go to the “Manage File Types” page.
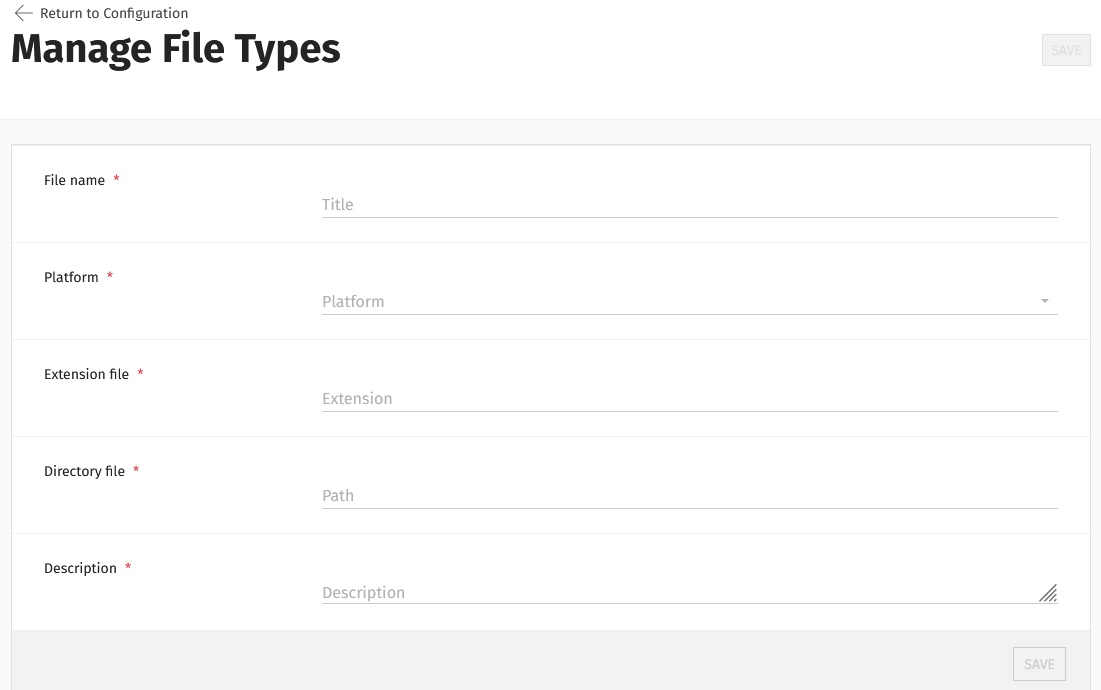
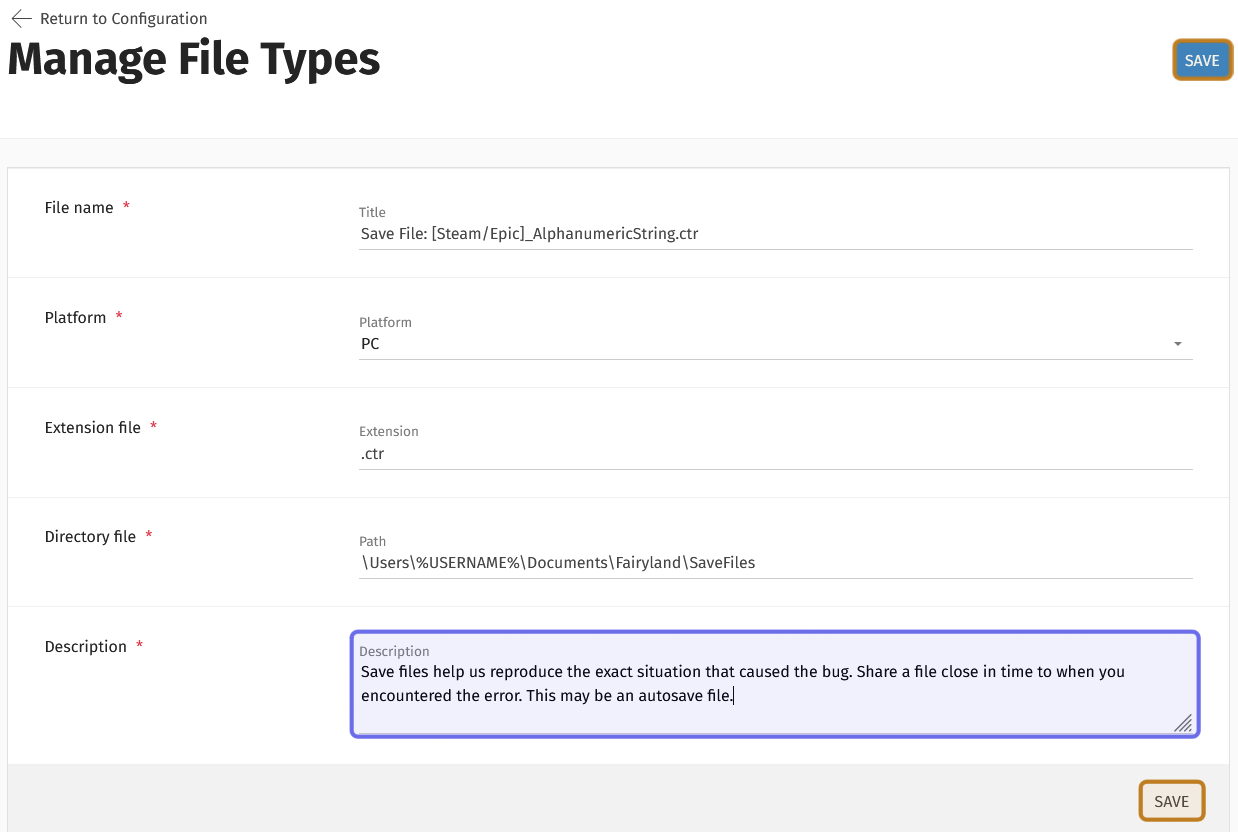
The “Manage File Types” page’s top half has five fields - seen above - used to add a new file type.
This page has all the fields needed to add a new file type. You can also scroll down to see a list of all file types that have already been added. Filter by platform to see the file types that will appear on the front end when a user selects that platform.
The front-end “File Upload” step has a list of all the file types for the selected platform. An example of a list is highlighted in purple.
Add a file type
To add a new file type option, you will need to fill out all five fields on the “Manage File Types” page.
The top field is a text field labeled “File Name.” Enter a file name here.
Below the text field is a dropdown labeled “Platform.”
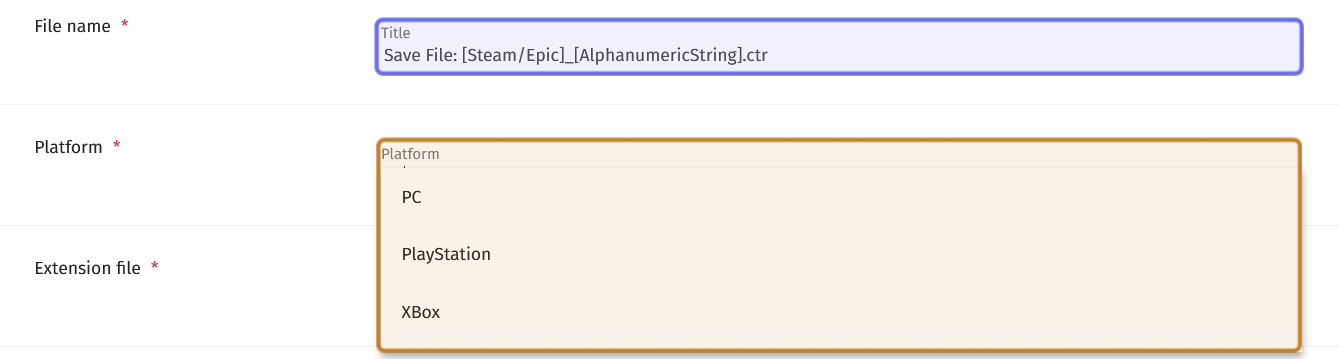
The “File name” field is highlighted in purple. The “Platform” dropdown is highlighted in yellow.
Select the platform that uses this file type. In most cases, it will be “PC.” The file types a user sees on the front end will be limited to file types assigned to the platform they select when creating a bug report.
Below the dropdown is a text field labeled “Extension file.” Enter the file type extension here (for example, “.dmp” or “.log”).

The “Extension file” field is highlighted above in purple. The “Directory file” field is highlighted in yellow.
Next, enter the typical file path in the text field labeled “Directory file.” The goal is to help the user locate the folder where they can find the file on their system.
Then, write a short description of the file type. We recommend the description gives users an idea of what they are sharing. If there are any instructions specific to this file type, you should include that here as well.
The “Description” field on the “Manage File Types” page is highlighted above in purple. The two “Save” buttons are highlighted in yellow.
Lastly, hit the “Save” button to finish adding the file type.
You can find the “Save” button in two places. One “Save” button is below the “Description” field on the right-hand side. The other “Save” button is at the top of the page to the right of the “Manage File Types” title.
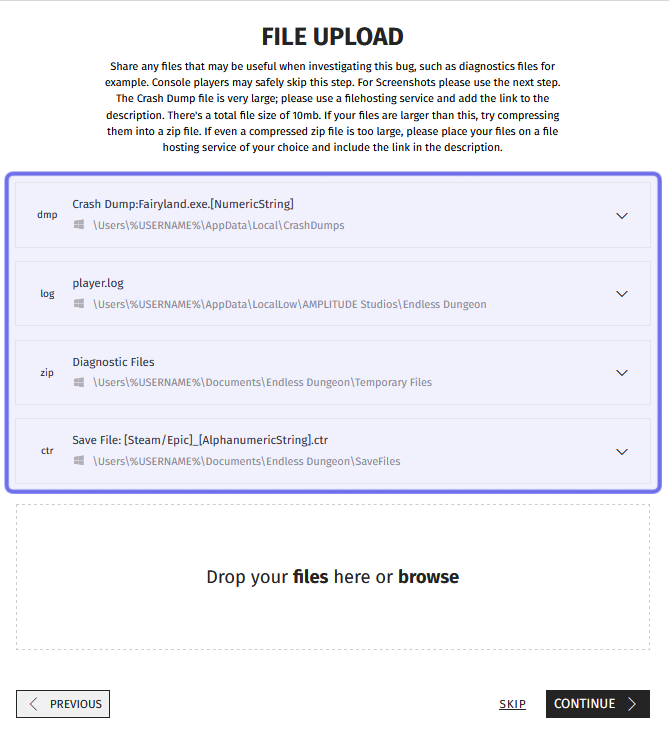
Once the file type is saved, it will appear on the front end when users make a bug report for that platform. The file name, extension, and directory path will appear in a list. Users can click on the file type to see the description.

Two examples of file type listings on the front end are shown above. The bottom example shows the file type expanded with the description visible.
Edit a file type
To edit an existing file type, scroll down the “Manage File Types” page until you see the list of file types.
Note: If you are struggling to find the file type you are looking for, try re-sorting the list. You can click any of the column headers to sort on that column.
Find the file type you want to edit. Look on the right-hand side of that file type’s row. There are two icons: a square with a line through it and a trash can. The square with a line through it is the “Edit” button.

A file type listing in the back office is shown above. The “Edit” button is highlighted in purple.
Click the “Edit” button. This re-opens the file type.
Make the desired changes. When you have finished making your edits, click “Update” to confirm.
The “Update” buttons replace the “Save” buttons from when you first created the file type. One can be found beneath the “Description” field on the right. The other is at the top of the page to the right of the “Manage File Types” title.
Delete a file type
To delete a file type, scroll down the “Manage File Types” page until you see the list of file types.
Note: If you are struggling to find the file type you are looking for, try re-sorting the list. You can click any of the column headers to sort on that column.
Find the file type you want to delete. Look on the right-hand side of that file type’s row. There are two icons: the “Edit” button and a trash can. The trash can is the “Delete” button.

A file type listing in the back office is shown above. The “Delete” button is highlighted in purple.
Click the “Delete” button. A window will pop up asking you to confirm that you want to delete the file type.
Click “Delete” in the window to confirm that you want to delete the file type. The file type will be removed from the front end and the list of file types in the back office.