
How to release a universe to the public ?
Who can change a Universe’s visibility settings?
Admins and Devs can change a Universe’s visibility settings.
Note: If a Universe has not been released, only Admins will be able to view it on the front end.
Where can I change a Universe’s visibility settings?
A Universe’s visibility settings can be accessed via the “Manage” menu in the back office. Find the Universe you want to release to the public or hide to some visitors. It will be nested beneath its Studio at the bottom of the “Manage” menu.
Hover over the Universe name. A gear icon will appear.
Click the gear icon to go to the “Universe Settings” page.
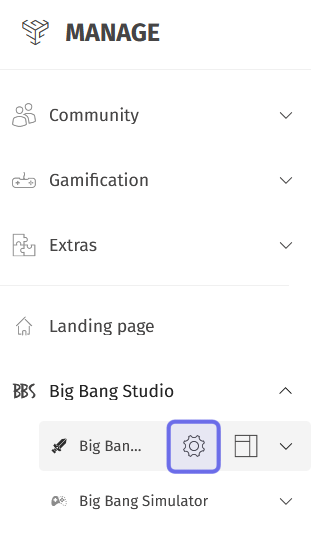
The “Manage” menu is shown above. The Studio is expanded, displaying two Universes. The “Settings” button for a Universe is highlighted in purple.
How do I make a Universe public?
From the “Universe Settings” page, you can share a new Universe with the world!
There are two labeled rows at the top of the page: “Display this universe” and “Universe visibility.”
The first row, “Display this universe,” contains a toggle. If this is toggled off, only Admins will be able to view the Universe on the front end.
Click the toggle on to release the Universe. The Universe will be visible to the users specified in the next field.
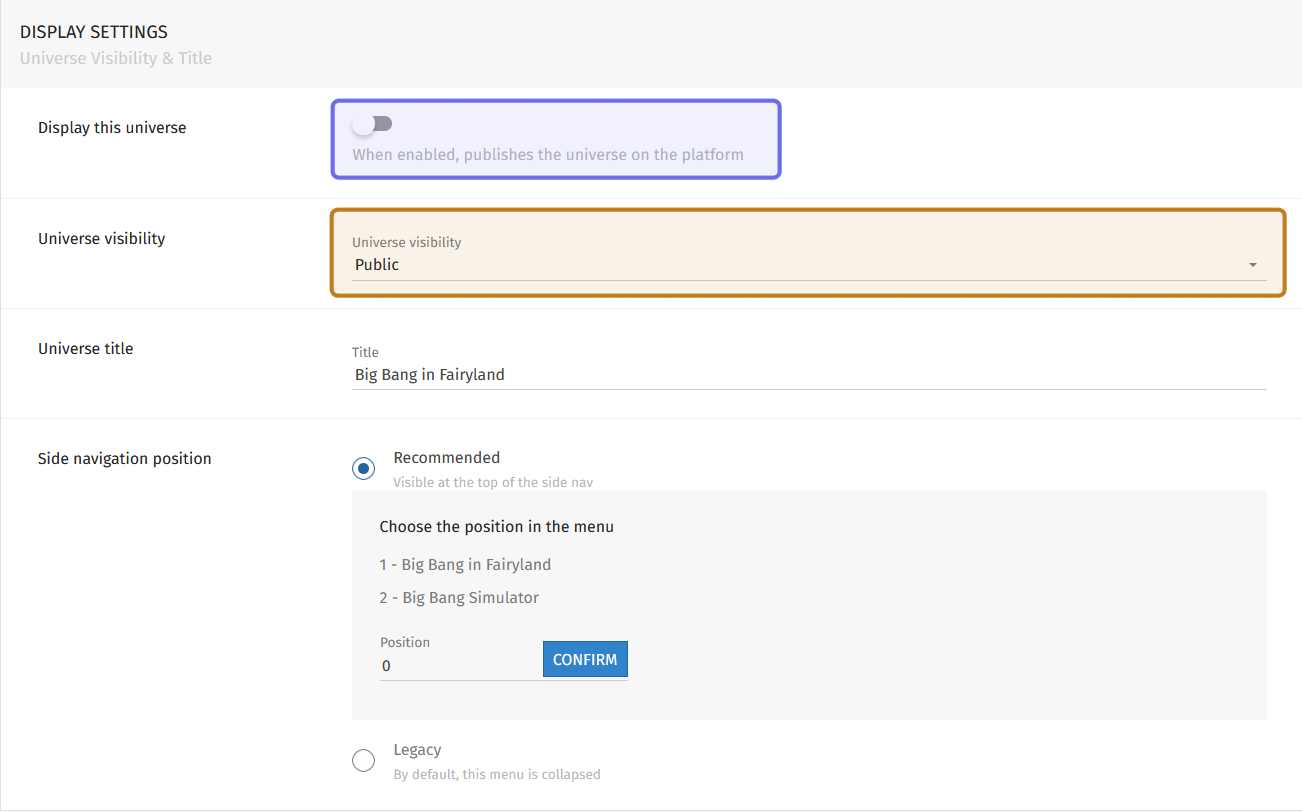
The top fields of the “Universe Settings” page is shown above. The “Display this universe” toggle is highlighted in purple. The “Universe visibility” dropdown is highlighted in yellow.
Specify which users can view the Universe by selecting a Restriction Level from the “Universe visibility” dropdown. The Universe will be visible to users with that Restriction Level and above.
“Public” is the default. A Universe visible to “Public” can be viewed by all site visitors.
When you first release a Universe, be sure to also specify how it should appear in the Side Navigation.
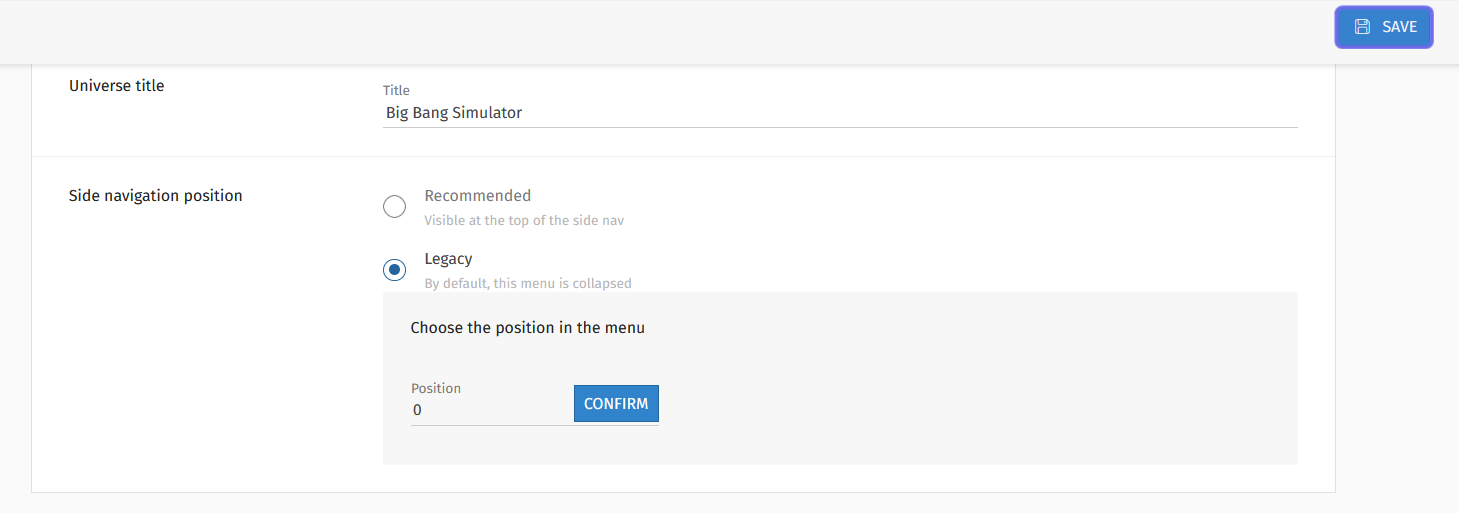
First, enter the Universe name in the “Title” field. This is how the Universe will be referred to in menus.
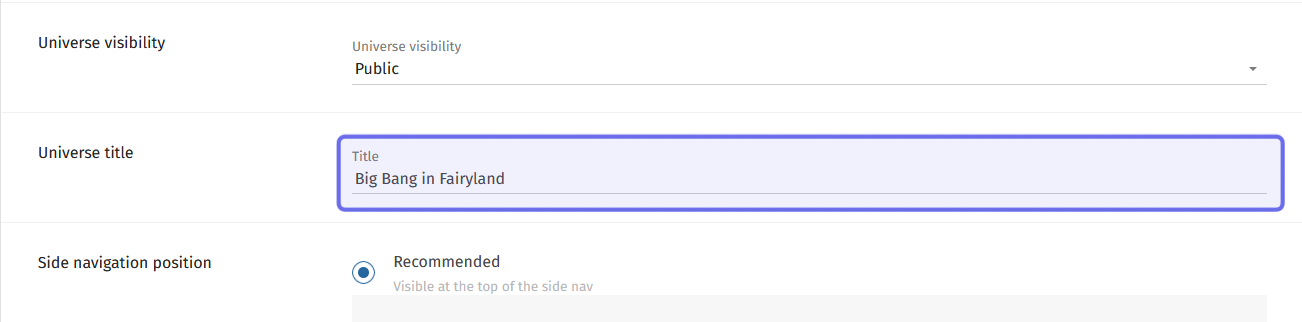
The “Universe title” field on the “Universe Settings” page is shown highlighted in purple.
Next is a row labeled “Side navigation position.” This determines where the Universe is placed in the Side Navigation.
How do I set a Universe’s position in the Side Navigation?
The front end Side Navigation has two sections: “Recommended” and “Legacy.” The “Recommended” section is visible by default. The “Legacy” section is a dropdown that users can expand.
An expanded Side Navigation. The “Recommended” section is highlighted in purple.
The “Legacy” section is highlighted in yellow.
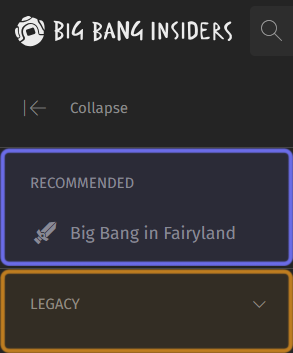
When the Side Navigation is collapsed, the icons of “Recommended” Universes are displayed. The “Legacy” section is represented by a down arrow.

A collapsed Side Navigation. There is one Universe in the “Recommended” section, highlighted above in purple. The “Legacy” section is represented by a down arrow, highlighted in yellow.
Universes are placed in the “Recommended” section by default. This makes them more accessible and visible to site visitors. However, you may wish to avoid having a long list of Universes in the Side Navigation. In that case, Universes can be moved to the “Legacy” section to create a more compact default menu. It can be useful to move Universes that are older and/or have small communities, which are still valuable but less likely to be what your site visitors are looking for. The options under “Side navigation position” let you indicate whether the Universe should be visible by default (“Recommended”) or in the collapsed menu (“Legacy”).
To move a Universe to the “Legacy” section, scroll down to “Side navigation position” and select “Legacy” from the two available options. A “Position” field will appear. You can use this field to order the Universes in a section.

Some visibility settings on the “Universe settings” page is shown above. The “Side navigation position” row is highlighted in purple.
Enter a number into the “Position” field. If there are already Universes in the “Legacy” section, you will see a list of the other Universes and their positions so you know where the Universe you are editing will sit.
Note: You can also use the “Position” field to update where a Universe sits in the menu order without changing the Universe’s section.
After you have entered a number in the “Position” field, click the “Confirm” button on the right.
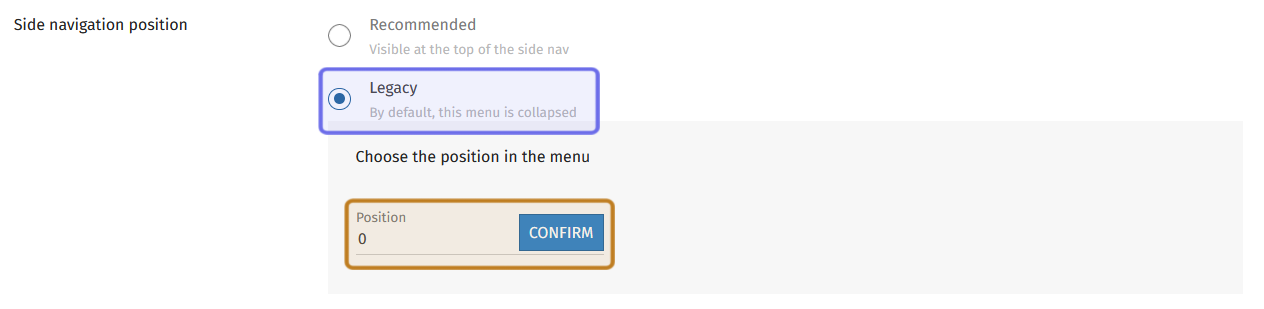
The “Side navigation position” options on the “Universe settings” page is shown above. The “Legacy” selection is highlighted in purple. The “Position” field and “Confirm” button are highlighted in yellow.
Click the “Save” button at the top of the page to finalize the change.
The “Save” button on the “Universe settings” page is shown above outlined in purple.
The Side Navigation will be updated on the front end. The Universe that was previously visible by default in the “Recommended” section will now be nested under the “Legacy” dropdown.
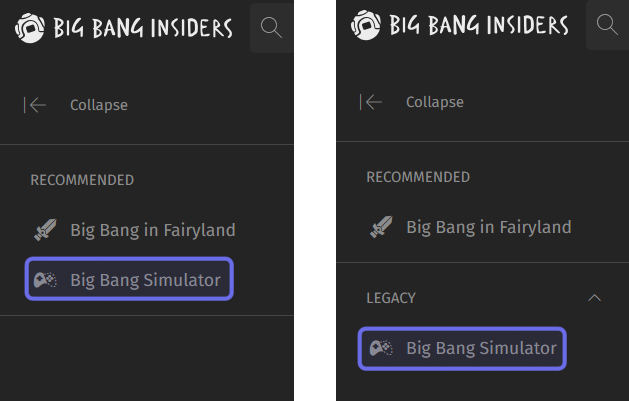
On the left, “Big Bang Simulator” is shown in the “Recommended” section of the Side Navigation. On the right, the process described in this section has been followed and the Universe is now displayed in the “Legacy” collapsible menu.
You can always return a Universe to the “Recommended” section by following the same instructions, but selecting “Recommended” instead of “Legacy.”
What is a “Dev Hint?”
Developer hints, or dev hints, are reminders for Devs and Admins when interacting with the community. When enabled, you can provide a list of points that Devs and Admins should emphasize or should not speak about. Developer hints are not intended to communicate guidelines to the community as a whole. They serve as reminders for Devs and Admins representing the studio.
How do I set up developer hints?
Scroll down the page until you see “Communication with users.” Beneath that is a section titled “Developer Hints.”
Note: You can also select “Communication with users” from the menu on the left and then click “Developer Hints” in the menu that drops down.
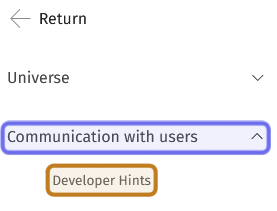
The menu on the left of the “Universe Settings” page is shown above. Clicking “Communication with users,” highlighted in blue, will drop down “Developer Hints,” highlighted in yellow. Clicking “Developer Hints” to be taken to that section of that page.
At the top of the “Developer Hints” section is a toggle. Click to turn on developer hints. If this is not toggled on, nothing entered in this field will be visible on the front end.
Below the toggle is a “Title” field. Enter a title for the developer hint section into this field.
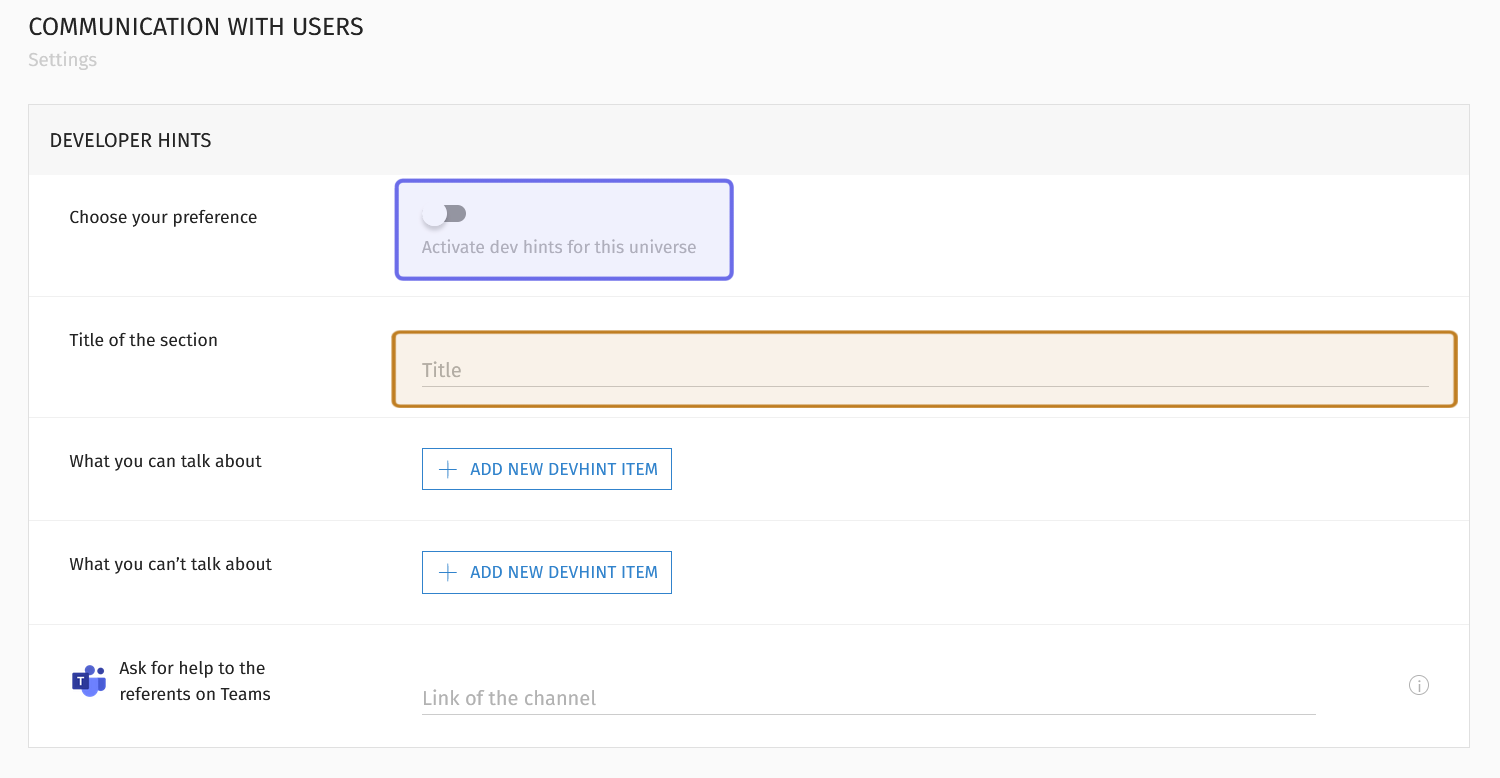
The “Developer Hints” section is shown above. The toggle to activate developer hints is highlighted in purple. The “Title” field is highlighted in yellow.
Next, add your hints. There are two rows: “What you can talk about” and “What you can’t talk about.” The text entered here will be shown to Devs and Admins when they are replying to a thread or comment.
To add a hint, click the “+ Add New Dev Hint Item” button in the section you want to add to. A new text field will be added.
Type the topic users should or should not talk about in the new field.
Repeat the process in both the “What you can talk about” and “What you can’t talk about” rows until your two lists are completed.
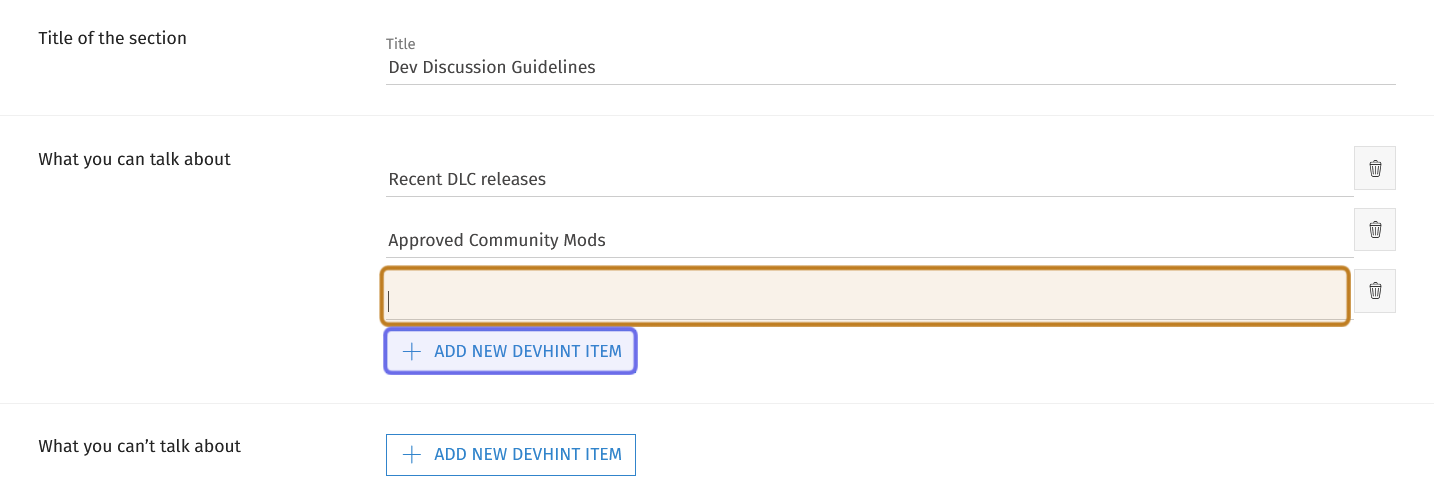
The “+ Add Dev Hint Item” button is highlighted in purple in the screenshot above. An example of the field added when the button is clicked is highlighted in yellow.
If you need to delete a hint, click the trash can icon on the right.

Clicking the trash can icon, shown highlighted in purple, will delete the hint in that field.
When you’ve finished adding the dos and don’ts, add a Teams link to direct Devs and Admins to the chat where they can ask for clarification or more details. If you aren’t sure how to find a Teams link, click on the “Info” icon to the right of the Teams link field.

The field for the Teams link is shown above. The “Info” icon is highlighted in purple.
When you’ve filled out all of the fields, click “Save.” You can find the “Save” button in the top-right corner of the page.
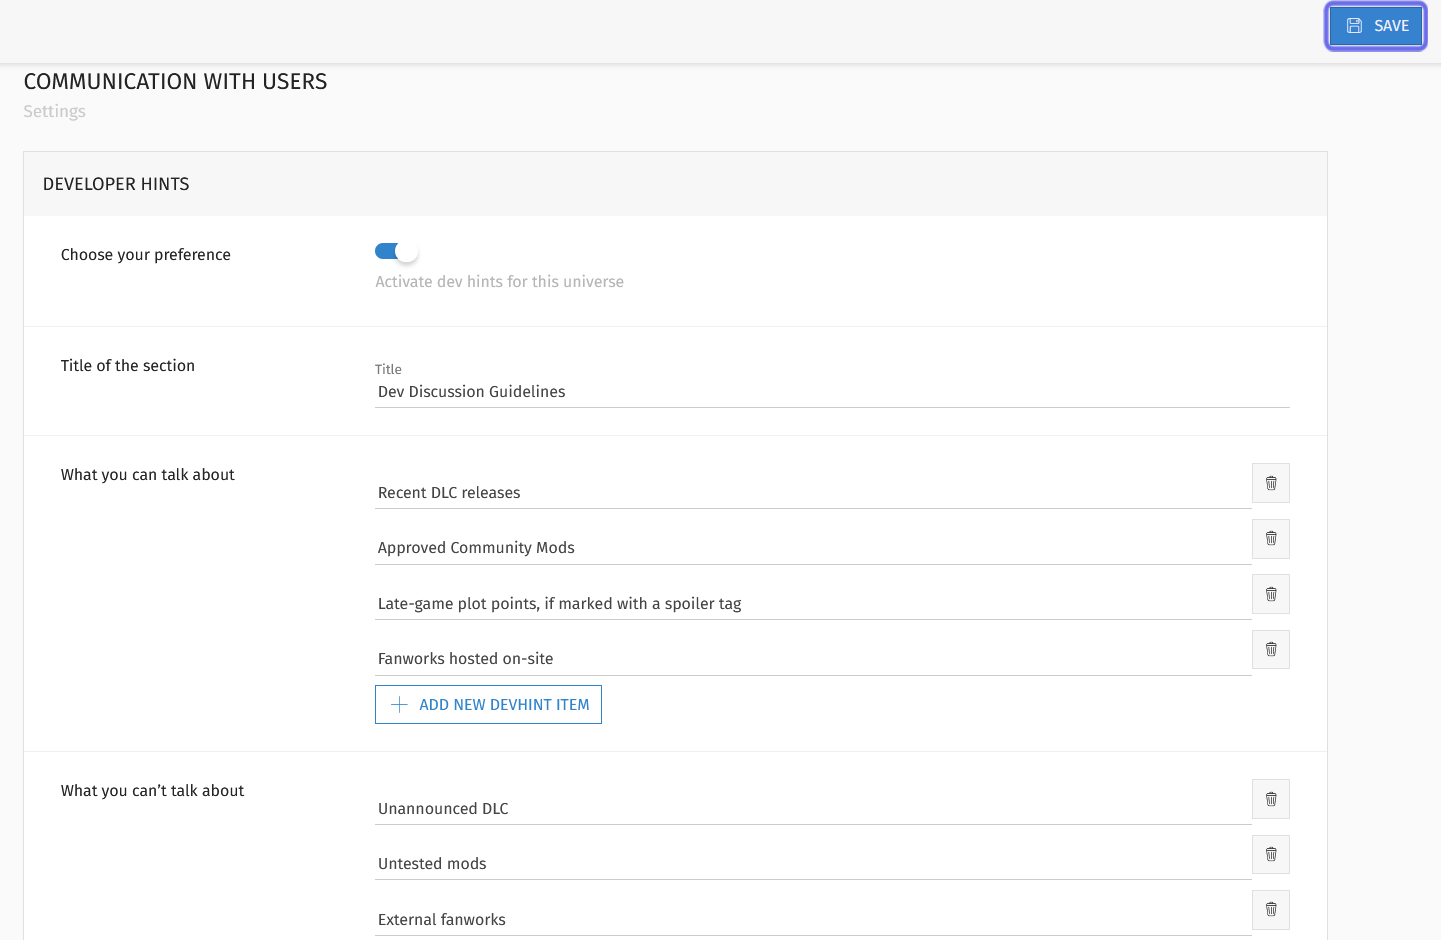
The “Developer Hints” section is shown above. The “Save” button is in the top-right and highlighted in purple.
Once saved, the hints will be available as a reminder for Devs and Admins writing replies on the front end. Dev hints can be found on the front end wherever users are able to post a reply (in forums and beneath ideas, votes, bugs, and contests). The hints appear near the bottom of a page, above the option to add a reply.
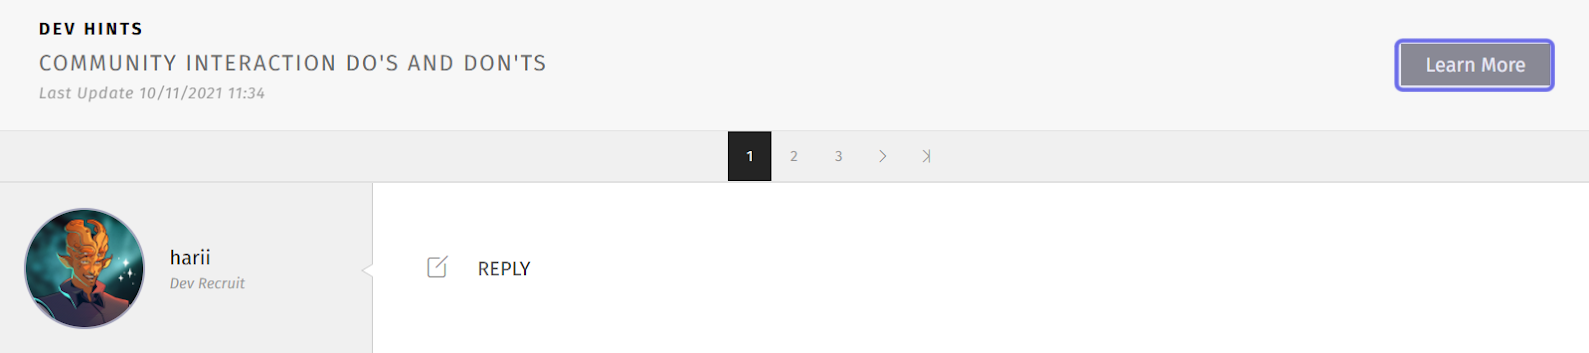
The “Reply” button at the bottom of a thread is shown with the dev hints above. The “Learn More” button is highlighted in purple on the right.
Dev hints are collapsed by default. Devs and Admins can click the “Learn More” button on the right to expand the list of dos and don’ts.
If the dev hints exceed the available space, there will be an “Expand” button below the list. Clicking on the “Expand” button will display the full list of hints.
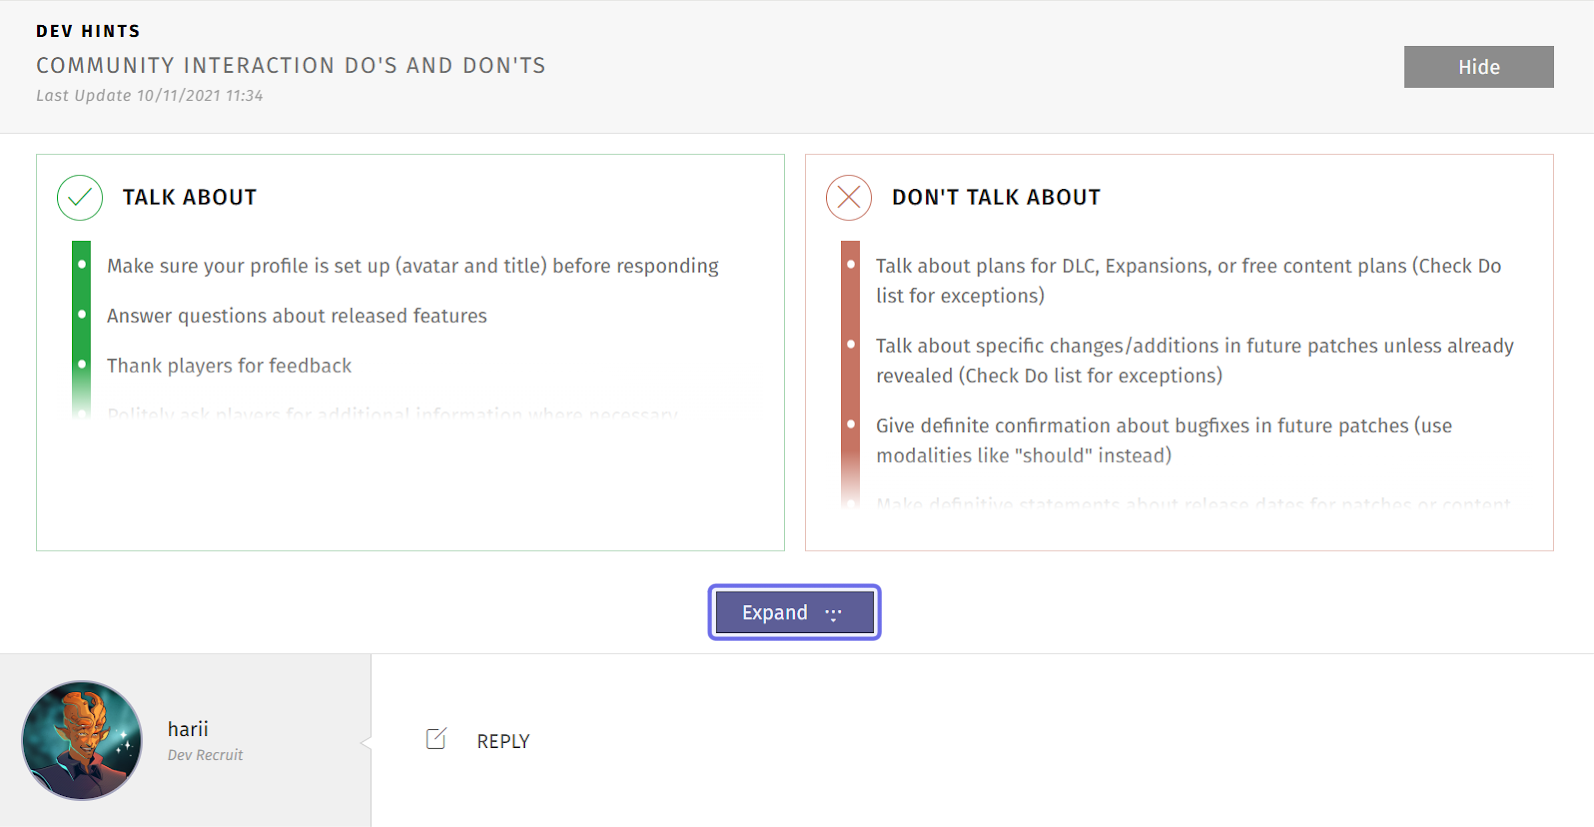
An opened “Dev Hints” section is shown above. The “Expand” button to display the full list is highlighted in purple.
The dev hints title and section will not be visible to users who are not Admins or Devs.