
How to set rate limits
Who can set the rate limits?
Admins and Devs can set rate limits in the back office.
Where can I set the rate limit?
Navigate to the back office and scroll to “Settings” in the “Manage” menu.
Then, click “Rate Limits.”
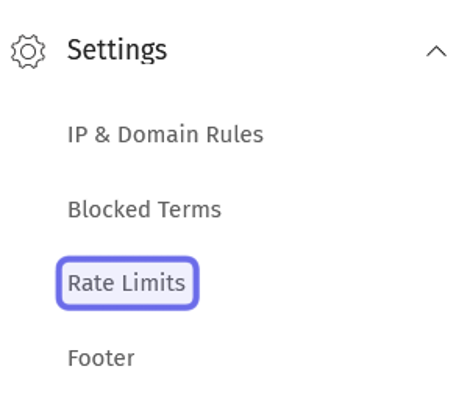
The “Settings” dropdown is shown expanded in the screenshot above.
“Rate Limits” is highlighted in purple.
How do I set the rate limit?
Rate limits are separated into two types: “Creation” and “Reply/Reproduction.”
The rate limits in the “Creation” section apply to users posting their own content, such as submitting an idea or creating a tutorial.
The rate limits in the “Reply/Reproduction” section apply to what users post in response to another person’s content.
Rate limits can be set globally or for a specific Universe.
If a user tries to post the same type of content more quickly than the rate limit, they will see an error and their post or comment will not be published.
Note: Rate limits don’t apply to Devs and Admins.
Global Rate Limits
After navigating to the “Rate Limits” page, you will land on the global rate limits settings. If needed, use the tabs to navigate between global rate limits and rate limits by Universe.
Find the type of post you want to add a rate limit to. If the post starts a new content chain, such as an idea or a thread, it will be in the “Creation” section. If the post replies to existing content, it will be in the “Reply/Reproduction” section.
Use the time field to the right of the post type to specify the delay between posts. You can set a limit of up to one day between posts.
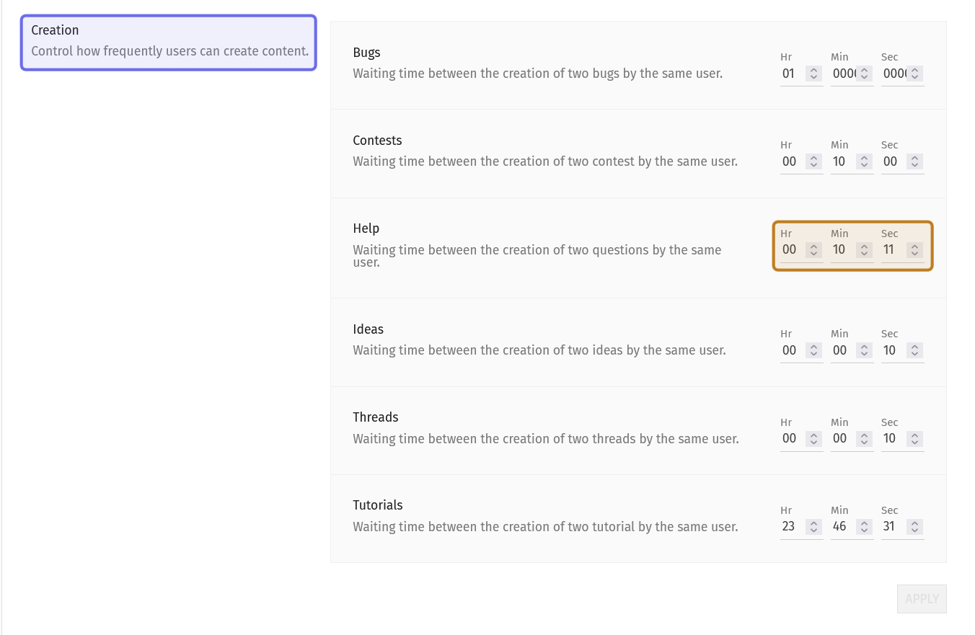
The “Creation” section is shown above. The section label is highlighted in purple. A time field is highlighted in yellow.
To set the time between posts, click a field and type in a valid time, or use the arrows on the right to move in increments of one.
The minimum amount of time is 00hr 00min 00sec. The maximum amount of time is 23hr 59min 59sec.

The rate limit for questions on the “Help” feature is shown above. The minutes field is highlighted in purple. Clicking on that field allows you to type in a time. The arrows to move the seconds field incrementally are highlighted in yellow.
After entering a new rate limit, click the “Apply” button at the bottom of the section that you have changed.
Note: You can change multiple rate limits in a section at one time. Edit multiple fields in the same section, then click “Apply” at the bottom of that section.
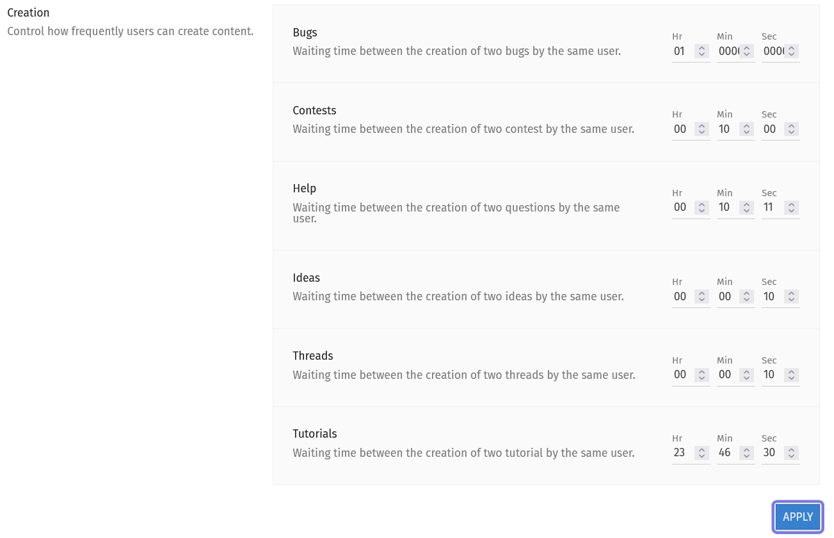
The “Apply” button for the “Creation” section is shown outlined in purple.
Rate Limits by Universe
To set rate limits for a specific Universe, click the “Universes” tab in the page header. Then, select a Universe from the dropdown.
Note: We recommend using consistent rate limits across all Universes to reduce confusion. However, if one Universe receives substantially more traffic, it may be necessary to set separate rate limits.
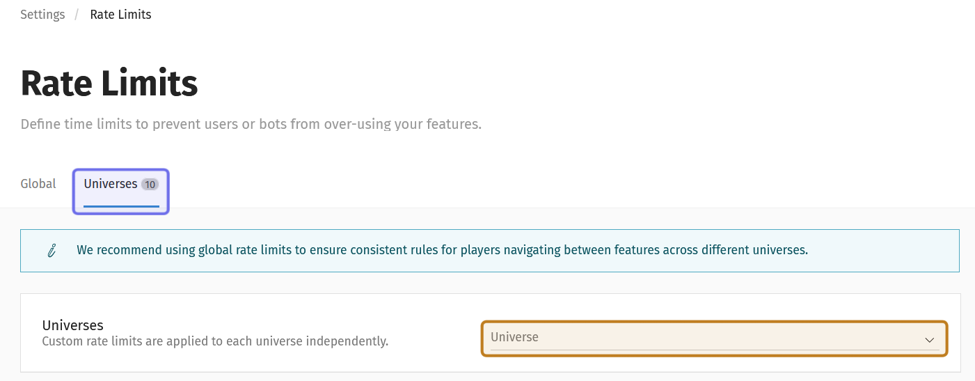
The “Universes” tab is highlighted in purple above. The “Universes” dropdown is highlighted in yellow.
Universe-specific rate limits are also divided into “Creation” and “Reply/Reproduction.” Use the toggle to activate rate limits for a section.
Click “Add a rate limit.”
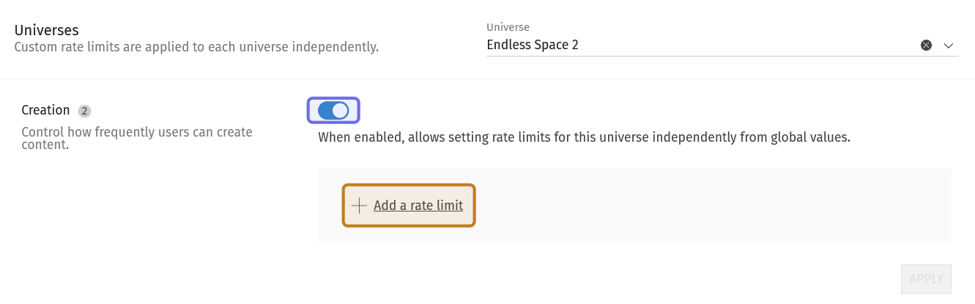
The toggle to turn on rate limits for the “Creation” section is outlined in purple. It is activated in the screenshot above. “Add a rate limit,” highlighted in yellow, adds a new rate limit field.
Select a post type from the dropdown. Then, use the time fields to set a rate limit for that post type.
Click in a field to enter a time or use the arrows to change the time by increments of one. The time must be between 00hr 00min 00sec and 23hr 59min 59 sec.
Note: Every time field must be filled. Add 00 to any blank fields.
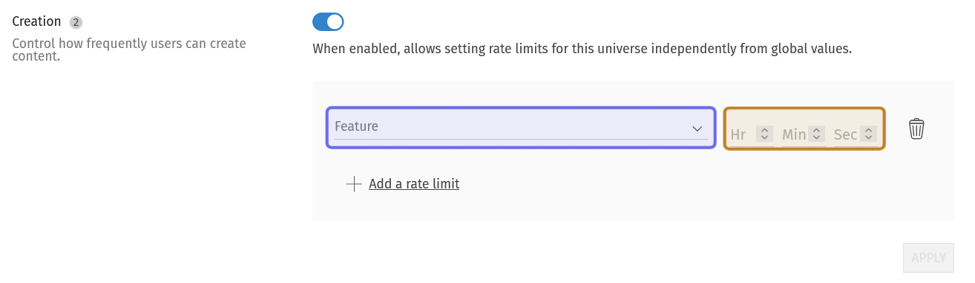
The dropdown to select a post type is highlighted in purple. The time fields to set a rate limit are highlighted in yellow.
If you want to add another rate limit, click “Add a rate limit.” Repeat the process until you have added all of the rate limits you would like to add for a section.
Click “Apply” to set the rate limit(s).
Note: If you click “Apply” before setting a rate limit, you will see an error message.
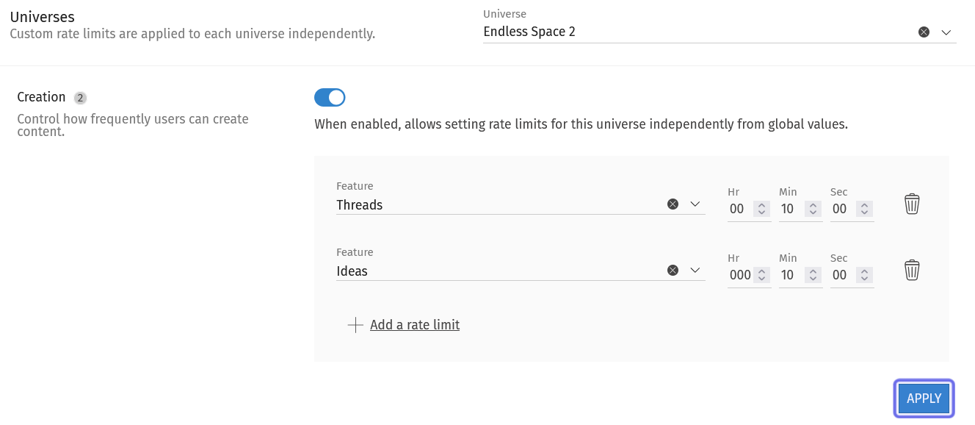
The “Apply” button at the bottom of the “Creation” section is outlined in purple.
Follow the same process to add rate limits to the other second section.
Note: Any rate limit that isn’t specified defaults to the global rate limit.
How do I deactivate rate limits?
Deactivate a rate limit to remove the delay between users posting a specific type of content.
Deactivating Global Rate Limits
Locate the rate limit you want to deactivate under the “Global” tab.
Set the limit to 00hr 00min 00sec. Then, click “Apply.”
There will no longer be a delay for members who try to post that type of content in quick succession.
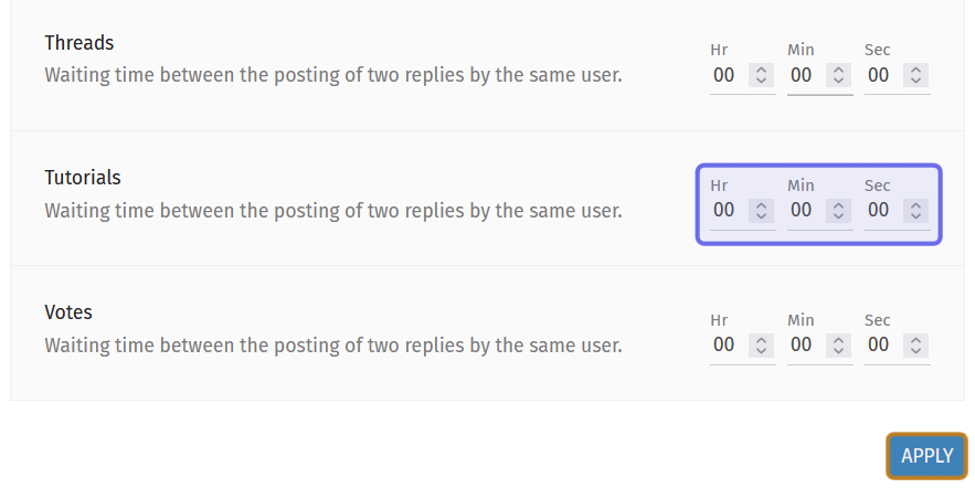
The time fields to deactivate a rate limit are highlighted in purple. The “Apply” button is highlighted in yellow.
Note: You can deactivate multiple limits at once by setting those limits to 00:00:00, then clicking “Apply.
Deactivating Rate Limits by Universe
You can disable all rate limits for a specific Universe or delete one limit at a time. When a rate limit is disabled or deleted, that Universe feature will default to the global limit.
Select the relevant Universe from the dropdown. Universes with rate limits set will show a number on the right-hand side of the dropdown.
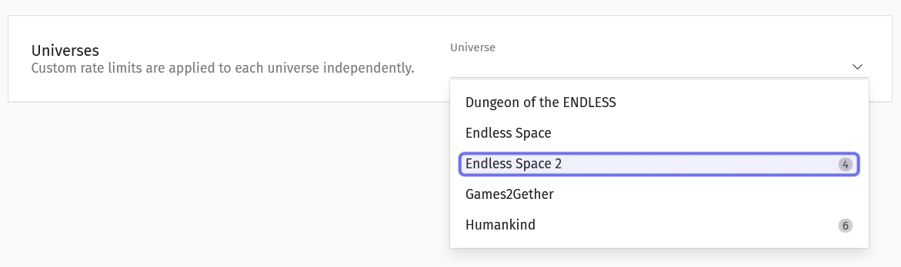
An expanded “Universes” dropdown is shown above. A Universe in the list that has rate limits set is highlighted in purple.
You can deactivate all “Creation” rate limits or all “Reply/Reproduction” rate limits at once using the toggle. Click the toggle to turn off all rate limits in that section.

The toggle to enable or disable “Creation” rate limits for a Universe is highlighted in purple above. It is shown toggled to the right with rate limits active.
Delete a specific rate limit by clicking the trash can icon on the right-hand side. Then, click “Delete” in the confirmation window.
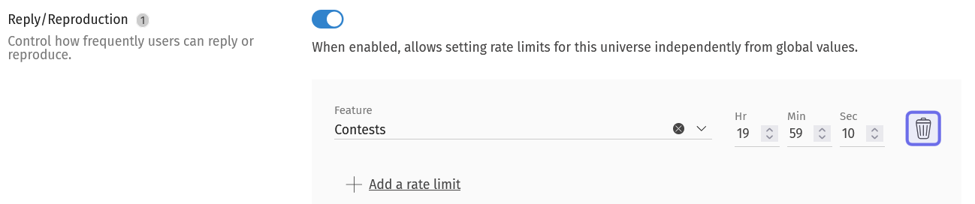
The button to delete a single rate limit is highlighted in purple.