
How to create a new vote ?
Who can create a vote?
Devs and Admins can create votes.
Where do I create a vote?
Votes are created in the back office. Navigate to the “Votes” feature for a Universe with that feature enabled.
You will land on the “Votes” dashboard. On the right-hand side of the page header, you will see a button labeled “Add Vote.”
How do I create a new vote?
Click on the “Add Vote” button to create a new vote.
Add a vote description
On the left you will see fields for the vote’s core content.
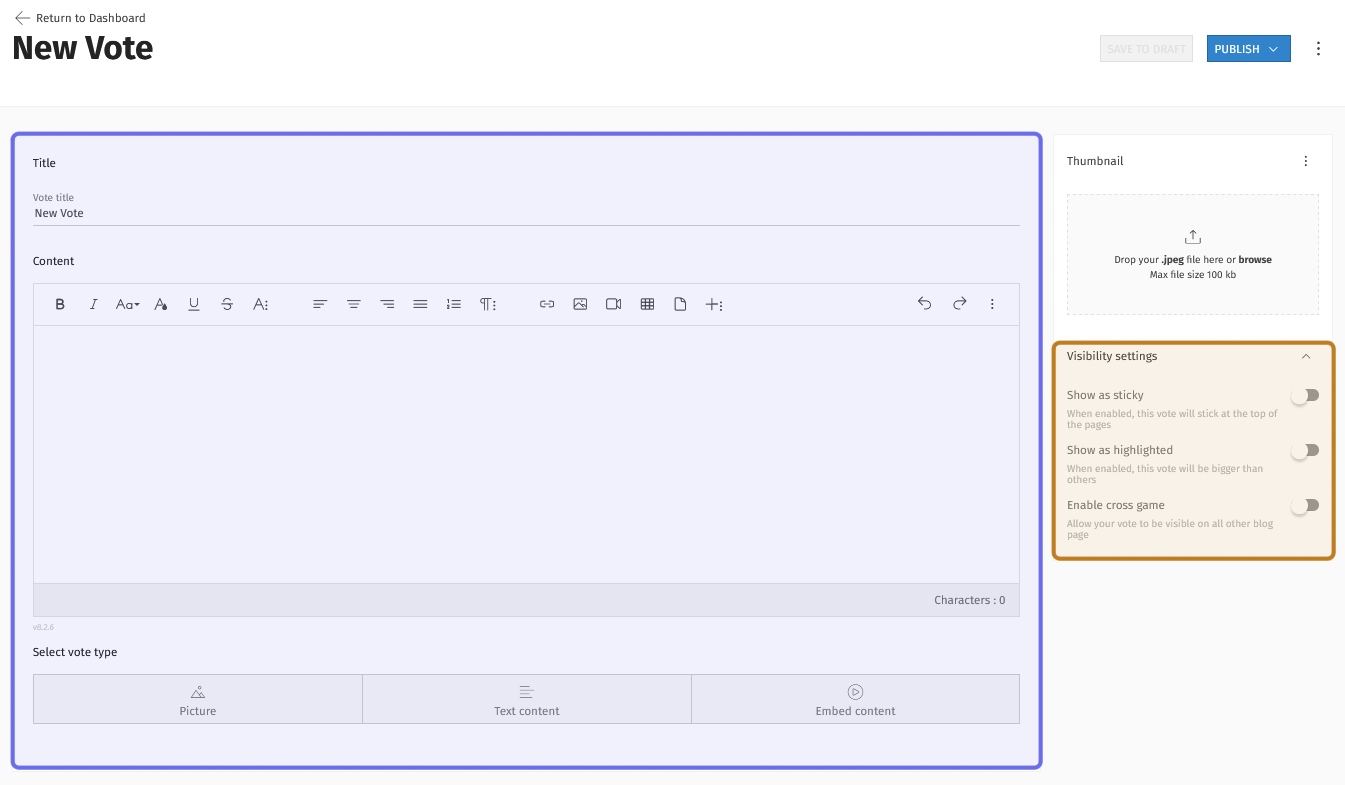
The vote’s core content is highlighted in purple above.
The visibility settings, explained further down, are highlighted in yellow.
The “Title” field is located at the top of the box on the left. If it fits, it is a good idea to make this the vote query. This will serve as the post’s headline on the front end.
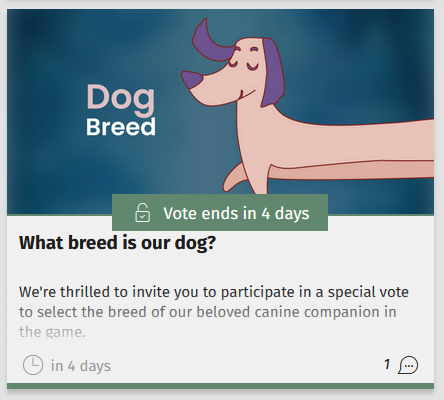
In the above example, “What breed is our dog?” was entered as the vote title.
You can elaborate on the parameters of the question or explain how the vote results will be used in the text editor below the “Title” field.
Then, it is time to enter the possible responses!
Add vote choices
Below the text editor, you will see three options for how to present the vote choices: picture, text content, and embed content.
To add an option, click on one of the “Select vote type” buttons. The option to “Add a choice” will appear below the buttons. Click to add a new option of whatever vote type was selected.
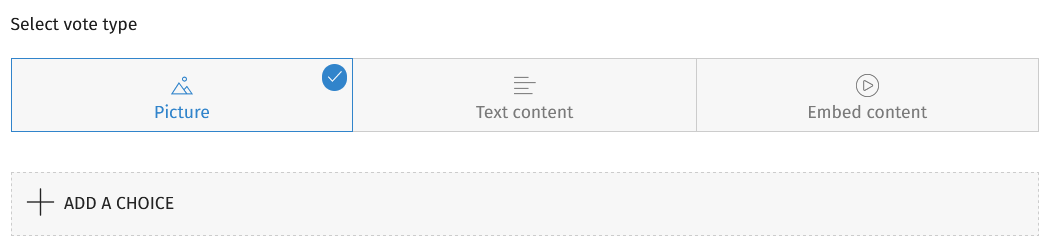
In this screenshot, “Picture” is selected. The “Add a choice” button has appeared below.
This will open a side panel. Upload an image and enter any other clarifying information, then click the “Apply” button in the top-right of the side panel. A new option will be added!
Note: If a choice was submitted by a community member, you can use the “User” field to credit them when you add that choice.
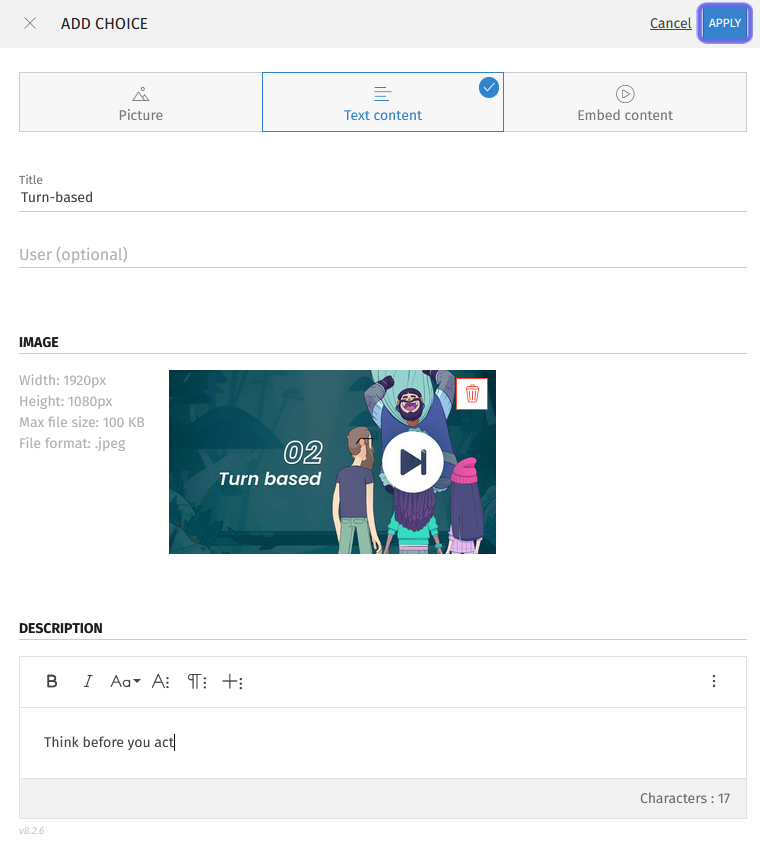
Add the vote choice outlined in the side panel by clicking “Apply,” highlighted here in purple.
Then, repeat the process until all of your desired vote choices have been added. A vote requires a minimum of two choices before it can be published.
You can also edit or delete vote options as needed. Once added, each vote option will have its own row with two icons on the right-hand side.
Click the square icon to re-open the side panel. From there you can edit the vote option.
Click the trash can icon to delete.
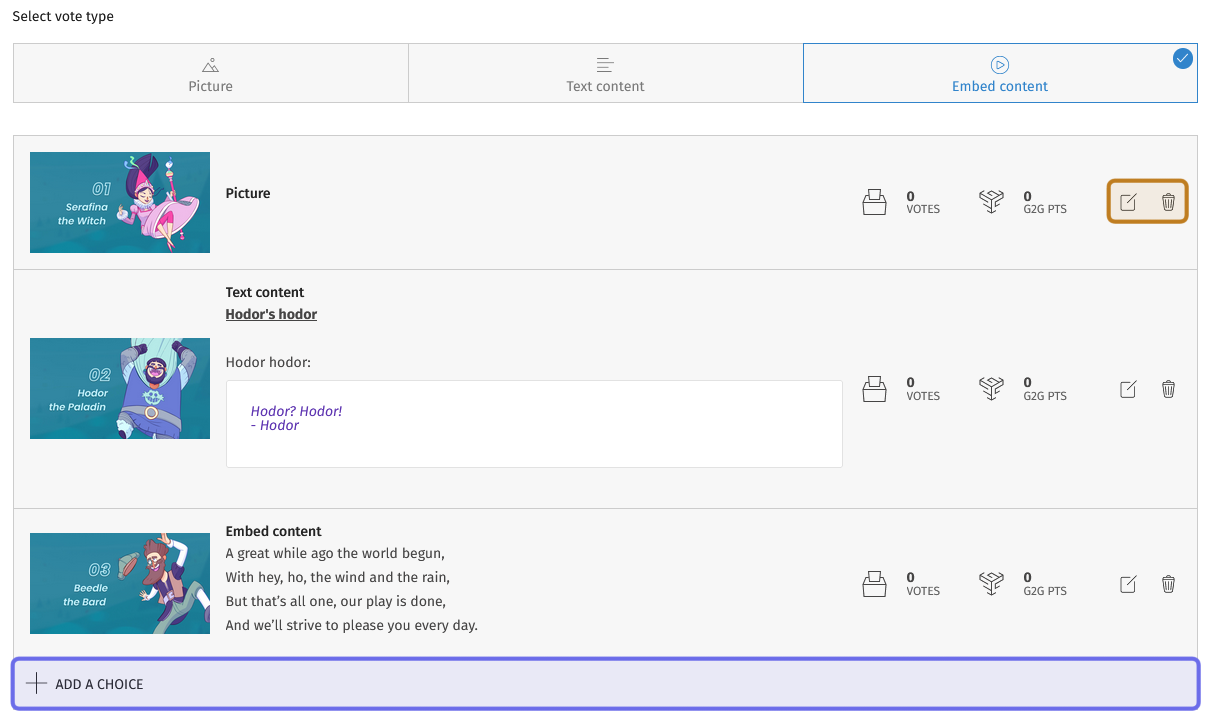
A vote’s options are shown above. To add a new option, click “Add a choice,” highlighted here in purple. To edit or delete, use the icons highlighted in yellow.
Vote choice types
All vote choice types ask for slightly different information, but appear the same when the vote is published to the front end. However, the pop-up when the image is clicked on is different depending on the vote type selected.
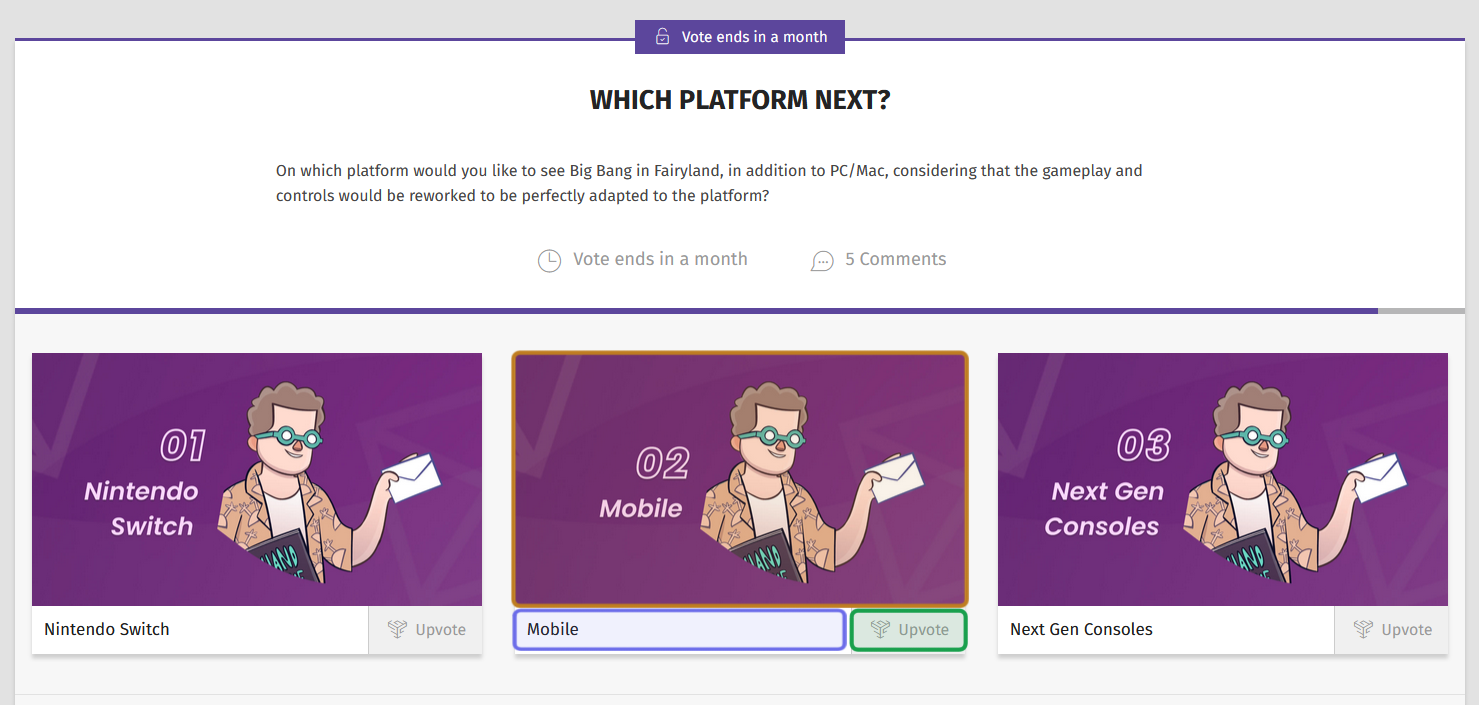
All vote options look the same on the vote’s page. Each option will include the image, outlined in yellow; the title, outlined in purple; and the “Upvote” button, outlined in green. Users can click the “Upvote” button to select an option.
The “Picture” option lets you add an image and title. Its pop-up is a large version of the image. Users can cast their vote from the pop-up.
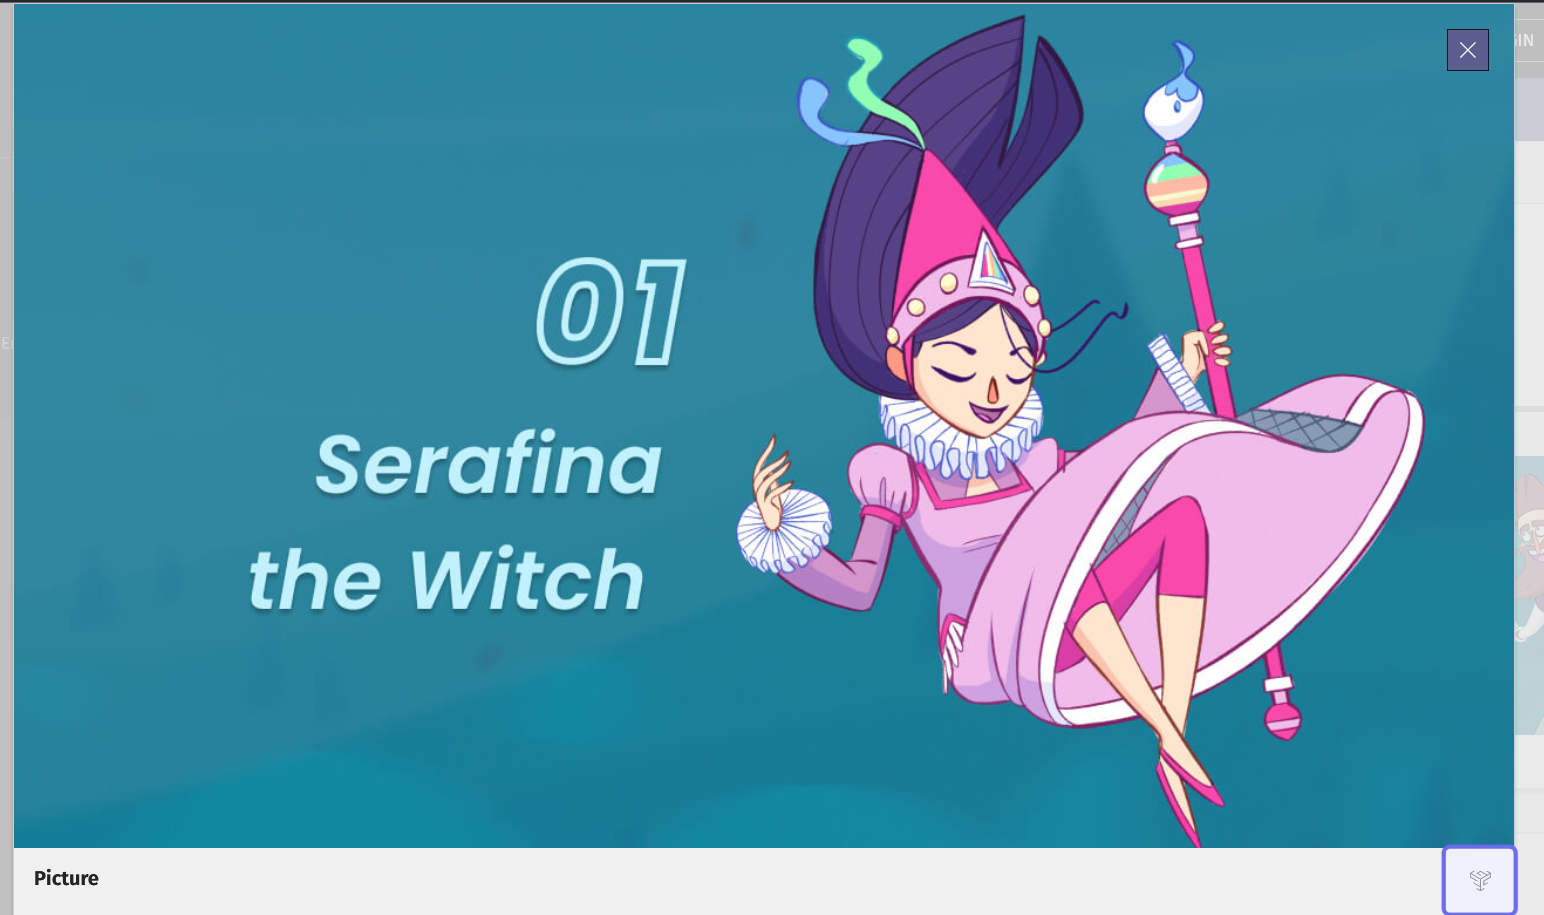
This is an example of a “Picture” option’s pop-up.
The “Upvote” button is highlighted in purple above.
The “Text content” option lets you add a description alongside the title and image. Its pop-up includes the title and text description to the right of the image. Users can vote from the pop-up by using the “Vote for this choice” button beneath the text.
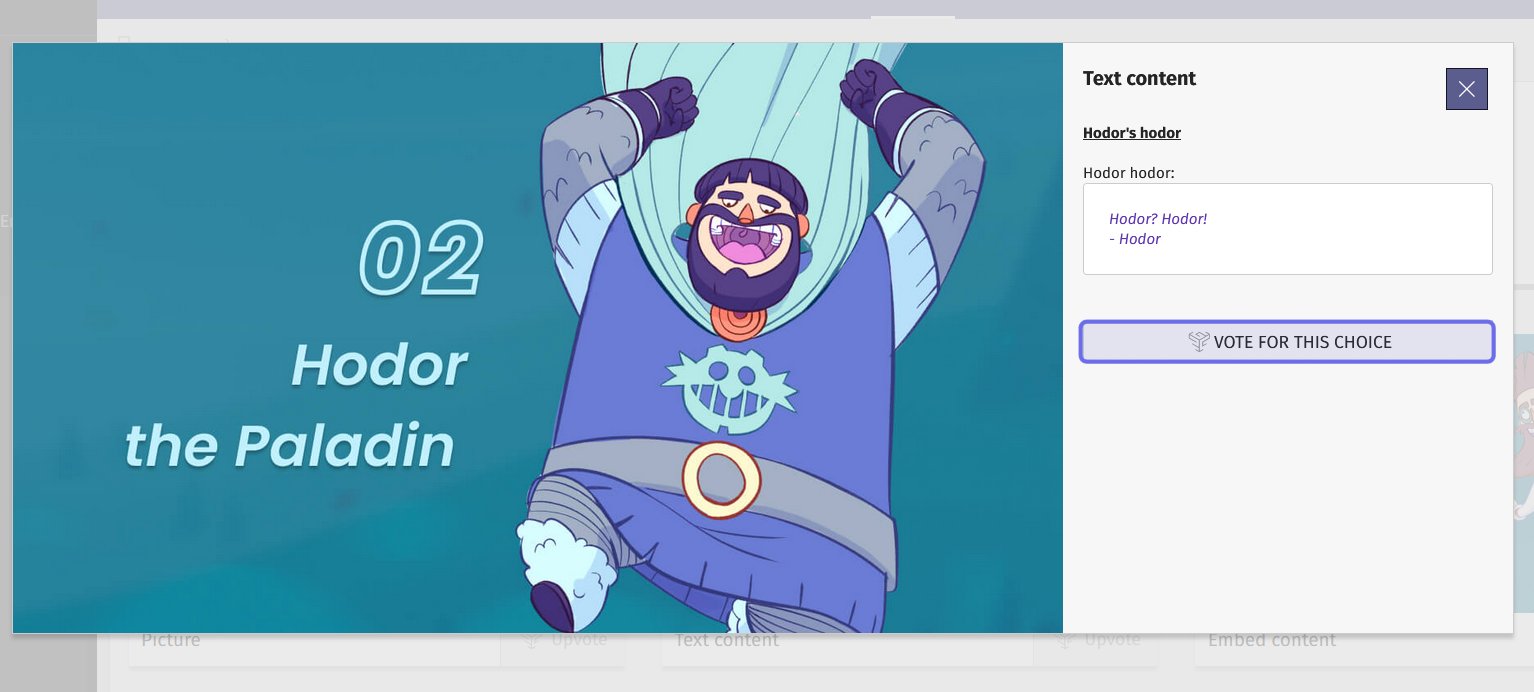
This is an example of a “Text content” option’s pop-up.
The “Vote for this choice” button is highlighted above in purple.
We’re working on rolling out the “Embed content” option. It will allow you to include embedded content in the option’s pop-up on the front end. For now, contact your account manager to implement this vote type.
Thumbnail and Visibility Settings
On the right, you will see “Thumbnail” and “Visibility Settings.”
Beneath “Thumbnail” is a grey box. Click to browse or drag-and-drop to upload an image. This will be the preview image for the vote as a whole. You will want to catch your community members’ attention - it might help to include bold text referencing the vote’s content!
Note: The thumbnail must be 800x385 pixels and cannot exceed 100KB. Click the three dots next to “Thumbnail” to download a template.
Next, choose the “Visibility Settings.” These toggles give you some options on how the vote will be displayed on the front end. There are three toggles:
Show as sticky: has the vote appear at the top of the page on the front end.
Show as highlighted: gives the vote a larger preview on the front end.
Enable cross game: displays the vote across all Universes.
Click to toggle an option on. When an option is enabled, the toggle will be pushed to the right and highlighted blue.
Set the vote window and publish
Once you have all your options and visibility settings in place, you’re ready to set the vote window and publish!
Note: Not ready to publish? Click “Save to draft” in the page header. When you’re ready to return, you’ll find this vote on the “All Votes” page with the setting “Partially filled.”
On the right side of the header, you will see the “Publish” button.

The right side of the header has two buttons. “Publish” is highlighted in purple above.
“Save to draft” is highlighted in yellow.
Click the “Publish” button. Options to set the vote window will appear.
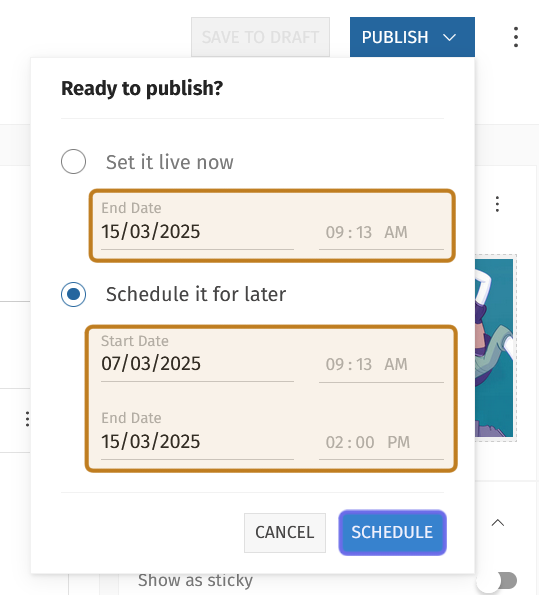
Clicking “Publish” will display options to set the vote window. The date and time fields are highlighted in yellow here. The button highlighted in purple will read “Publish” or “Schedule” depending on which radio button is selected.
If you want the vote to be available immediately on the front end, select “Set it live now.” Then add the date the vote will close.
Beneath “Set it live now” there is a date and time field labeled “End Date.” Click the date to open a date picker. Choose the date you want the vote to close from the calendar. Then, type in the time you want the vote to close to the right of the date.
Note: The time field uses your local timezone.
Once you’ve set the end date, click the “Publish” button at the bottom of the window. The vote is now open for your community!
If you’re getting the vote ready in advance, select “Schedule it for later.” Then use the two date and time fields beneath “Schedule it for later” to set the vote window.
Use the top “Start Date” field to set when you want the vote to open. Click the date to open a date picker. Choose the date you want from the calendar. Then, type the time you want the vote to open in the time field to the right. The vote will not be visible for most users on the front end until this date.
Next, follow the same process to set the end date using the date and time fields under “End Date.” This is when the vote will close and the winning option will be visible on the front end.
Once the vote window is set, click the “Schedule” button at the bottom of the window. Your vote is now set to publish!
Note: Every vote needs a start and end date!
Can I edit or delete a vote?
If you need to, you can edit a vote, or if you want to start again from scratch, you can always delete a vote entirely.
To edit or delete a vote, return to the vote’s edit page by clicking on the vote’s title on the “All Votes” page.
To edit a vote, make any needed changes. Once you’re ready, click “Update” in the header. The “Update” button replaces the “Publish” button in an already published vote.
To delete a vote, click the three dots next to the “Update” button. Click on the “Delete” button that appears. A pop-up will ask you to confirm that you want to delete the vote. Confirm, and the vote will be deleted.