
How to modify a “Promotional” content block
Who can add a new “Promotional” content block?
Devs and Admins can add a new content block in the CMS.
Where can I add a new “Promotional” content block?
You can add new content blocks in the CMS. Access the CMS for the landing page and for Universes in the back office.
Once you are on the CMS page for the page you want to modify, you will see a graphical representation of the block layout on the left and a layout side panel on the right.
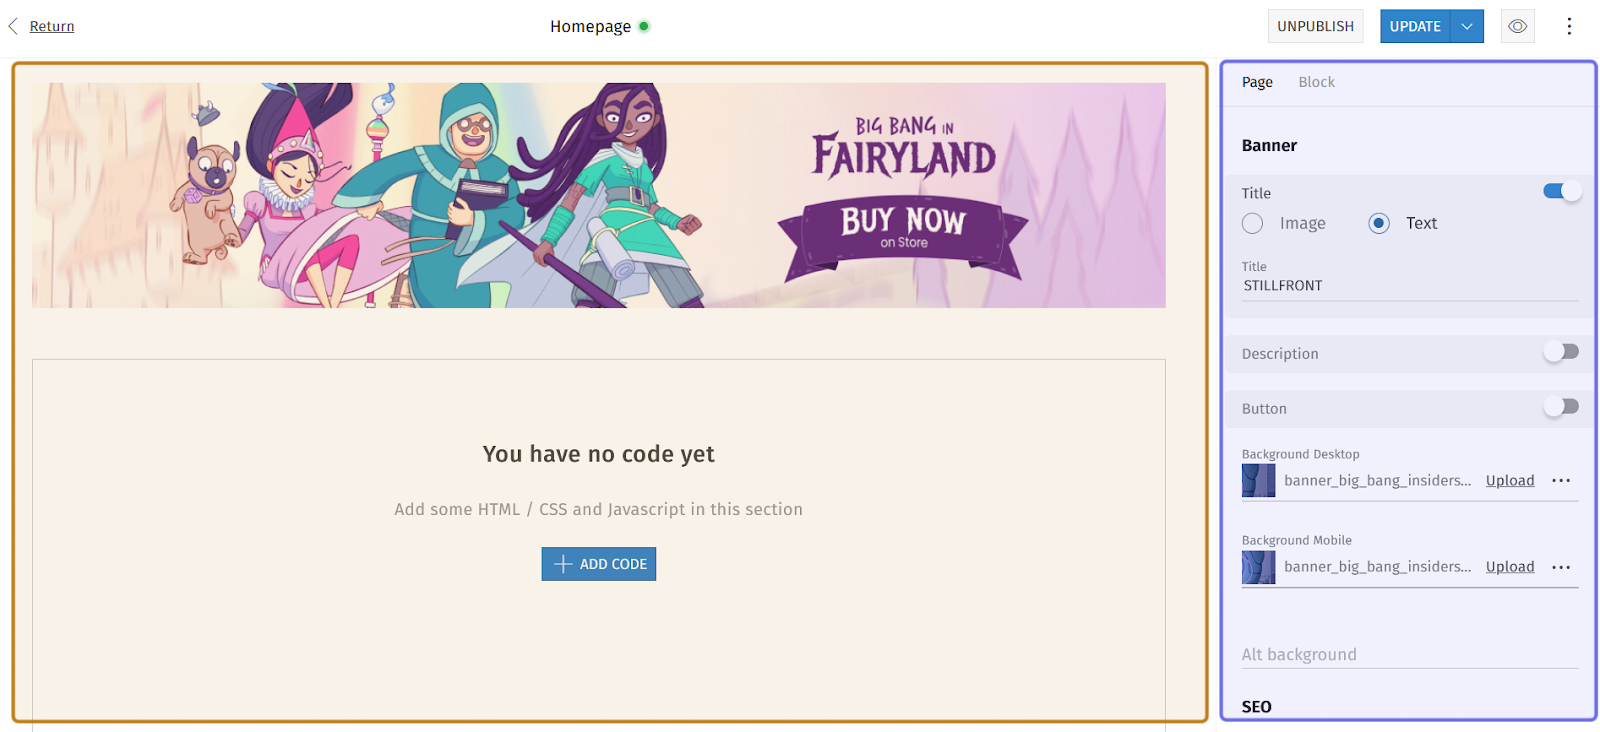
An example of a page in the CMS is shown above. The graphical layout is highlighted in yellow. The layout side panel is highlighted in blue.
How do I add a new “Promotional” content block?
To add a new “Promotional” block to a page, click the “+” button. Hovering over any block in the graphical layout on the left will bring up the button.
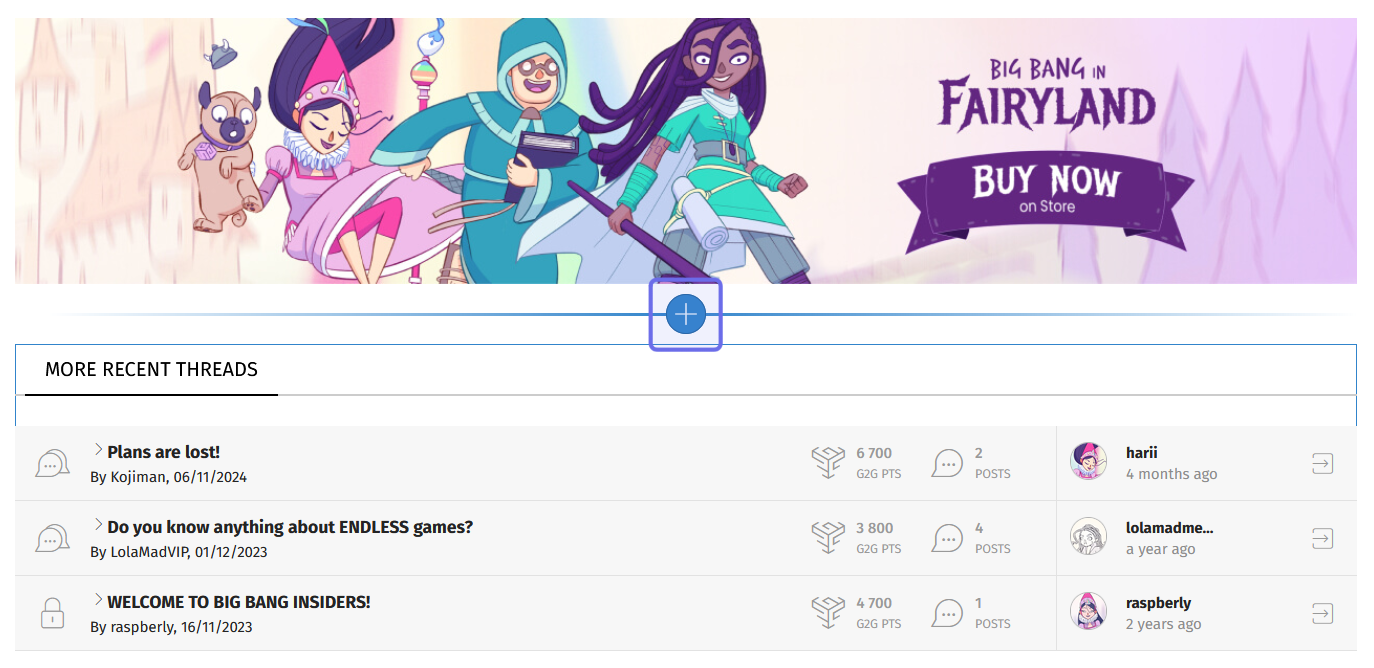
Two CMS blocks are shown above. The “+” button to add a new block is highlighted in purple.
Clicking the “+” button will open a menu. Choose “Promotional” from the list. You will find this option near the top of the menu. If you are having trouble finding it, use the search bar at the top of the menu.
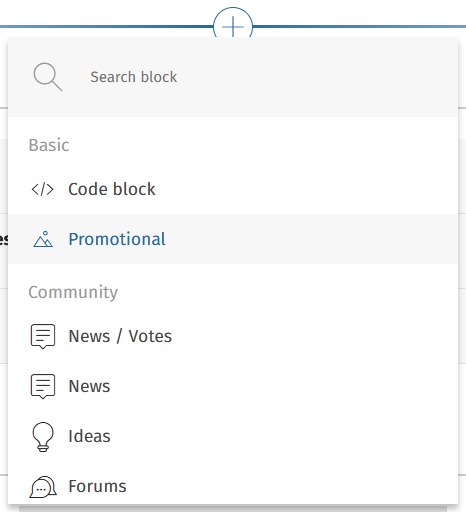
The “Promotional” option in the “+” button menu is second in the list above.
A new block will be added in the location where you clicked the “+” button.
Click the new block or select the “Block” tab from the side panel on the right to see the options for editing the block’s content.
At the top of the side panel you will see a section labeled “General.” It has a text field labeled “Link.” Enter the URL for the page you want this block to redirect to in this field.
Below “General” is the "Visibility" section. There is a single dropdown. Select a Restriction Level from the dropdown. Only visitors with that Restriction Level or above will be able to view the block. It is set to “Public” by default, which means the block will be visible to all site visitors.
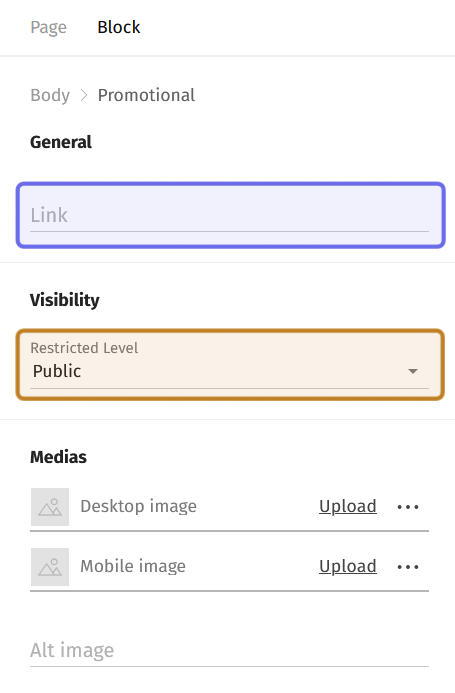
The side panel of a “Promotional” block. The “Link” field is highlighted above in purple. The “Visibility” dropdown is highlighted in yellow.
Below “Visibility” is the “Media” section. This is where you can upload the image that will fill the block. There are two fields: “Desktop image” and “Mobile image.”
Click “Upload” in an image field to browse and select an image. Once it is uploaded, you will be able to see the image in the preview block on the left.
The image uploaded to “Desktop image” cannot be larger than 1280x264px and the file size cannot exceed 500KB.
The image uploaded the “Mobile image” cannot be larger than 758x360px and the file size cannot exceed 100KB.
When you upload an image, the block preview on the left will update.
Note: It is recommended to upload both a desktop and mobile version of the image to ensure the image displays correctly on all devices.
Next to the “Upload” button are three dots. Clicking the three dots will open a menu with two options. You can download an image template or delete the current image.
At the bottom of the side panel you have the option to add alt text. Alt text descriptions are used when an image has trouble loading and by screen readers.
Type a short image description into the “Alt image” text field.
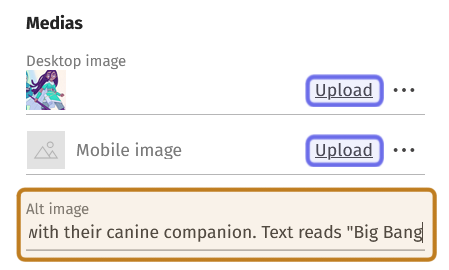
The “Media” section is shown above. The “Upload” button to add an image is highlighted in purple. The “Alt image” text field is highlighted in yellow.
Note: Want to check out your changes before making them live? Look for the eye icon in the top right of the page. Click the eye to open a new window that shows what your pending changes will look like on the front end!
Once you have added your items, remember to update the page!