
How to customize a page banner?
Who can create and modify a page banner?
Devs and Admins can create and modify page banners.
Where can I create and modify a page banner?
Page banners are modified in the CMS. Find the CMS for the landing page and for Universes in the back office.
Once you are on the CMS for the relevant page, you will see a graphical representation of the block layout on the left. The banner is located at the top. The options to modify the page banner are in the side panel to the right.
If you can’t see the options, look for the two tabs at the top of the side panel. Click the “Page” tab. Under the “Page” tab, you should now see the fields to modify the banner.
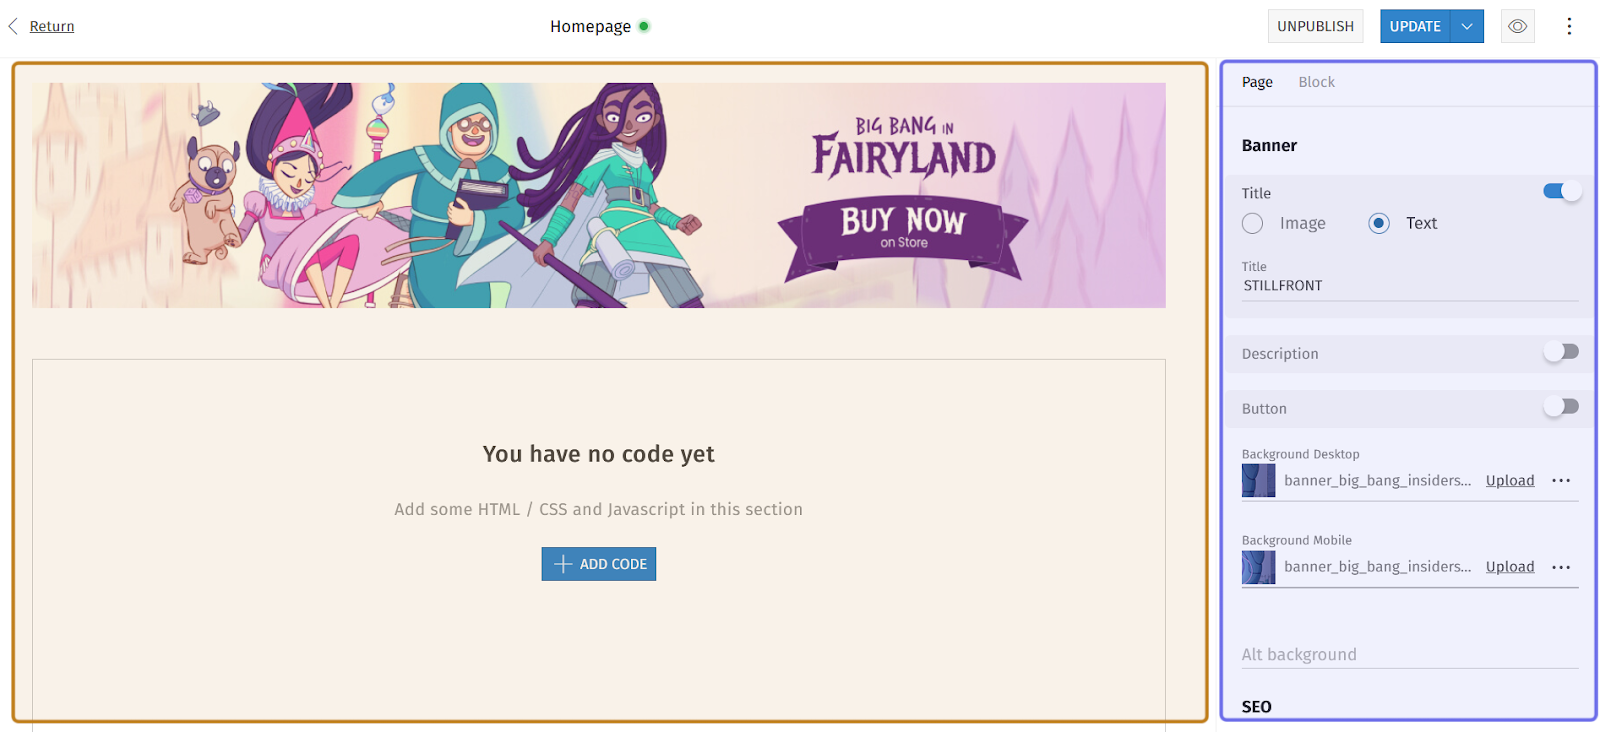
An example of the CMS is pictured above. The graphical layout is highlighted in yellow. The side panel is highlighted in purple.
How do I create a page banner?
At the top of the side panel are three toggles: “Title,” “Description,” and “Button.” These toggles are for optional content that you can put on top of the banner image.
Below the toggles are two image fields: “Background Desktop” and “Background Mobile.” You can upload your banner image here.
Click “Upload” on the right-hand side of the image field to browse and select an image. The desktop banner must be 1800x360px and not over 500KB. The mobile banner should be 768x360px and not over 100KB. Uploading two versions of the banner image ensures it will display correctly on all devices.
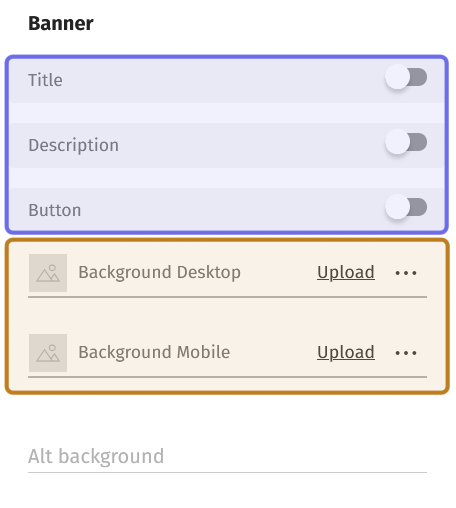
The top of the “Page” tab in the CMS side panel is shown above. The three optional content toggles are highlighted in purple. The two fields to upload a banner background are highlighted in yellow.
Below the two image fields is a text field labeled “Alt background.” Enter a short description of the background image here. Including alt text helps make your page more accessible.
If you would like to add a title, description, or button on top of the banner image, click the corresponding toggle to turn it on.
Title
Toggling “Title” on will display two options: “Image” and “Text.” Click to select whether you want to place an image, such as a logo, or white text over the banner image.
If you select “Image,” you will see a “Logo” image field and a text field for including alt text.
To add an image, click the “Upload” button on the right of the “Logo” field. Browse and select the image you want to upload. It must have a height of at least 153px and the file size cannot exceed 100KB.
The image will be centered on top of the banner’s background image.
Below the “Logo” image field, you can provide alt text. Describing the image in the “Alt Image” field makes the page better accessible to screen readers.

The “Title” toggle is shown above. The toggle shown is active and highlighted in yellow. The “Image” and “Text” options are highlighted in purple. The “Image” option is selected.
If you select “Text,” you will see a “Title” text field. Enter your title text.
The title will appear centered on the banner image.
Note: Text placed over the banner’s background image will be white. Make sure white text will be visible over the background by checking the graphical layout on the left of the CMS page.
Description
Toggle on “Description” to open a text field also labeled “Description.” Enter short, descriptive text that suits your banner in the text field.

The “Description” toggle above is active. Also shown is the “Description” field that appears when the toggle is set to the right.
What you type in the “Description” field will appear over the banner image in small, white text. If “Title” is also toggled on, it will appear directly below the title.
Make sure your text will be visible over the banner’s background image by checking the graphical layout on the left of the CMS page.
Button
Toggle “Button” to add an external link to your banner. When toggled on, two text fields will appear: “Call to action” and “Link.”
Enter the text you want to appear on the button in the “Call to action” field. This is intended to be text that gives visitors a reason to click, such as “Preorder Now” or “Buy Here.”
Next, enter the URL you want the button to direct to in the “Link” field.
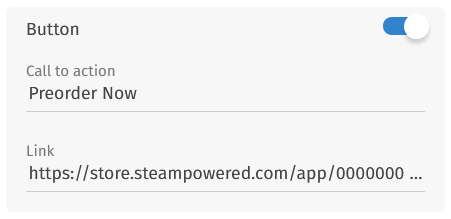
The “Button” toggle above is active. The “Call to action” text field and the “Link” field to include a URL are also shown.
The button will appear as a rectangle over the banner image. Keep in mind that the button outline and text will be white so may not be visible against pale backgrounds.

An example of a page banner on the front end. This banner uses a title, description, and button, all shown in the middle of the banner.
SEO
The “Page” tab of the side panel is also where you can add metadata to make your page more visible to search engines. See the article on SEO for more.
Once your banner is finished, make sure to publish to save your changes!
How do I modify a page banner?
Modifying a page banner is similar to creating one. First, you navigate to the CMS side panel on the relevant page. You will be able to modify any of the fields used when creating the banner, including activating or deactivating a toggle and changing the banner background.
Once you have made your changes under the side panel’s “Page” tab, update the page.