
How to customize a “Stream” CMS block
Who can customize a “Stream” block?
Devs and Admins can modify CMS blocks.
Where can I customize a “Stream” block?
You can add and modify blocks in the CMS. Find the CMS for the landing page and for Universes and Studio home pages in the back office.
Once you are on the CMS page with the “Stream” block you want to modify, you will see a graphical representation of the block layout on the left and a layout side panel on the right.
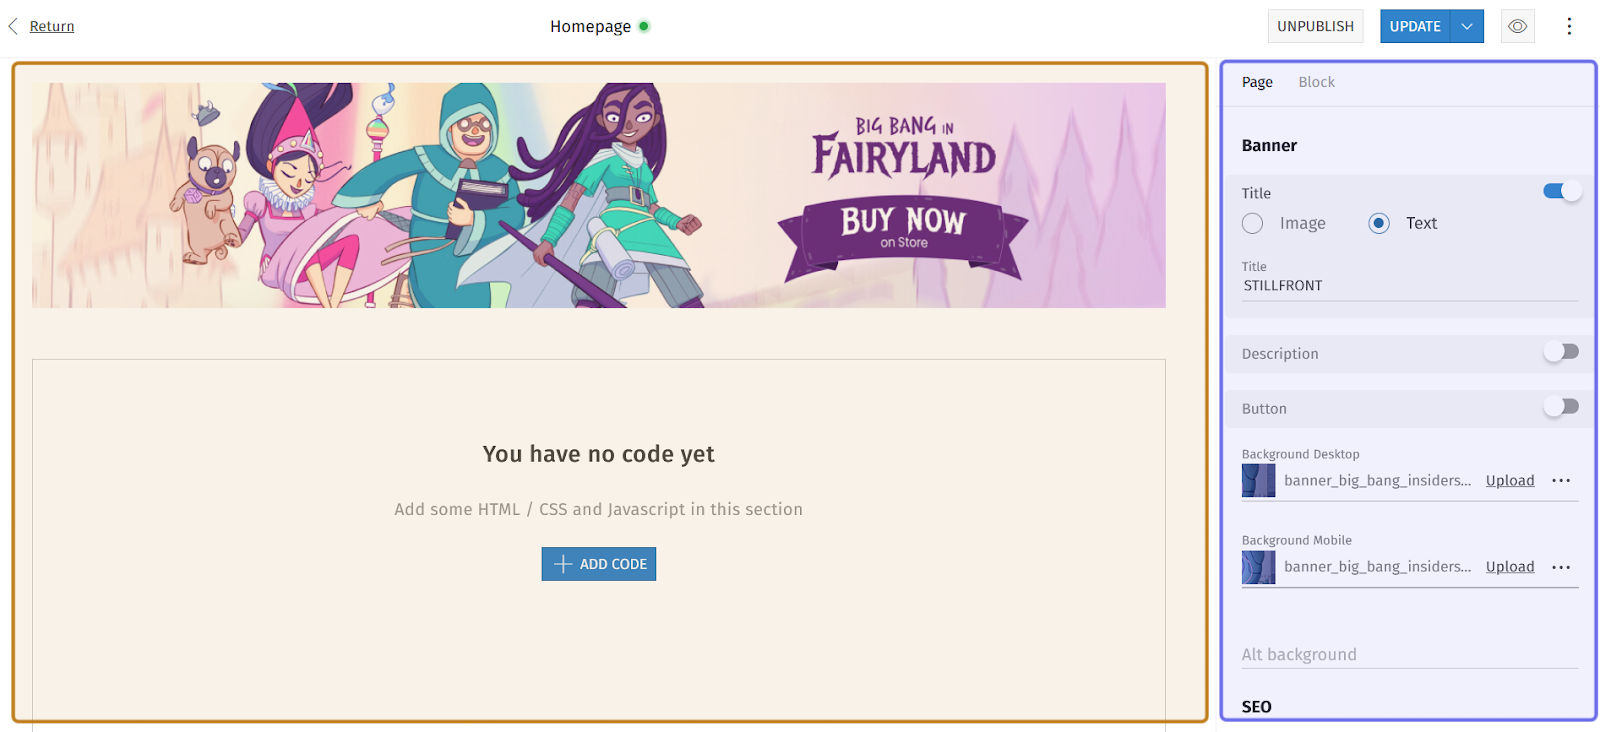
An example of the CMS is pictured above. The graphical layout is highlighted in yellow. The side panel is highlighted in purple.
The options to modify the block will be in the side panel on the right.
How do I customize a “Stream” block?
Click on the “Stream” block you want to edit in the graphical layout on the left. The customization options for that block will open in the side panel on the right.
You can also click on the “Block” tab in the side panel to access the customization options. Click on “Stream” in the list that appears to edit that block.
Note: You can customize the “Stream” block when you first add a new block.
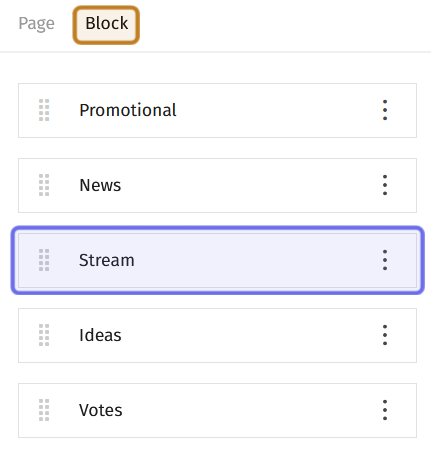
An example of the “Block” tab in the layout side panel is shown above. The “Block” tab is highlighted in yellow. The bar representing the “Stream” block is highlighted in purple. Click this bar to access the edit options for that block.
In the side panel, a “Stream” block has a “General” section with three fields and a “Visibility” section with a single dropdown.
The top field is “Title.” Enter a name for your block here. The title will appear at the top of the block on the front end.
Below “Title” are the two fields that link the “Stream” block to your Twitch channel.
Enter your Twitch channel name in the “Channel Name” field. This is the name that identifies your channel on Twitch found at the end of your channel page’s URL.
Next, enter your channel ID in the “Channel Id” field. This is your channel’s unique numerical identifier.
Note: You can get your Channel Id based on your Channel Username easily by using this website.
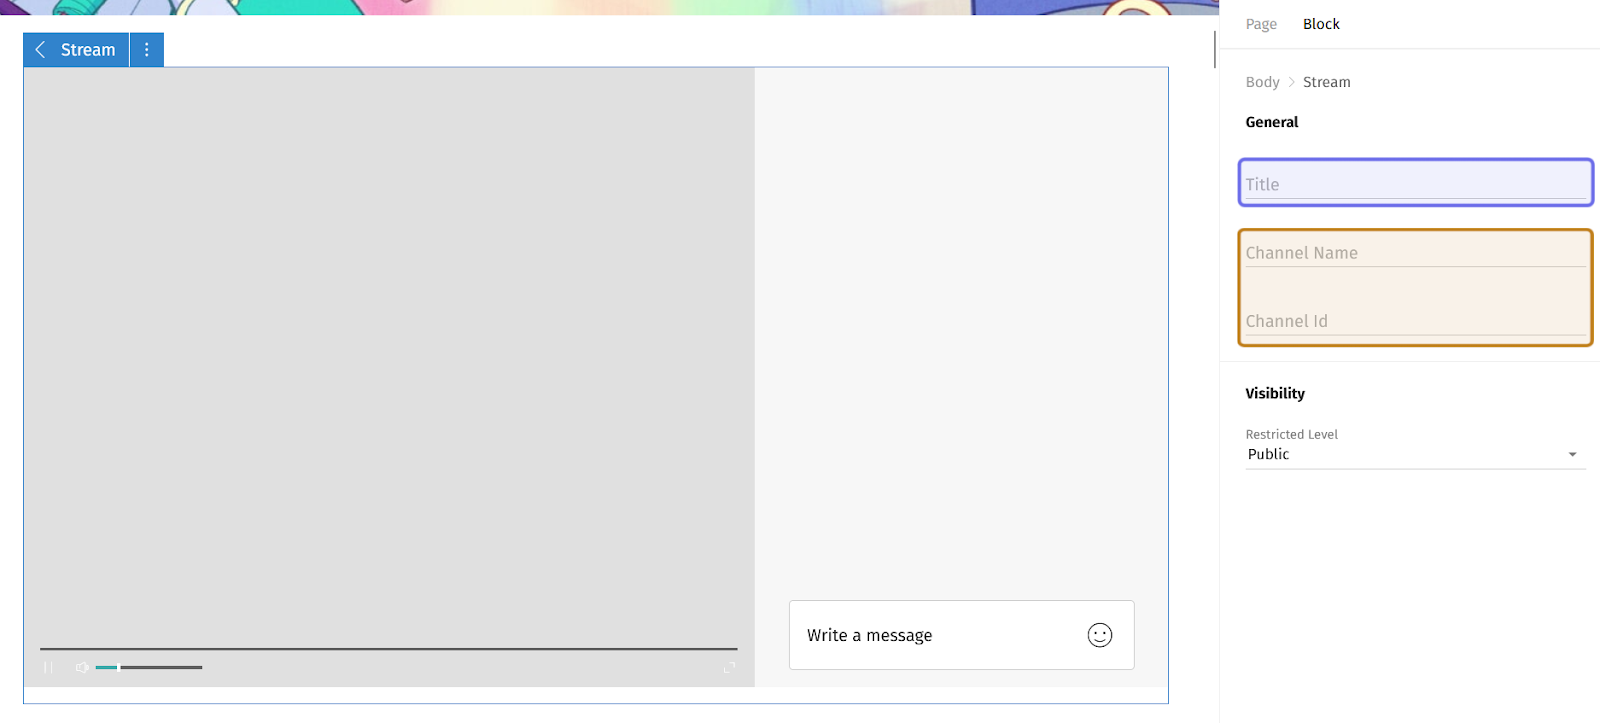
A “Stream” block in the graphical layout and the side panel in the CMS is shown above. The “Title” field is highlighted in purple. The two fields that link to a Twitch channel are highlighted in yellow.
Under “Visibility” is the “Restricted Level” dropdown. The “Restricted Level” dropdown allows you to limit who can see the block when it is displayed on the front end. Click on the dropdown and select the lowest Restriction Level you want to be able to see the block. The block will be visible to this Restriction Level and above.
If you leave the “Restricted Level” dropdown at its default value of “Public,” all page visitors will be able to see the block.
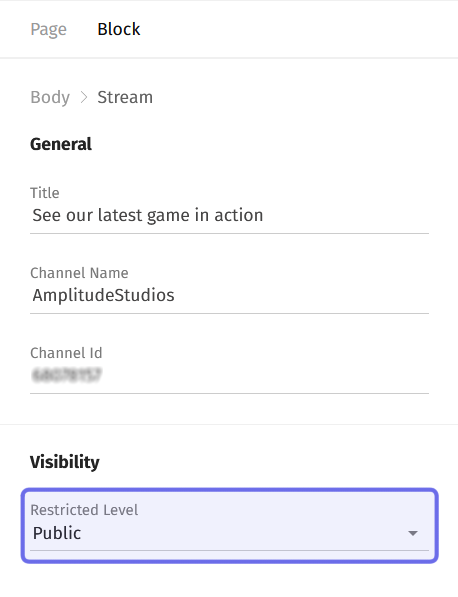
The fields of a “Stream” block in the side panel are shown above. The “Restricted Level” dropdown is highlighted in purple.
Once you have modified the block, click the “Update” button to publish the changes on the front end.
The “Update” button takes the place of the “Publish” button in the top-right corner of the CMS page. Following the same process as scheduling publication, you can also schedule an update.
Note: The block will only display video when your Twitch channel is live. If your channel is offline, it will show a screencap of your most recent stream and link back to your channel page.
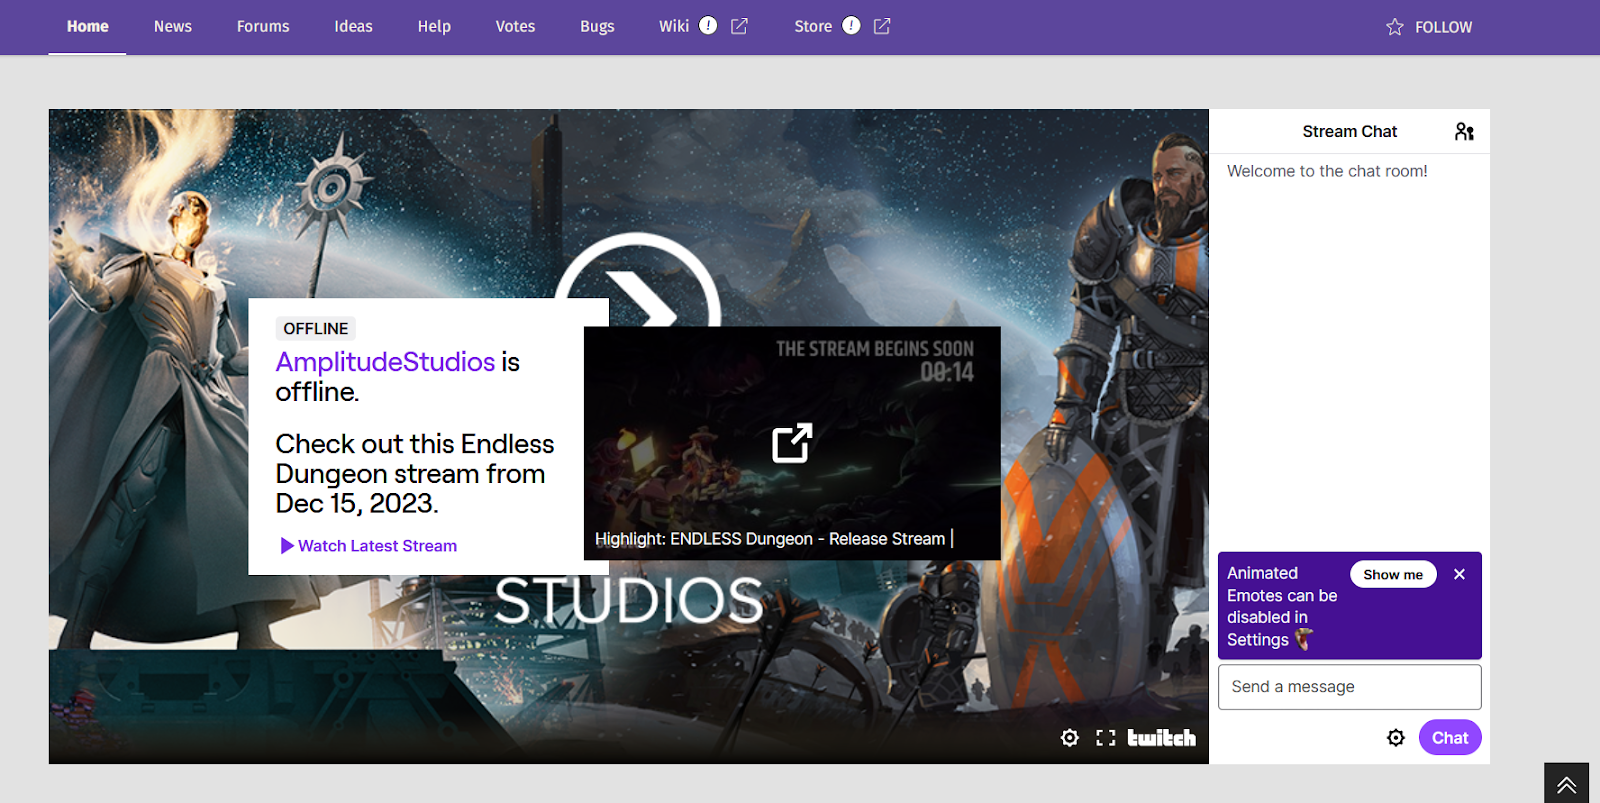
A “Stream” block as seen on the front end when the channel is offline.