
How to modify “News,” “Votes,” and “News/Vote” CMS blocks
How do I display “News” or “Votes” on a home page?
There are three CMS blocks that can display content from a Universe’s “News” and/or “Votes” features.There are three CMS blocks that can display content from a Universe’s “News” and/or “Votes” features.
The “News” block displays the three most recent news articles.
The “Votes” block displays the three most recent votes.
The “News/Votes” block displays the three most recent news articles and/or votes. This block can show any combination of three articles and/or votes. It is determined solely by recency.
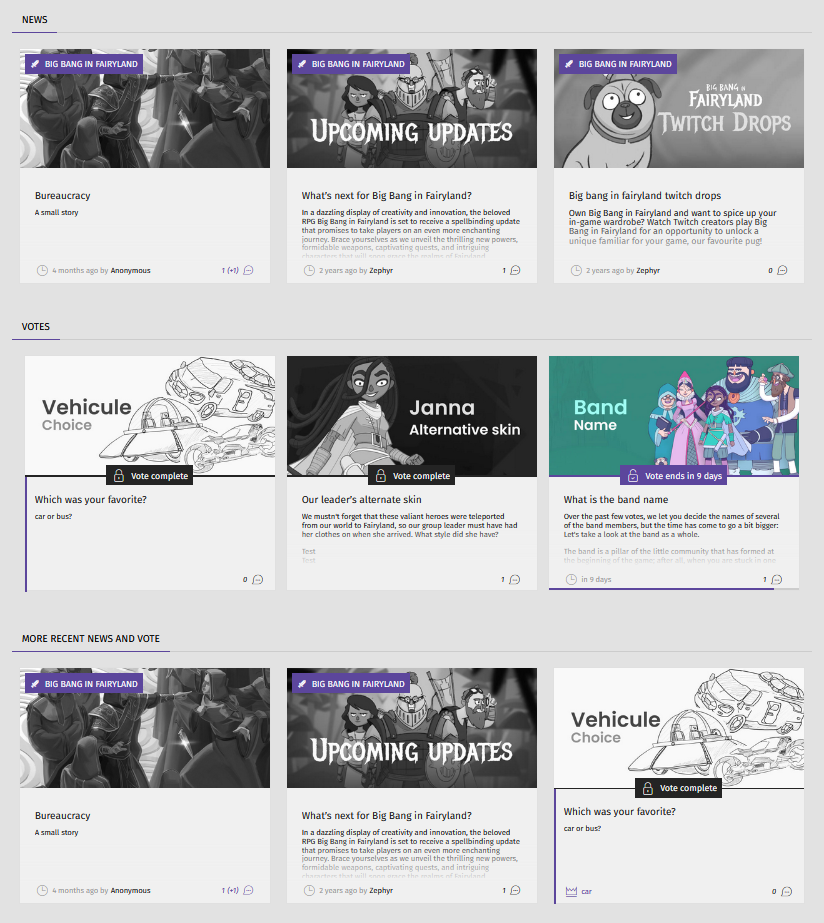
The above screenshot shows three CMS blocks on the front end. Top to bottom are a “News” block, a “Votes” block,” and a “News/Votes” block.
The news articles and/or votes displayed depend on which page the block is added to. The Landing Page draws from the relevant content of all Studios. On a Studio page, the block will draw from all of that Studio’s Universes. A block on a Universe page will only draw from content for that Universe.
Who can modify “News” and “Votes” blocks?
Devs and Admins can modify CMS blocks.
Where do I modify “News” and “Votes” blocks?
You can add and modify blocks in the CMS. Find the CMS for the landing page and for Universe and Studio home pages in the back office.
Once you are on the CMS page with the “News,” “Votes,” or “News/Votes” block you want to modify, you will see a graphical representation of the block layout on the left and a side panel on the right.
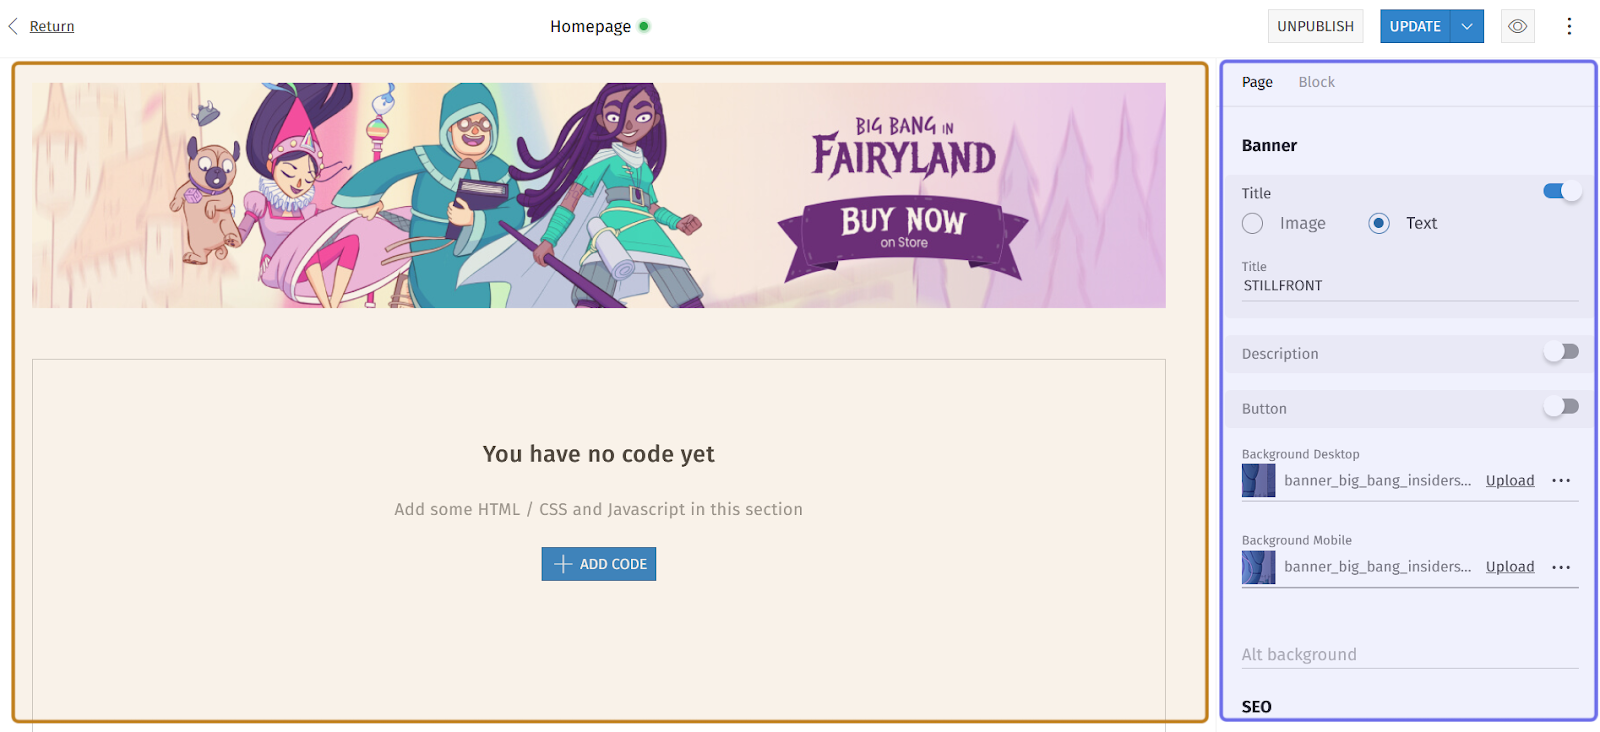
An example of the CMS is pictured above. The graphical layout is highlighted in yellow. The side panel is highlighted in purple.
Click on the block you want to modify in the layout on the left or under the “Block” tab in the side panel to open the options to modify the block. The options will appear in the side panel.
How do I modify “News” and “Votes” blocks?
“News,” “Votes,” and “News/Votes” blocks all have two sections in the side panel: “General” and “Visibility.” These two sections (mostly) have the same fields.
In all three blocks, the top field is “Title.” The title text will appear at the top of the block on the left. You can use the default title (for example, “News”) or update the field with a more specific block title (such as “Studio News”). The “Title” field has a 50 character limit.
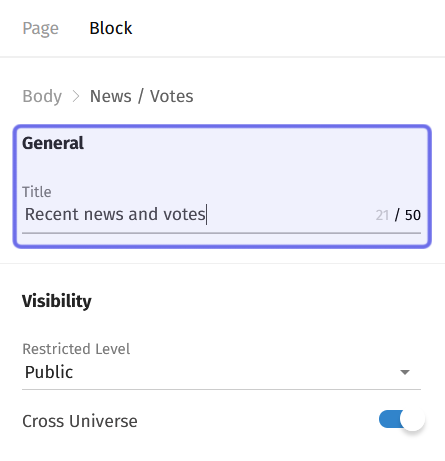
The side panel of a “News/Votes” block is shown above. The “General” section is highlighted in purple. This section looks the same in the side panel of “News” and “Votes” blocks.
There are two fields in the “Visibility” section for “Votes” and “News/Votes” blocks. A “News” block’s “Visibility” section has three fields.
At the bottom “Visibility” section you will see a “Cross Universe” toggle. When this is toggled on, the block will draw from all news articles and/or votes, including those marked “Cross Universe.”
Note: The Landing Page would draw from cross-universe articles and/or votes from all Studios. A Studio or Universe page would draw from cross-universe articles and/or votes only from the relevant Studio.
Click to toggle on. When on, the toggle will be set to the right and not greyed out.
Above the toggle is the “Restricted Level” dropdown. This gives you the option to limit who can see this block on the front end. Click on the dropdown and select the lowest Restriction Level you want to be able to see the block from the list. The block will be visible to this Restriction Level and above.
If you leave the “Restricted Level” dropdown at its default value of “Public,” all page visitors will be able to see the block.
The “News” block has an additional field under “Visibility:” “Tags.” You can use this field to filter the articles displayed in the block to only include articles tagged with that tag.
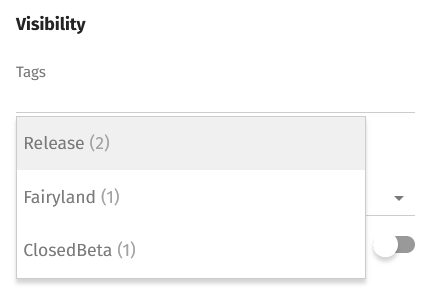
The “Tags” field for a “News” CMS block is shown above.
To filter by a tag, begin typing a tag in the field. Matching tags will drop down, along with the number of tagged articles in parentheses. Click on a tag from the list to add it to the displayed tags.
If no tags are added here, this will display the three most recent news articles regardless of tags.
Once you have modified the block, click the “Update” button to publish the changes on the front end.
The “Update” button takes the place of the “Publish” button in the top-right corner of the CMS page. Following the same process as scheduling publication, you can also schedule an update.