
What information can be found on a user profile in the back office?
Who can view user profiles in the back office?
Admins and Devs can view users’ back office profiles.
Where can I find users’ back office profiles?
To find a user’s back office profile, first expand the “Community” dropdown in the “Manage” menu.
Select “Users.” This will take you to the “Users” dashboard.
There are two tabs at the bottom of the page header. Select “All Users.”

The “All Users” tab on the back office “Users” page is highlighted in purple above.
What information can I find on a user’s back office profile?
A user profile in the back office includes all of the information visible on the user’s front-end profile with additional information and tools for moderation and user management.
Note: You can go directly to the user’s profile on the front end by clicking the “Go to G2G Profile” button in the top right.
The username, title, and number of G2G points head the back office profile page. Below the header is a horizontal series of tabs.
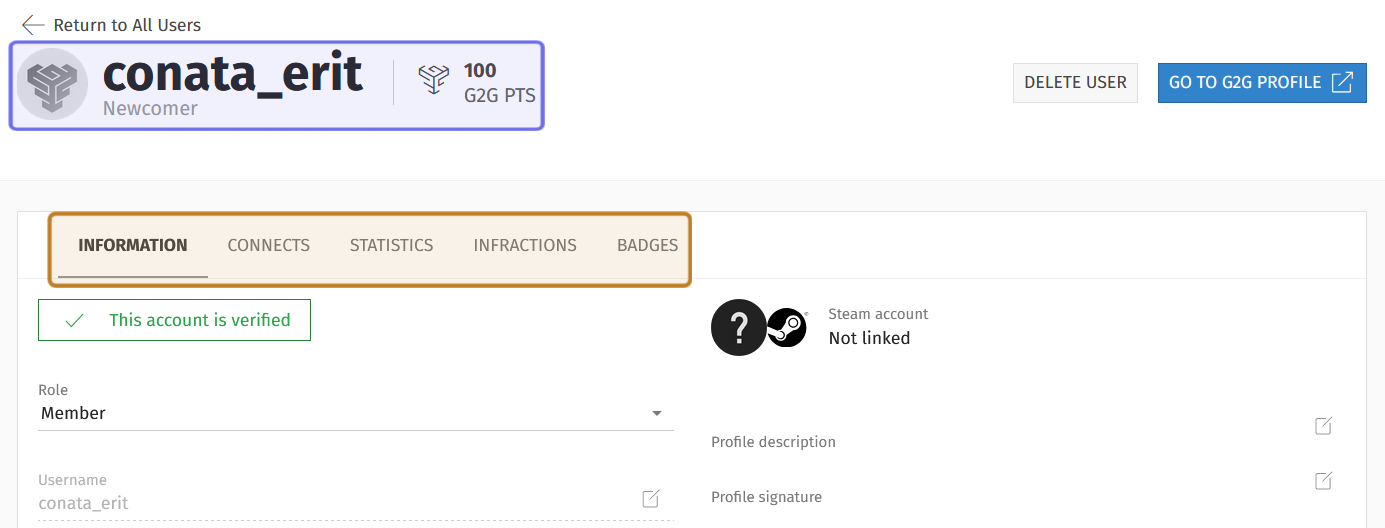
Part of a user’s back office profile page is shown above. The information found in the page header is highlighted in purple. The tabs are highlighted in yellow.
Use the tabs to access different information and tools related to the user.
Information
When you land on a user’s back office profile, the “Information” tab will be open by default.
Directly beneath the tab, you can see whether or not the account has been verified by email. To the right, you can quickly see whether or not this user has a linked Steam account.
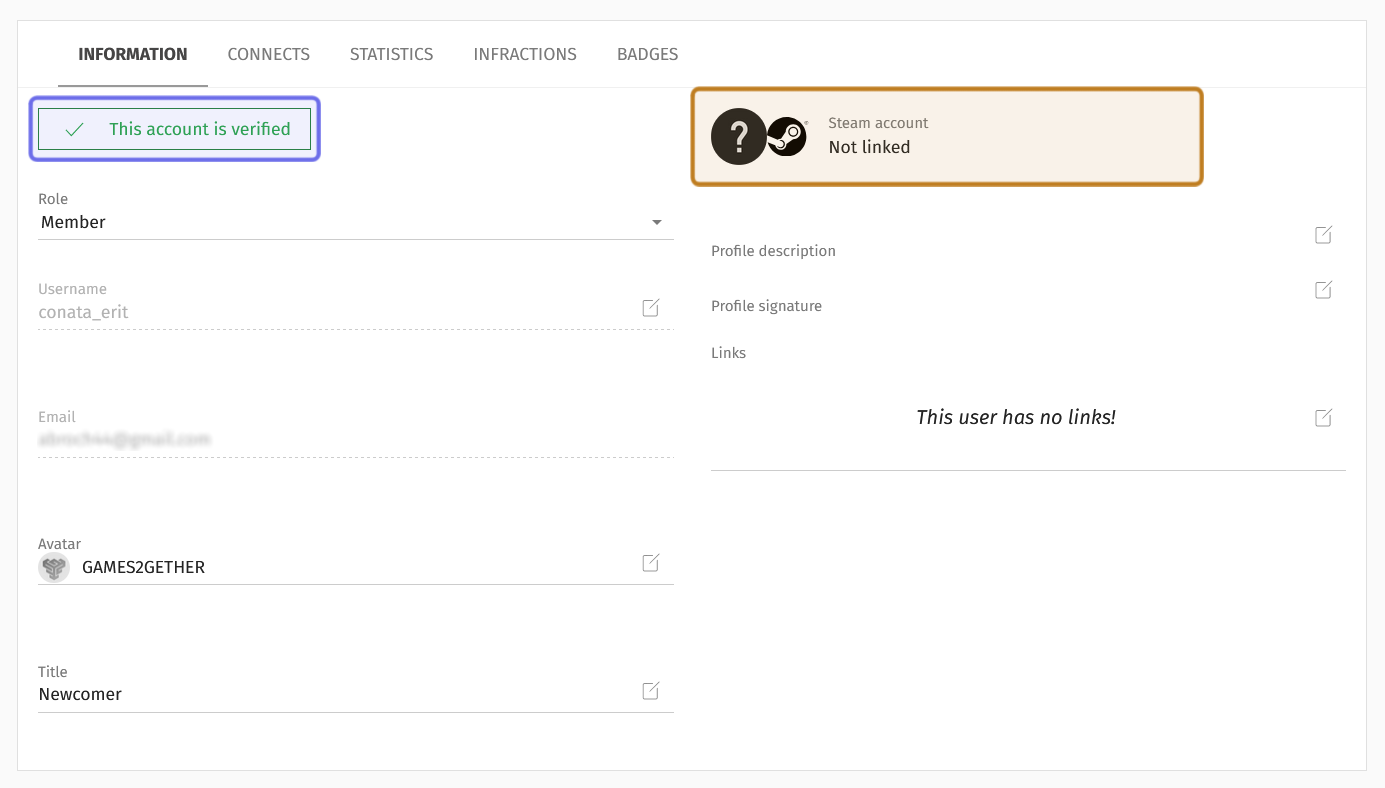
An example of the “Information” tab is shown above. The user’s verification status is highlighted in purple. The user has not linked a Steam account. This is shown in yellow.
Basic user information is displayed on the left. The top field is the “Role” dropdown. It displays the user’s current role. This is also where you can change a user’s role.
Beneath the user’s role are their username and email. All users can change their username or update their email on the front end, if this is allowed by the platform.
Note: You cannot change another user’s username or email.

A user’s basic information - their role, username, and email - is highlighted in purple.
The remaining information displayed under the “Information” tab shows ways the user has customized their profile.
At the bottom left are the avatar and title the user has selected. You can add a custom avatar or set a new title for a user by clicking the “Edit” button on the right of the field. (The “Edit” button is the square icon with a line through the top-right corner.)
On the right are the profile description, signature, and any links that the user has added to their profile. If required, such as if content needs to be removed, these can also be edited by clicking on the “Edit” button.
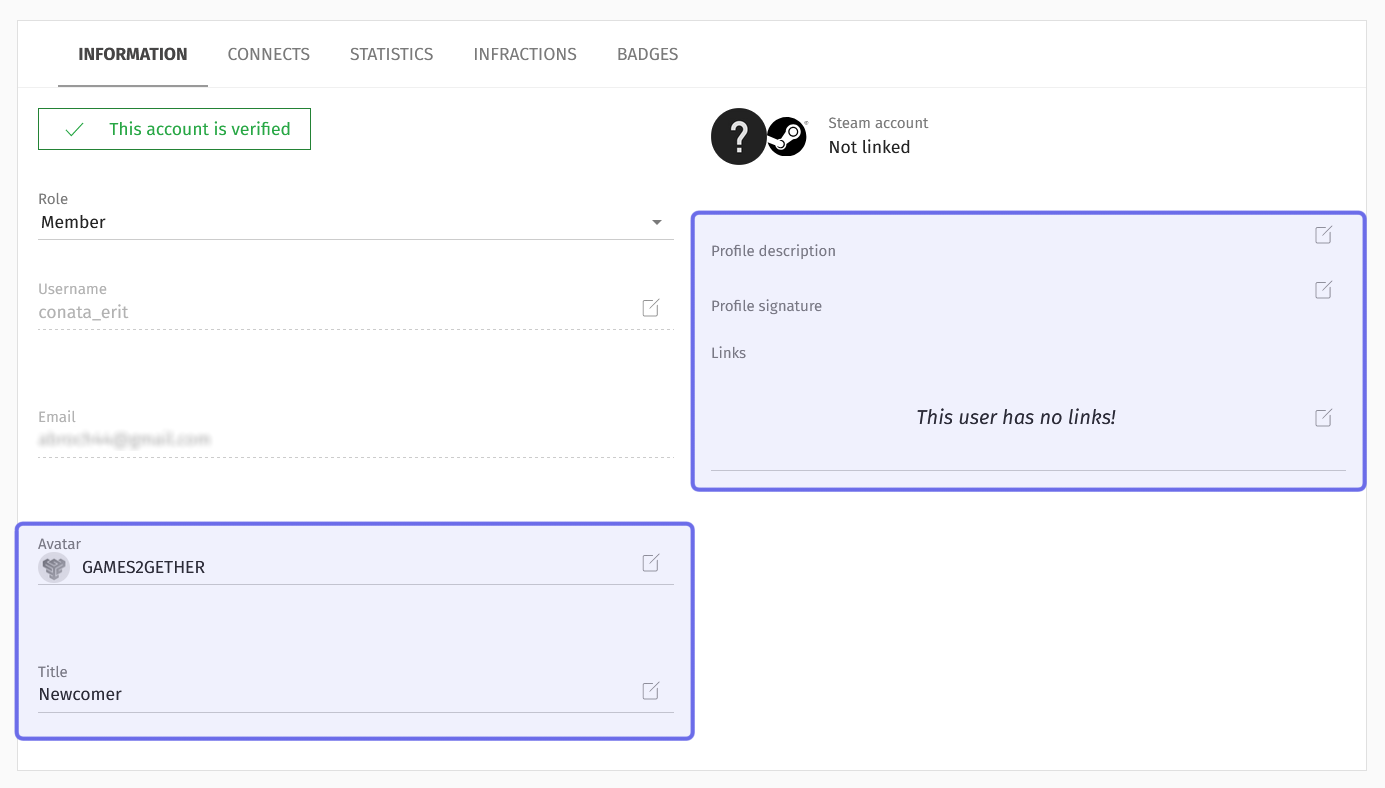
Ways to customize a user’s profile on the front end are highlighted in purple.
Connects
Click on the second tab from the left to see which external accounts the user has linked to G2G. A user can link an account on Steam, Twitch, Epic Games Store, Xbox Game Pass, and Discord to their G2G account. Linking an external account may award the user a badge.
If the user has linked an account, the date the accounts were linked will be displayed beneath the platform name. On the right, there will be an active “Disconnect” button. Devs and Admins can unlink another user’s accounts by clicking “Disconnect.”
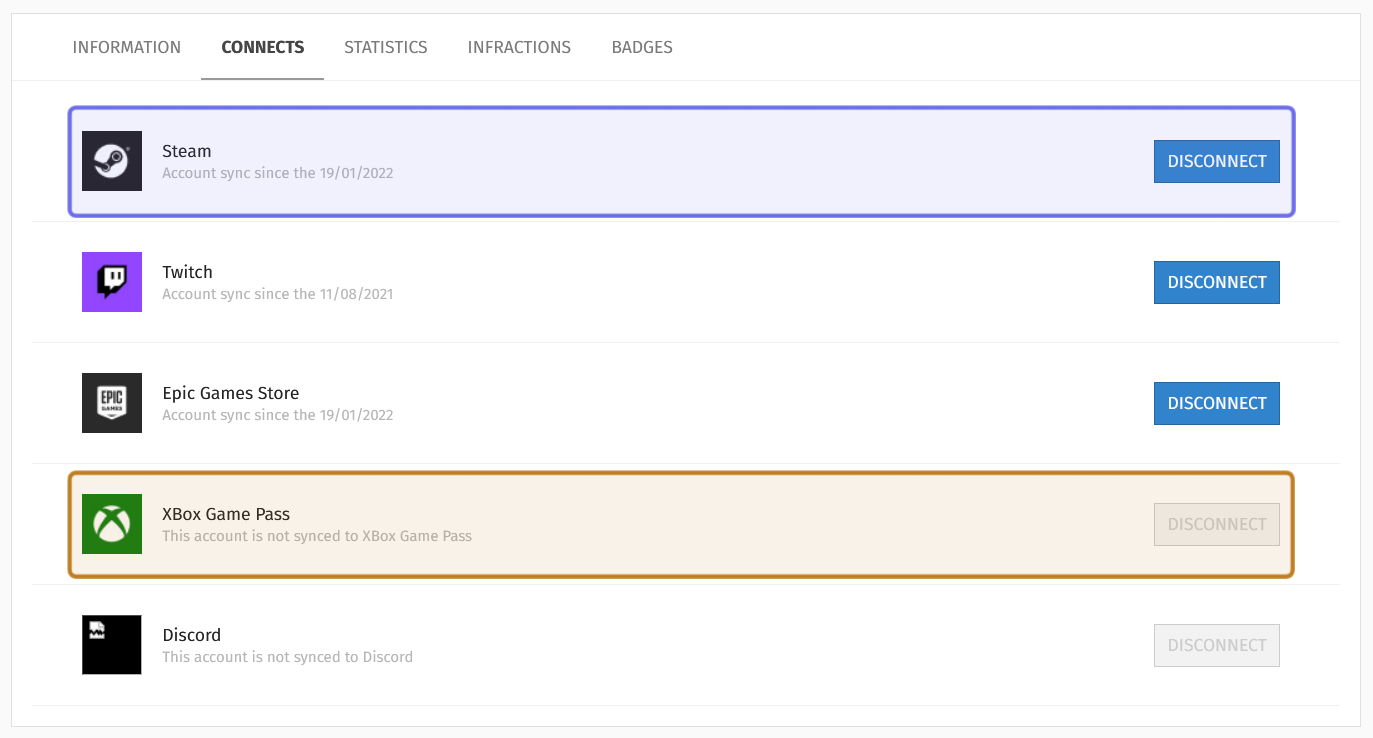
Platforms are listed under the “Connects” tab. A Steam account has been connected, shown above highlighted in purple. An XBox Game Pass account has not been connected, as shown highlighted in yellow.
Statistics
Engagement data unique to that user can be found under the "Statistics" tab. The top section summarizes the user’s contributions, such as how many ideas they have created and how many comments they have left.
Next, it shows a quick overview of the user’s engagement with the gamification system, listing how many badges the user has earned and how many avatars and titles they have unlocked.
Below the summary, there is a graph. You can find options to specify what data is visualized in the graph’s top right.
Use the “Start Date” and “End Date” fields to view data within a specific time range in the past year. Clicking on one of these fields will open a date picker. Select dates from the date picker to set the range.
To the right of the “End Date” field is the “Statistics Type” dropdown. Click to open the dropdown. Then, select one of the following data types:
Select “Forums” to see how many views and posts to forums the user has made over the time period.
Select “Ideas” to see how many ideas this user has viewed and how many ideas they have submitted over the time frame
Select “Tutorials” to see how many tutorials the user has contributed and how many times they have viewed other tutorials.
Select “Dev content” to see how this user has interacted with content that can only be posted by Devs and Admins (news articles and votes).
Using the “Universe” dropdown, you can filter the data to only include statistics for a specific Universe. To narrow the data displayed down to a single Universe, click the dropdown, then select the Universe you want to view.
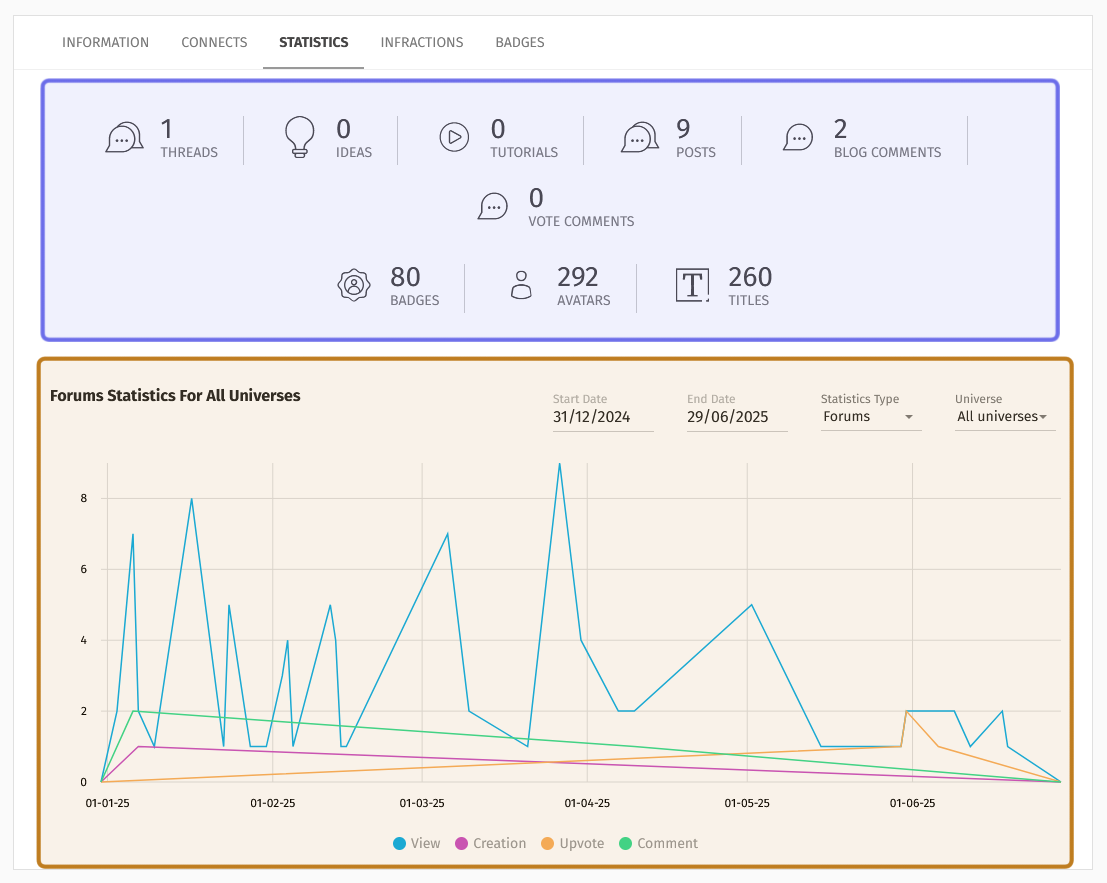
The “Statistics” tab of a user’s back office profile is shown above. The summary over time is highlighted in purple. The graph and its selectable fields are highlighted in yellow.
Infractions
Under the “Infractions” tab, you can find a list of any infraction reports that moderators have submitted about this user. The number of active infraction points is displayed at the top. This number determines whether or not the user is subject to an automatic ban.
Below the current points total is a list of all of the user’s historical infractions. This includes infractions that are currently contributing to the point total and older infractions whose points have expired.
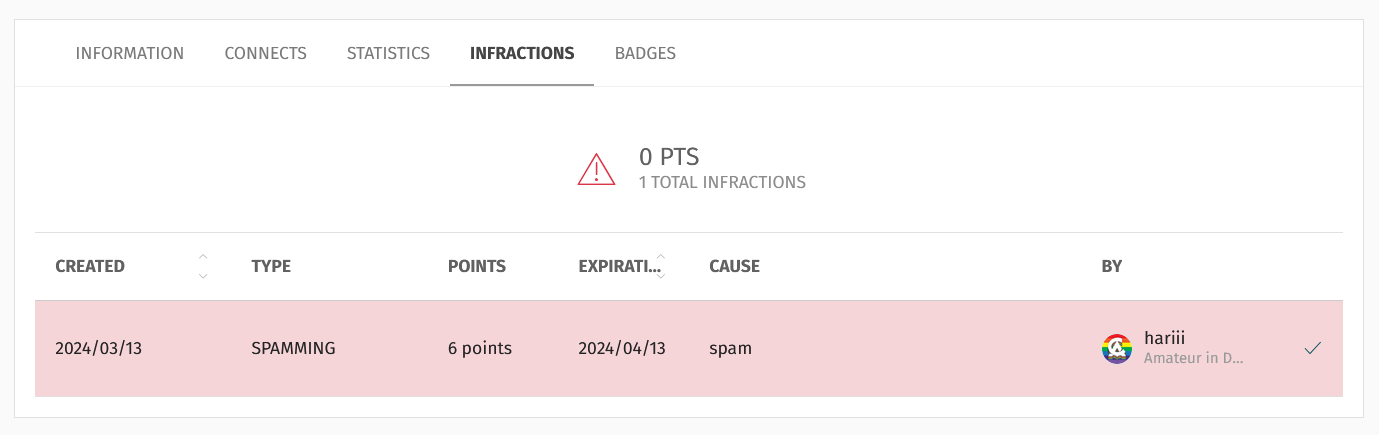
A back office profile’s “Infractions” tab is shown above. This user has one infraction, but no active points against them.
Badges
Under the “Badges” tab is a list of all available badges. To the right of each badge name, you can see how many of that badge’s ranks have been unlocked by the user.
If the user has not unlocked all of the badge ranks, you can manually unlock a rank using the “Unlock Badges” button on a row in the list’s rightmost side. Manually unlocking badges is useful for badges that aren’t connected to quests on the front end, such as a badge marking a user as a game dev or administrator.
Start typing a badge name in the search field in the top left to find a specific badge in the list.
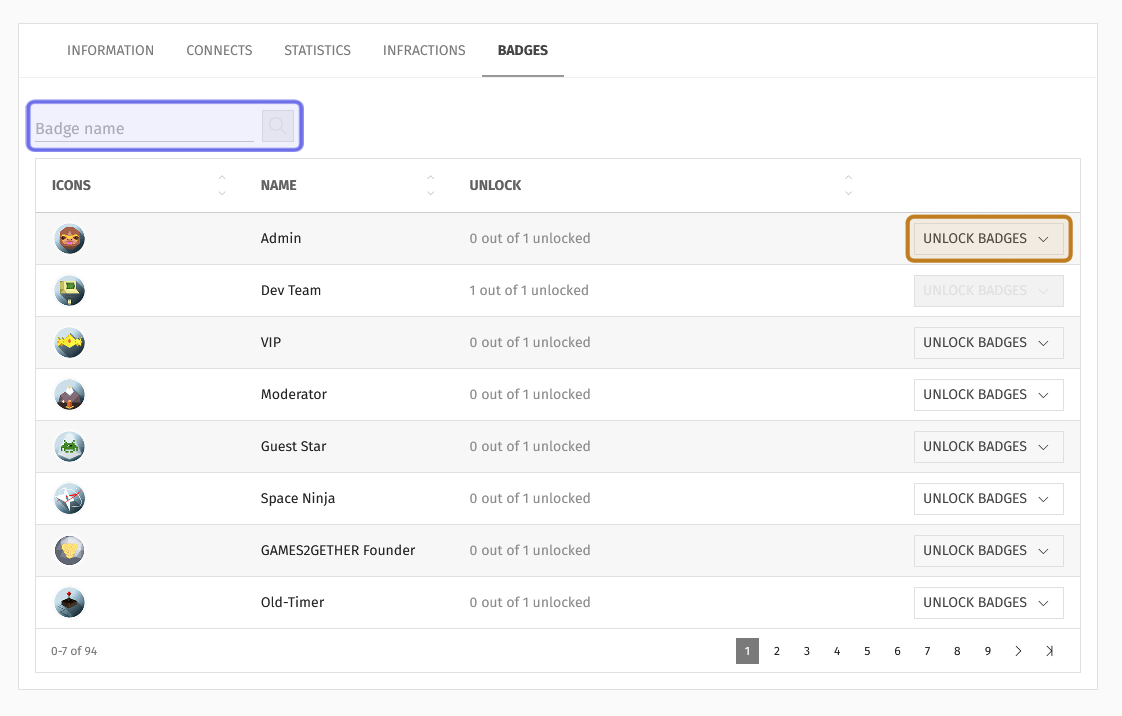
The “Badges” tab is shown above. The “Badge name” search field is highlighted in purple. An example of an “Unlock Badges” button is highlighted in yellow. In this example, the highlighted button would unlock the “Admin” badge.
Delete User
Devs and Admins can also delete a user from the user’s profile in the back office. There is a “Delete User” button in the profile header on the right.
Click “Delete User” to delete the user whose username is displayed in the header from the system.
Note: Exercise caution when deleting users. Once a user’s account is deleted, it cannot be recovered.

The header of a profile page in the back office is shown above.
The “Delete User” button is highlighted in purple.